

With the neck built, it was time to finish the body. This included routing all the body edges, routing the control cavity cover recess, and drilling the neck bolt holes.


Then, with the neck fitted into the neckpocket of the body, I measured out the 25.5″scale and positioned the bridge, drilling the holes for the mounting screws and for routing the pickup wiring.
With all the routing and drilling done, it was on to the most nerve-racking part of the build for me, finishing. Sanding all the parts took a lot of time, especially the inner parts of the cutouts, and I still didn’t do a great job but the results are good enough for me.
After sanding, it was time to add some color and protection to the wood. I found an awesome red paint (duplicolor metalcast) that I used for my brother’s guitar and decided to use it. It’s a translucent automotive paint that is meant to go over bare/bright metal, so it is extremely durable while still allowing the natural woodgrain to show through. I did 6 coats of the red, wet sanding after every-other coat.
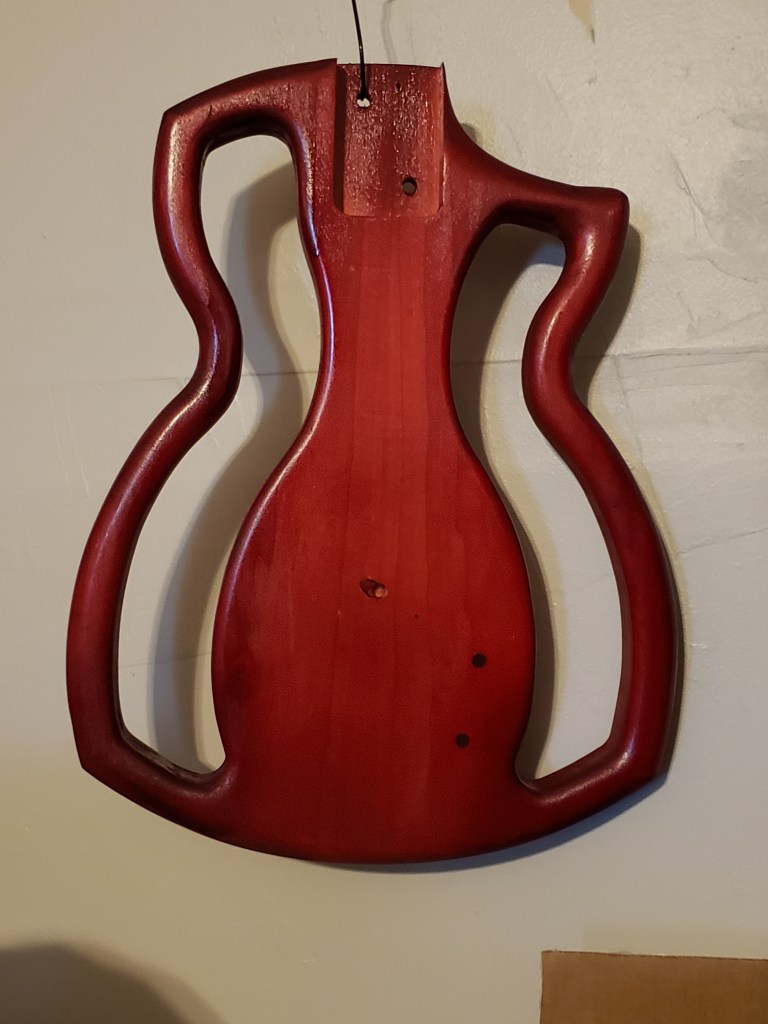
When the paint had time to cure, it was time to apply top coat. My go-to for guitar building has been Rust-oleum’s Triple Thick Glaze. It’s a non-yellowing coating that goes on well and provides an awesome high gloss finish. I applied 4 coats of the topcoat, wet-sanding after every-other coat. I then allow the topcoat to sit for a while (about a week in this case) before polishing. During this time, I also applied boiled linseed oil to the entire neck. I had thought about using the same Triple Thick Glaze, but ultimately decided that the linseed oil would give it a more natural feel

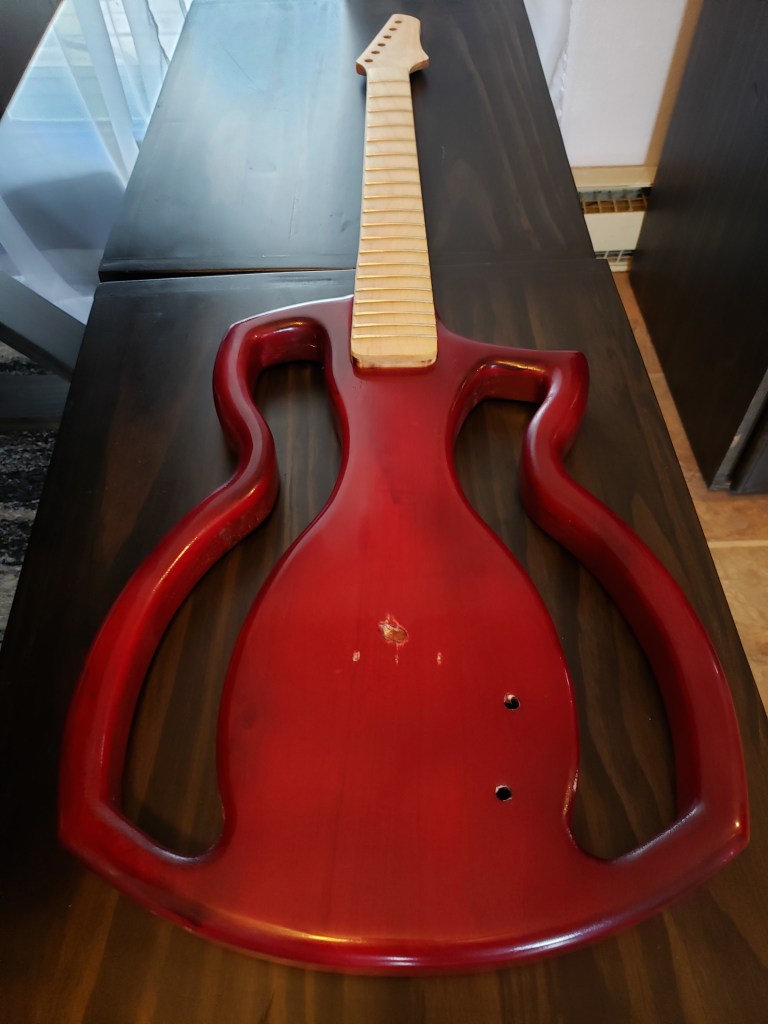
So, with all the painting and polishing done, all that is left is the final assembly and wiring.

Beautiful. Once again you have demonstrated your artistic talent.
LikeLiked by 1 person