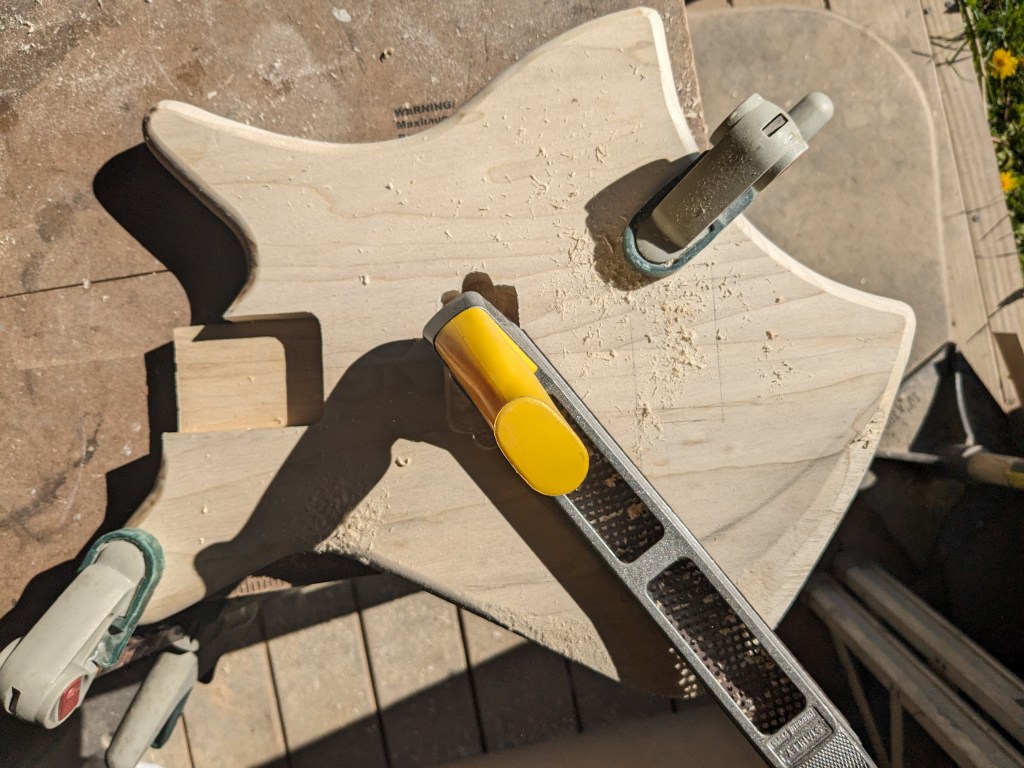
Once I had the body glued up, it was time to shape and sand it. I started by rounding over the edges, then got to work with a rasp to start contouring the arm rest area. This will reduce the weight a little and making it more comfortable to play.
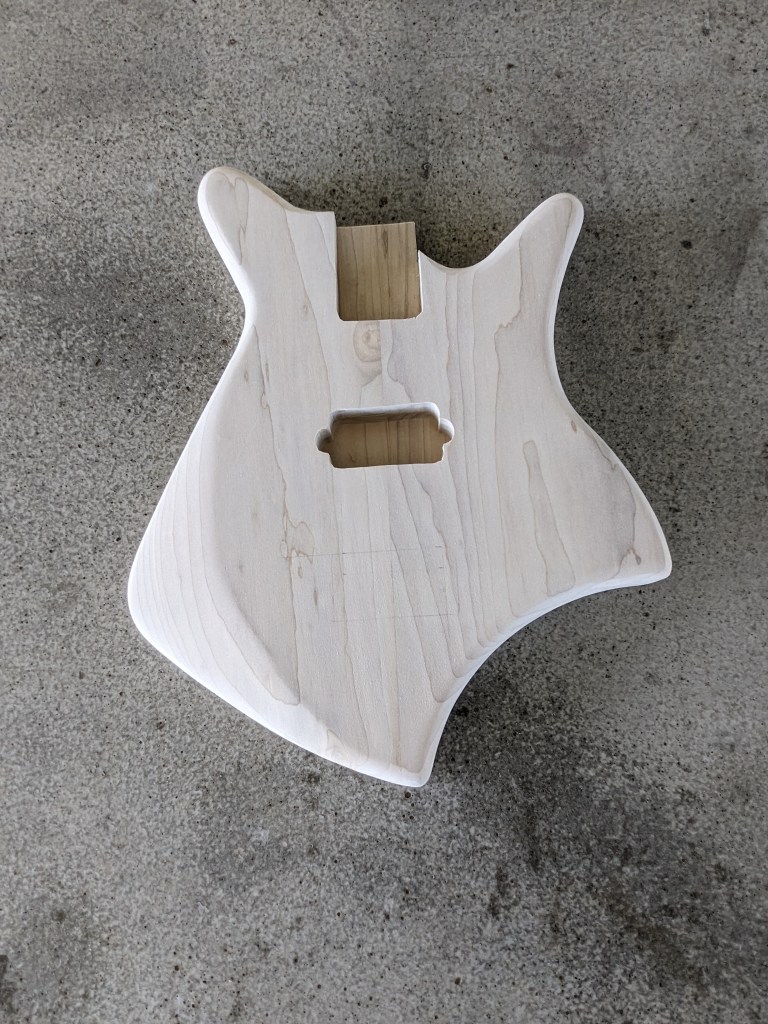
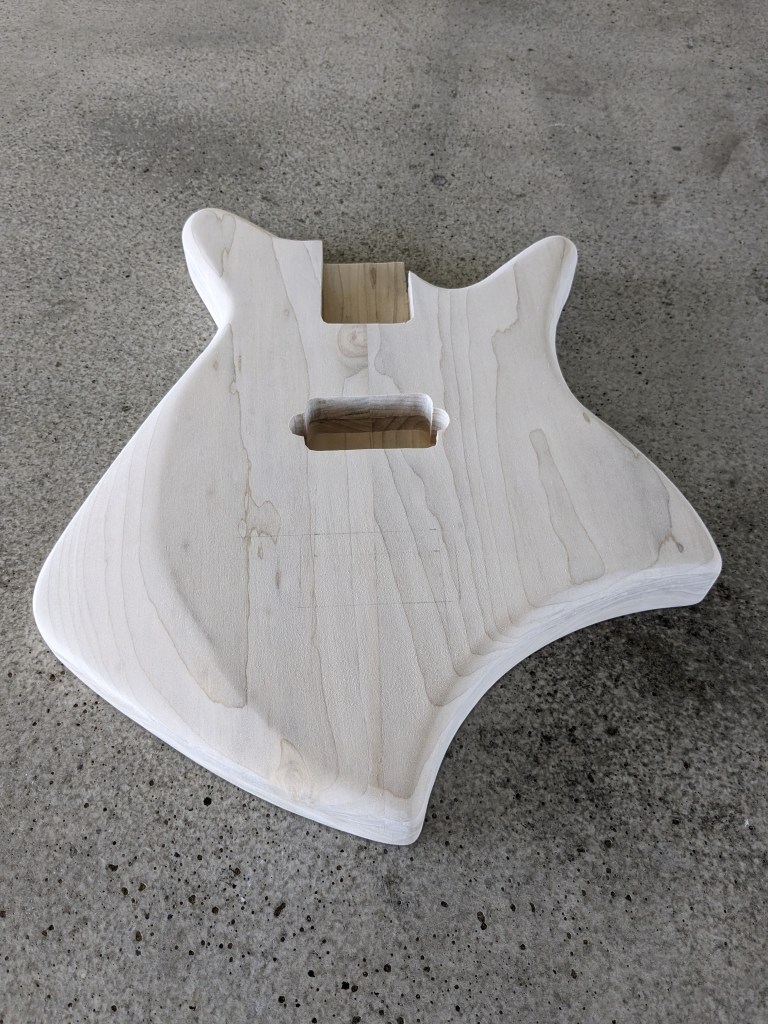
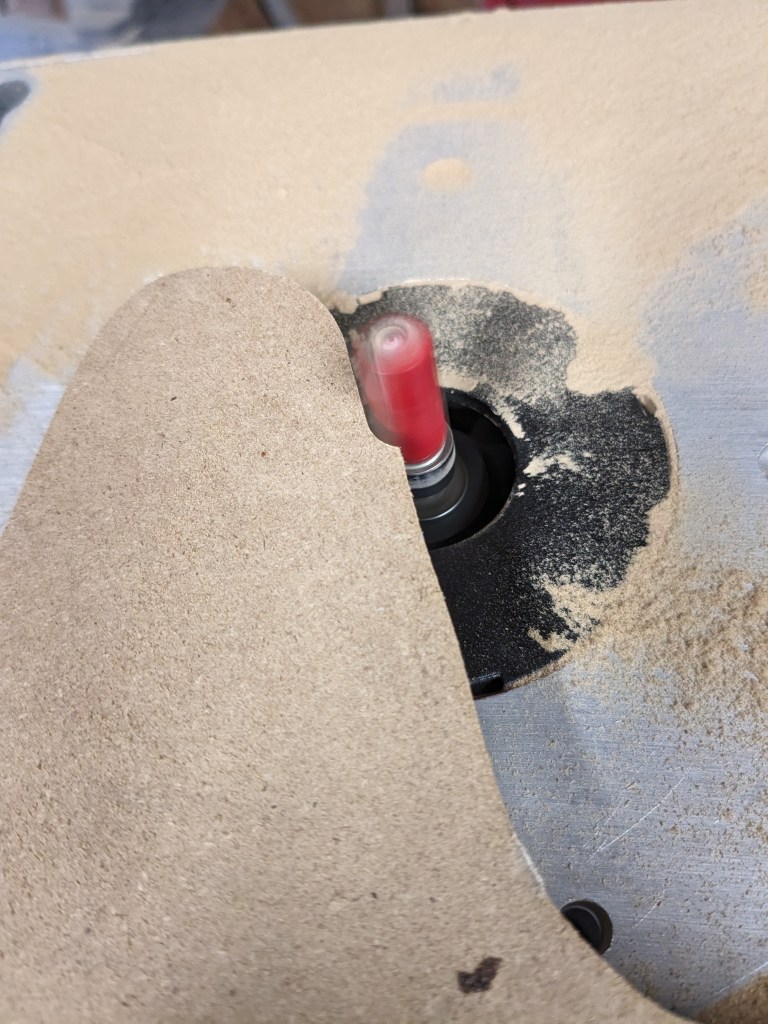
Once I had the contouring done, I drilled for the volume and tone pots, the jack, the bridge (including the grounding wire channel, and the neck screws.
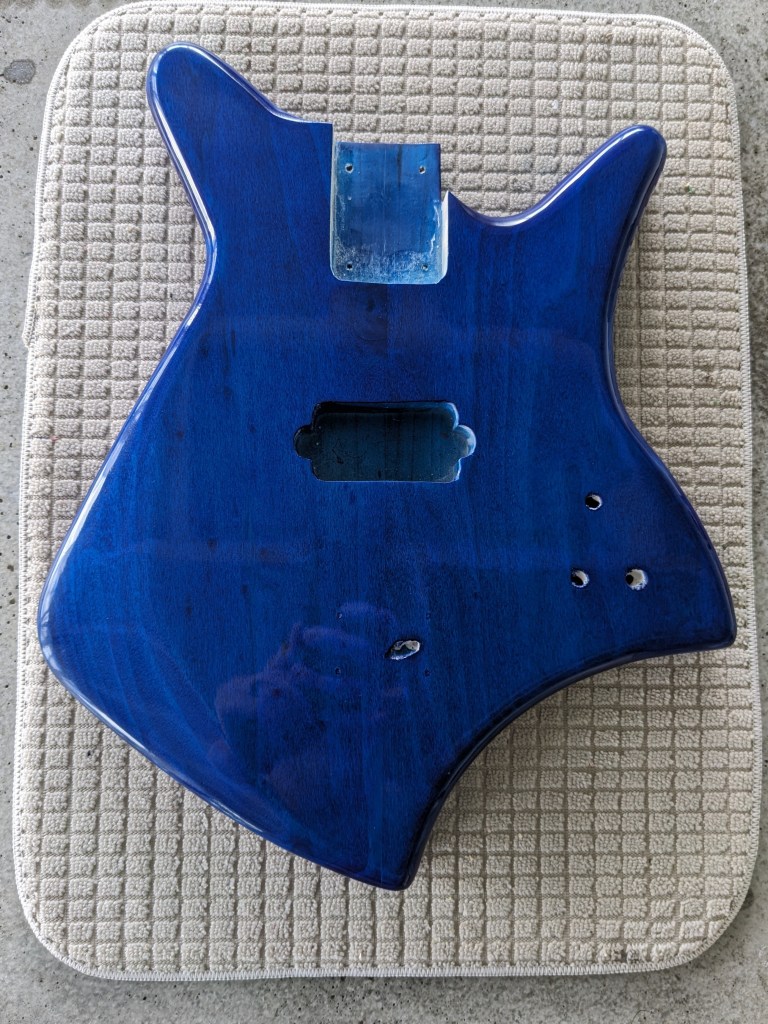
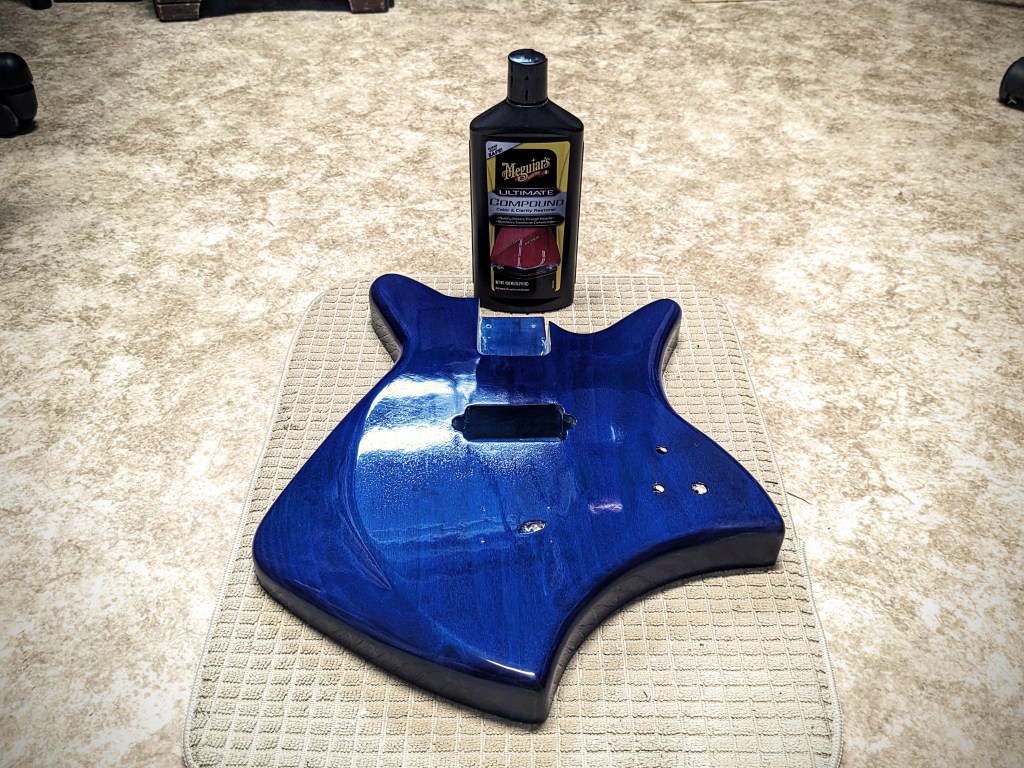
I didn’t take any pictures of the sanding process, but once it was done, it was time to add a little color. I really wanted to blue to stand out on this one so I started by staining the body with ColorTone liquid stain. This alone is usually good enough, but I wanted to enhance this with Metalcast Blue Anodized coating. This is a translucent blue finish meant to go over chrome or bright metal, but it works just as well over wood. I topped this off with Rust-Oleum Triple Thick Glaze. I gave each of these layers ample time to cure between coats, then let the whole stack rest for a week before wet sanding and polishing with Meguiars compound.
Once I had my design modeled in Fusion 360, I modeled the routing jigs I would need, and started 3D printing them. This included the body templet with the control cavity cutout and the control cavity cover routing templet. These are printed 1/4″ thick, then I use double sided “carpet” tape to adhere them to 1/2″ MDF and route to make a template that is 3/4″ thick. I do this because the 3D printed template is susceptible to heat. Routing the mdf doesn’t produce a lot of heat, but trying to rout 3/4″ or 1.5″ poplar does, and can actually start to deform the 3D printed plastic.
While the templates were printing, I glued up the blanks for the body, which you can see in the second picture. I took a 1″x8″x6′ poplar board and cut it into four 18″ long pieces, then edge glue two pieces together for the top and two pieces together for the bottom. then I planed them . Unfortunately, I didn’t take any pictures of this process.
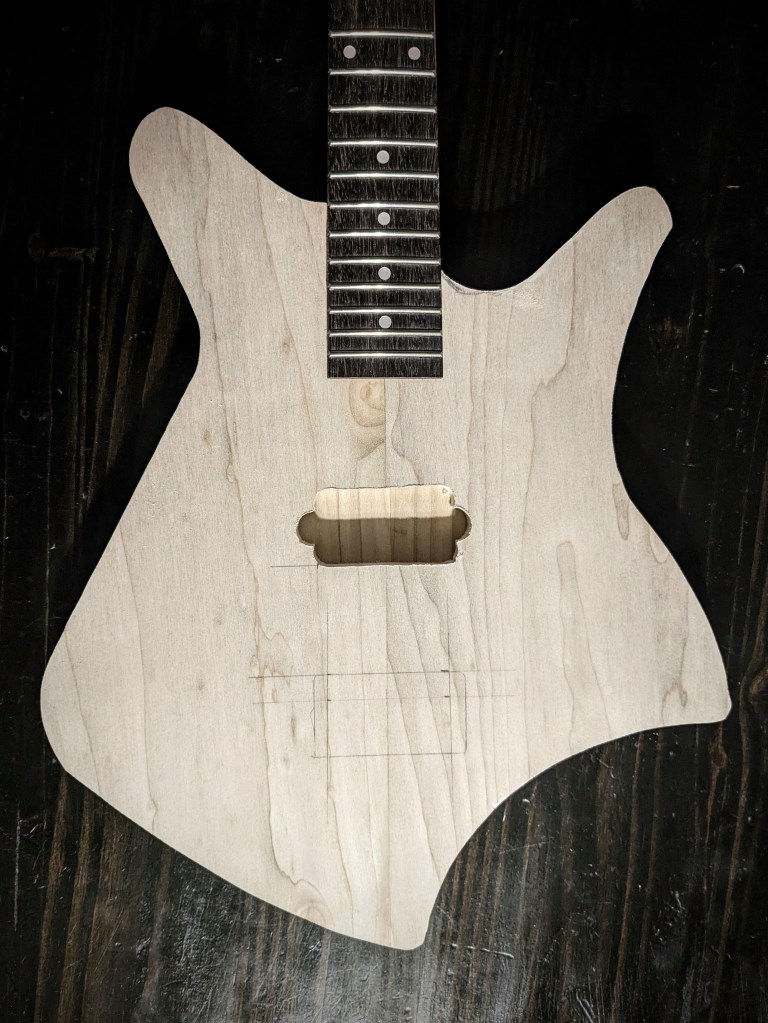
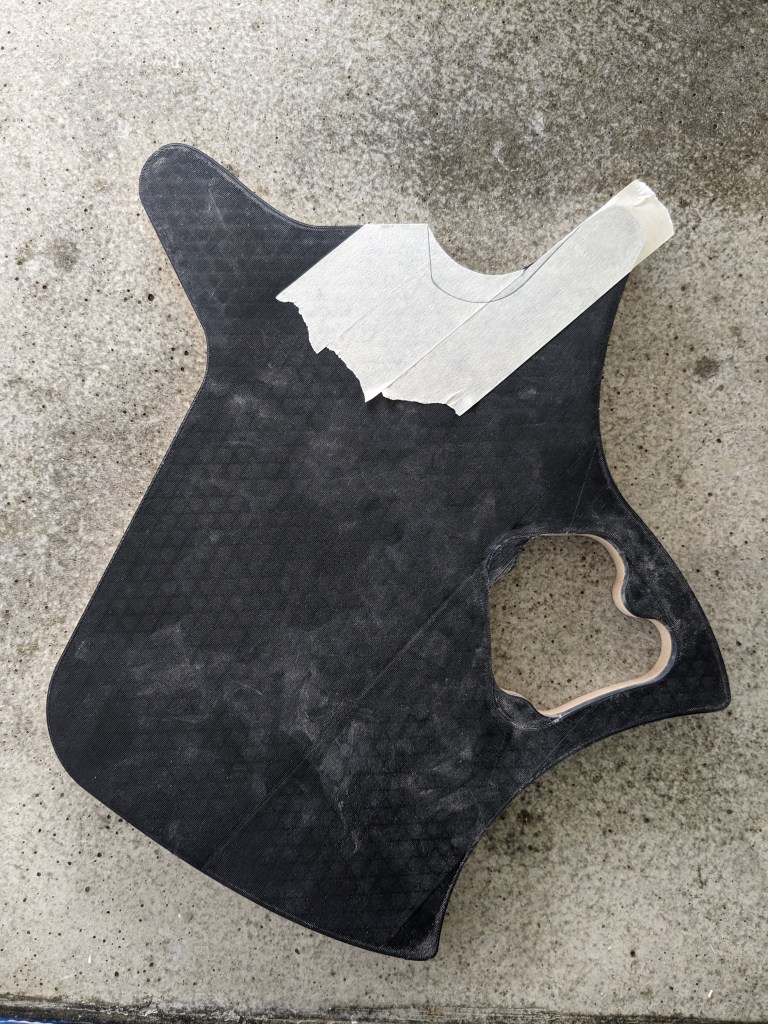
Once the blanks were ready, I traced out the template onto them and used a band saw to cut them almost to size. Then, routed exactly to size. At that point, I couldn’t resist a little mock up with the neck. This allowed me to layout the neck pocket, pickup cavity and bridge placements.
After mocking up the guitar, I realized that the cutout didn’t quite allow enough access to the lower part of the fretboard, so I freehanded a deeper cutout.
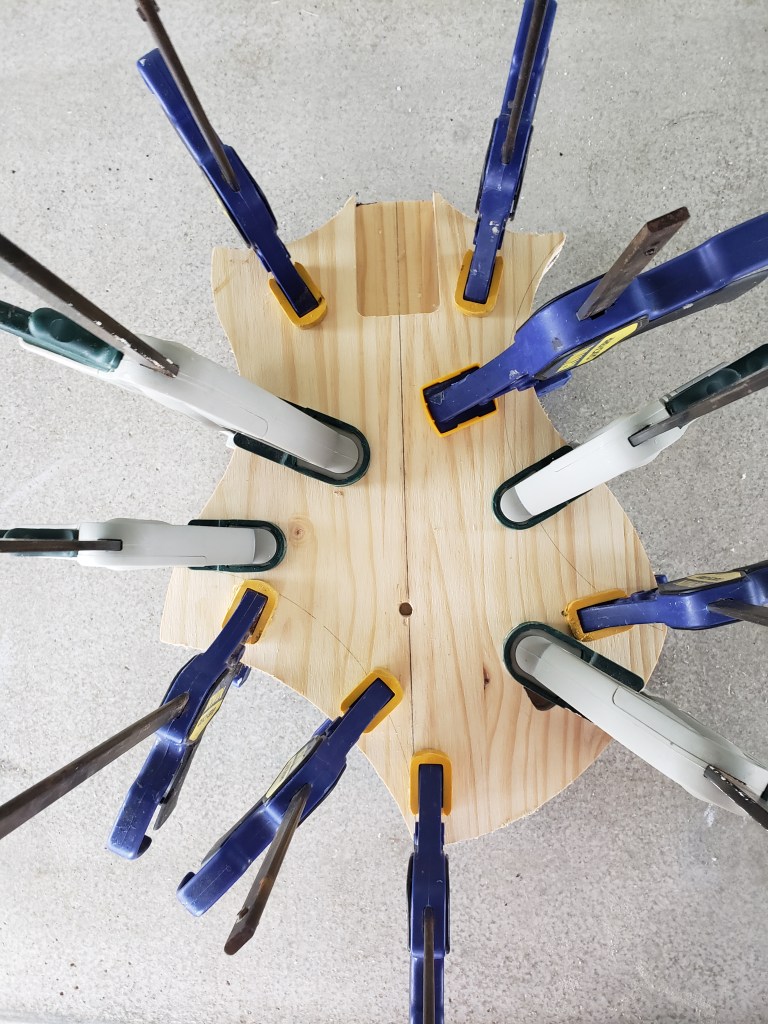
With the majority of the cutting and routing done, I glued up the top and bottom halves, using almost every clamp I own:
This is a part I definitely didn’t want to rush, so at this point all I could do was wait.
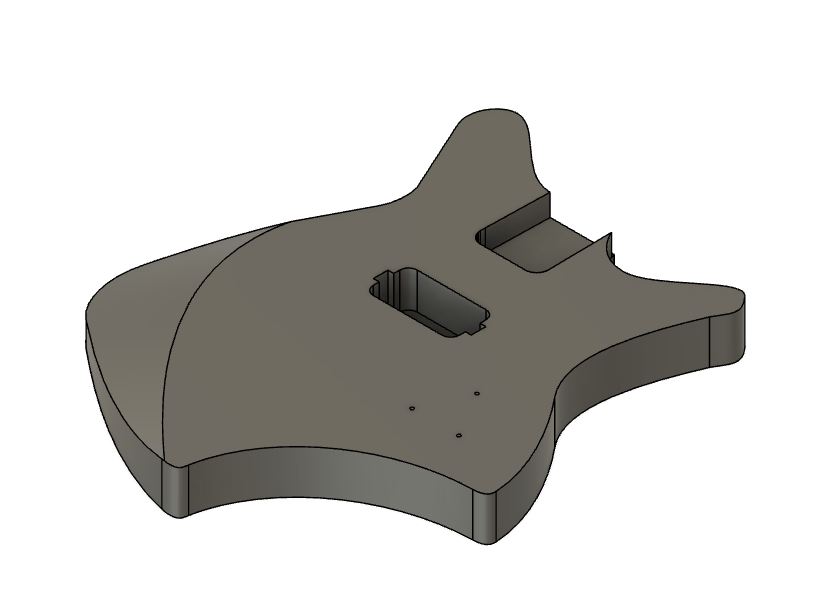
Once I had the basic 2D design established in Adobe Illustrator, I exported it as an SVG file so I could import it into Autodesk Fusion 360. Even though svg files are vector graphics, there is a discrepancy in how Illustrator and Fusion understand the size based on pixels. Illustrator treats the file as 72 dpi and fusion expects 96 dpi, so when importing an svg from Illustrator to Fusion you have to scale it 72/96% or a factor of ~1.33333.
Once imported, I extruded the body, then decided on the control cavity shape, the pickup routing cavity and the neck routing. In designing this guitar, I had a few criteria in mind. I wanted this guitar for playing heavy metal music, which meant I wanted a powerful humbucker pickup. A few years ago I used a BK2000 in a build. This is a quad rail pickup rated at 18 kilohms and has wiring so it can be split, making it even more versatile. I’d even bought an extra one at that time, so it was a no brainer to use it on this build.
Another criteria was the size. I wanted this to be as small as possible while remaining a full size guitar. In other words, I wanted it to be light, and compact to make it as easy and fast as possible to play, which really made me reconsider scale length. Scale length is the distance from the nut (top of the neck where the strings rest) to the bridge (part on the body that holds the strings. Manufacturers have used various scale length over the years, but Fender really standardized the 25.5″ scale length, and this is what I’ve used for all of my six string guitars so far. Lately, though, I’ve found that I really prefer a 24″ scale for my 3-string guitars, so I decided to use it on this design as well. Some manufacturers have sold 24″ scale guitars in the past as “student models”, so I am optimistic that this guitar should be easy to play.
Once I knew what pickup and neck I was going to use, I was able to place the cavities for these:
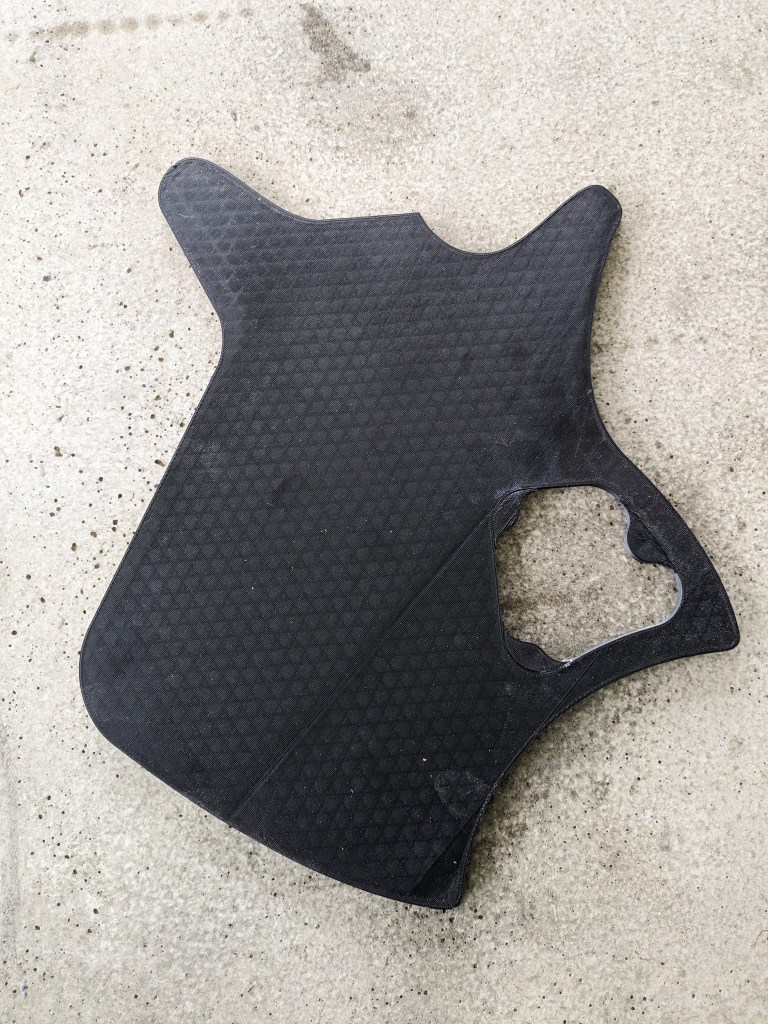
Next was the control cavity. Even though I was only going to have a push-pull Tone pot, Volume pot and jack, I wanted a large cavity to help reduce weight. I also wanted to to be easy to route, so I designed everything with a half-inch router bit in mind. This is what I came up with:
When I had the design done, I 3d-printed the routing templates and was ready to start the build!
So, after about a month of dealing with this bug I’m finally starting to feel like myself again which means that I want to jump right in and start working on everything I haven’t been able to touch for the past several weeks. The weather isn’t cooperating completely, which does limit a little of what I can do, but I’ve already gone for a couple (extremely disappointing) runs, gotten some writing done and made some progress on a couple guitar builds that have been collecting dust for way too long. I’ve also queried a couple more agents for My Life As Death and will try to submit to at least one more today. All in all, it’s been a pretty productive couple of days, and I still have a few more before I have to return to work.
And now that I’m feeling better, I hope to update this blog a little more often. And hopefully I’ll have something to report in regards to an agent before too long. In the meantime, feel free to check out my completed guitars for sale: https://www.etsy.com/shop/RileyCustomGuitars
Hello! There’s been so much going on but I want to keep this kind of brief, so I won’t go into too much detail over each project in this post.
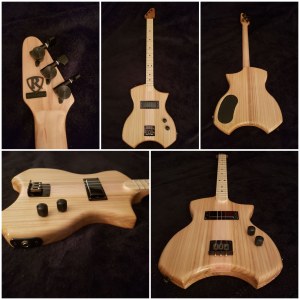
First off, the guitar I shared in my last post was RG13-0002. I love how it turned out with a split humbucker, but I didn’t get to enjoy it too long because I had a customer waiting for it before it was even done. Here’s the finished product:
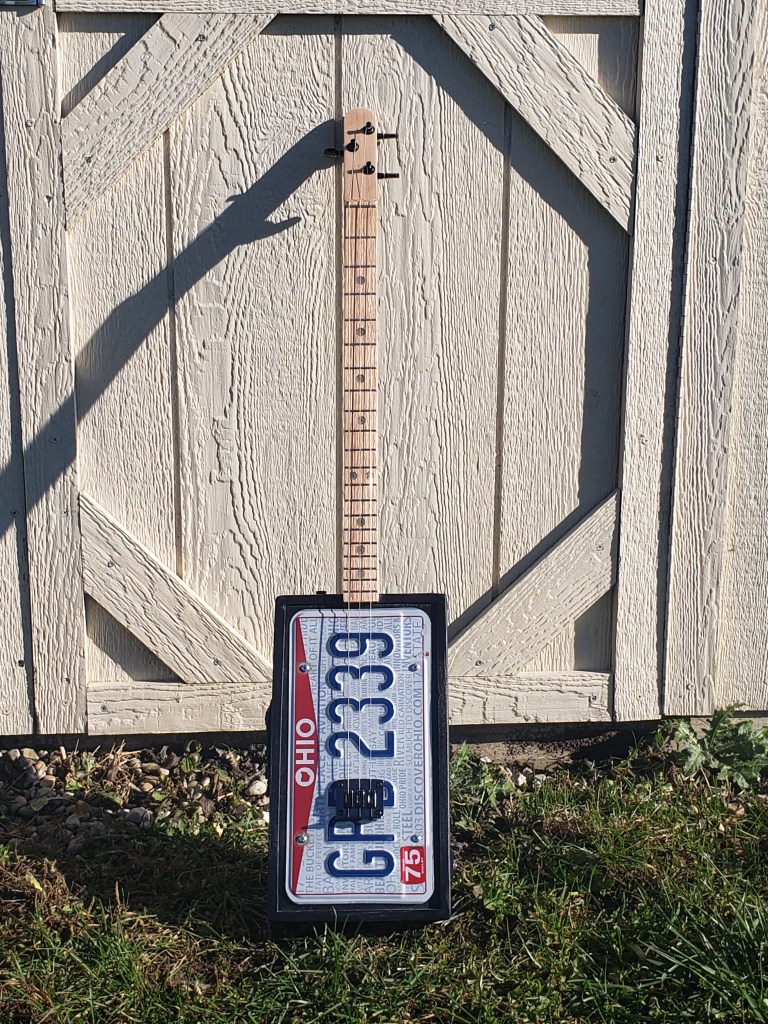
I also finished a 3-string license plate guitar but I haven’t got it put up online yet:
Additionally, I’ve got 6 other guitars I’m currently working on, so that’s where most of my free time has gone lately, not that I have a lot of free time between work and school.
Speaking of work, I’m now 3 months into my new job, and I still love it. The company I work for, and the people I work with are great. And while I probably won’t stay in the same position once I complete my schooling, I’m very happy doing it now and I have plenty of opportunities with this company once I get my engineering degree.
As for writing, I’ve been doing some, but not nearly as much as I want to. When I do take the time to write, I have been continuing to work on the sequel to My Life As Death. It feels like it’s starting off a little darker this time, but I’m also so early into it that I can’t say that for sure.
I’ve also been spending a lot of time getting my packet ready to submit to an agent. I found the agent I plan on submitting to first so I’m working on making sure I have everything to meet her requirements. Thankfully what she is asking for is pretty standard for the industry, so a week or two after I submit to her I will start researching other agents and I can pretty much use the same submission package for them as well. I know a lot of people suggest submitting to multiple agents at once, but she is the one I really want to go with, so I figure I’ll give her a week or two headstart.
So that’s a quick recap of all the projects keeping me from updating this blog as often as I should. I plan on updating a little more often, but now that MLAD is done, I will probably start sharing more posts on my guitar making processes. Every guitar is a little different but the various processes are generally similar for each.
Now that My Life As Death is done and the last chapter has been posted, I had to decide what’s next. Last week I tried moving on to several other books that I’d been working on. A couple of them are really close to being finished, and I made a little progress on each, but none of them really took off. So eventually I gave in and listened to what my creative mind was telling me. That means, I started working on the sequel to MLAD.
Unfortunately, the fall semester starts tomorrow, and between working full time and going to school full time, I don’t think I’ll be getting as much writing done as I like, so I won’t be serializing this one on my blog. Sorry, to those of you looking forward to the next chapter in Nate’s adventure.
I’ve also been selling more guitars, and having to build new ones to replace them, so I have no idea how long it will take for me to finish the next book, but I will be posting updates on this blog, and on facebook.
For now, though, here’s a picture of my latest guitar build:
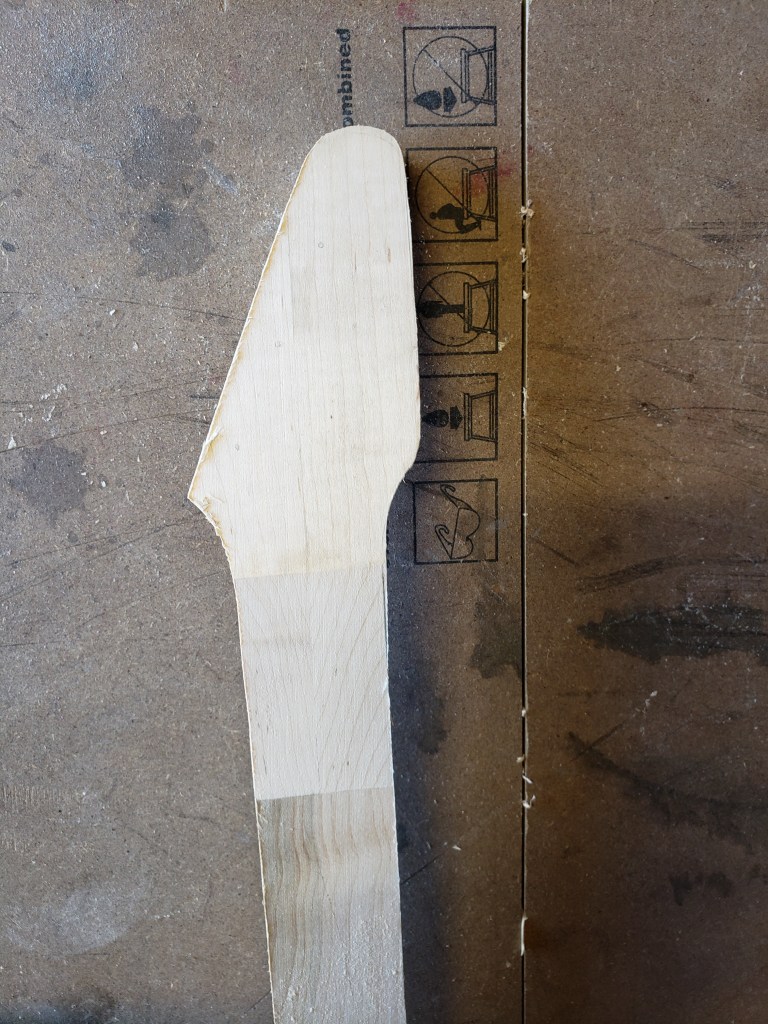
In messaging with a customer, I realized that I have not posted a full 3-string build, so now is the time. I’m starting with the RG-10, solid body design and then I’ll walk through the RG-9 acoustic/electric body style, but they both start with the same neck/head:
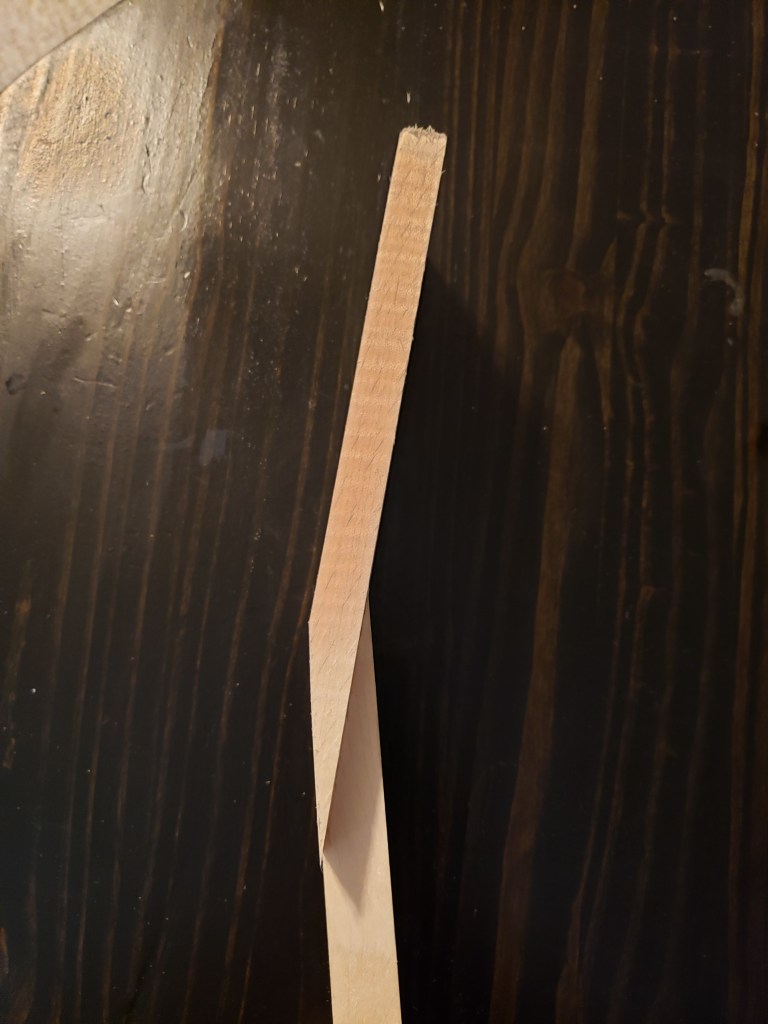
To build the neck, with a 15 degree scarf joint, I use a compound miter saw and a simple angled jig:
Using this jig, I cut two two smaller (~8″) pieces 1″x2″ maple that have been thinned down to 0.60″ thick. These will be glued together to make the head. I also use this jig to cut a 15 degree angle on the end of the neck. I tend to work on multiple guitars at once, hence the 4 pieces:
This process can be sped up a little, but starting with a single piece of 1″x4″ but I tend to have more 1″x2″ laying around.
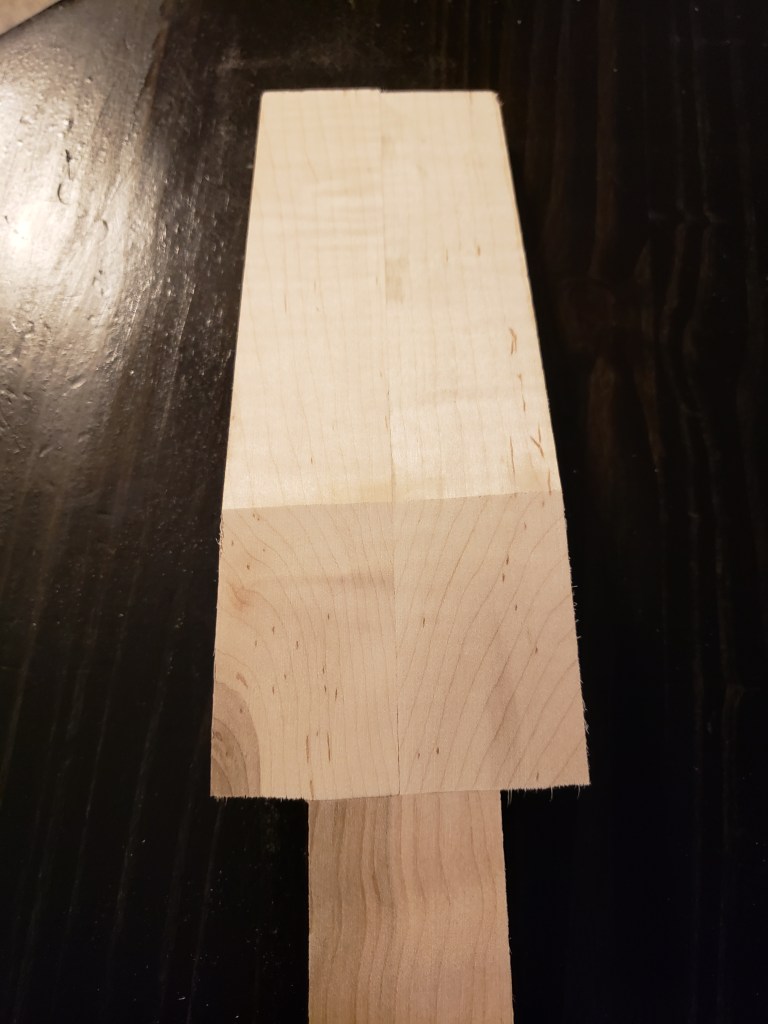
Once the head pieces are glued up, I then sand and place them until they are perfectly smooth. Then I glue them to the neck
The neck and head joint usually requires just a little more sanding/planing before the piece is ready fot the head shape to be cut.
I usually draw the head shape on, using my template, then start with the band saw to get the rough shape:
An oscillating drum sander helps dial in the final shape, before I drill the tuner holes:
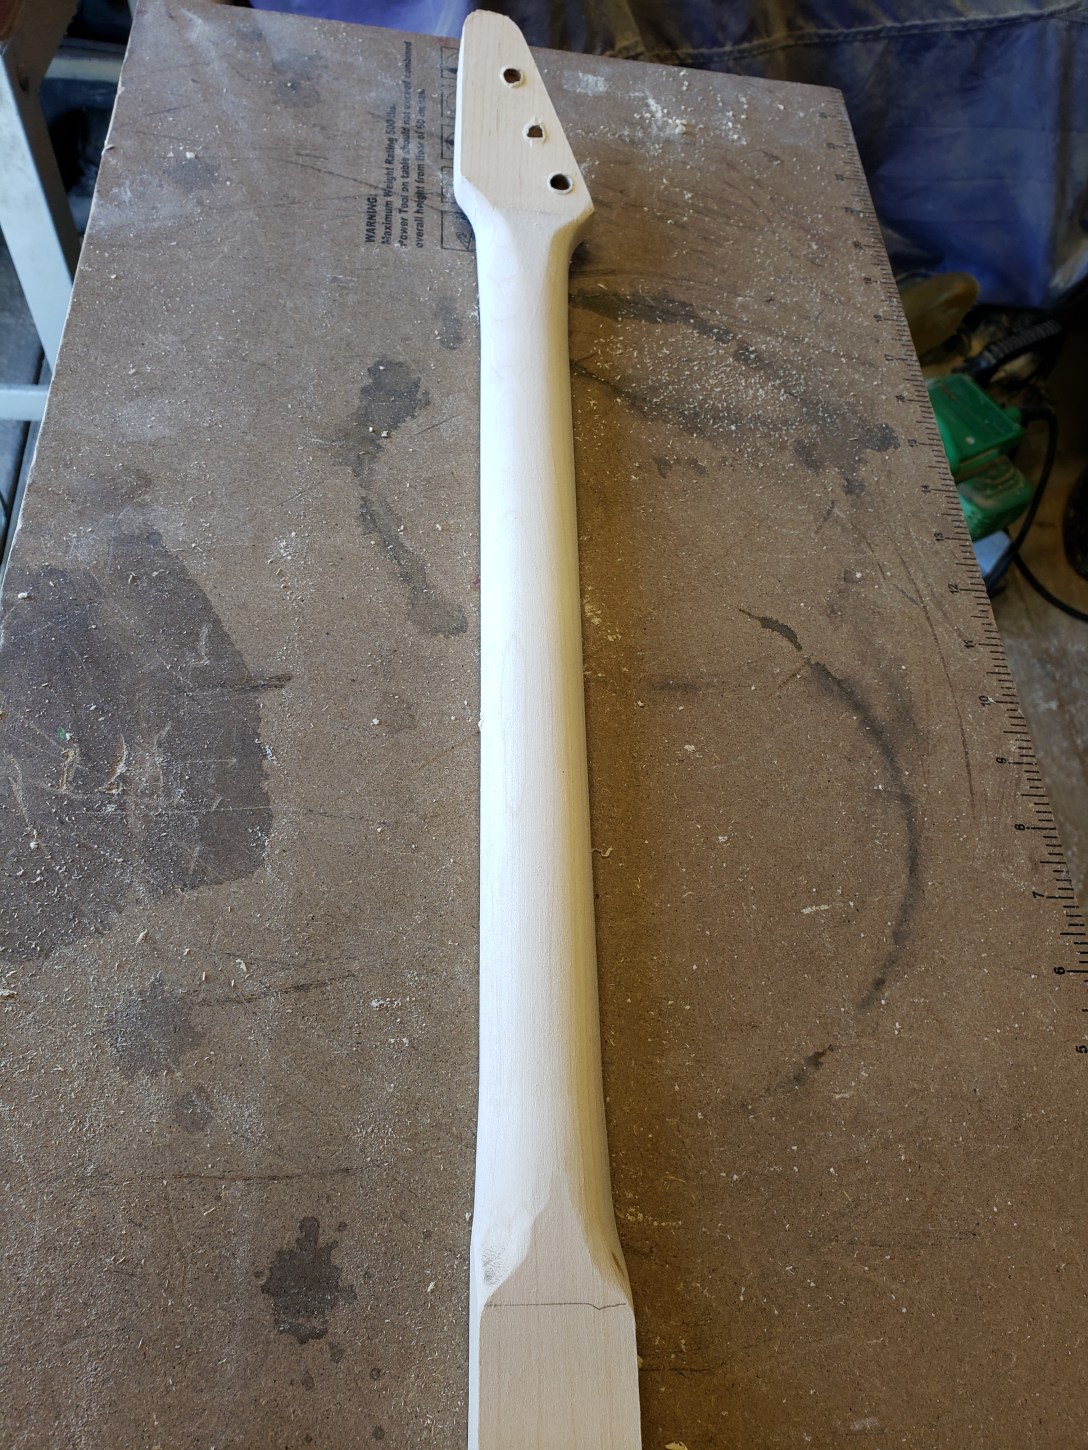
Once the holes are drilled, I start to shape the neck. A 45 degree router bit gets me a good shape to start with:
From there, I use rasps, files, a belt sanded and a mouse sander to get the shape I want:
I don’t spend too much time on getting it perfect just yet, because there will still be a lot more work to do once we add the body. This is the basic neck I use for both the RG9 and RG10 guitars. From here the processes take drastically different paths.
I started this next guitar with the idea of doing a budget build. I wanted to design a guitar that could be built with limited tools and for very little money. While the design changed a little over time, the basic concept remained the same.
To keep the cost down, I decided to use edge glued pine for the body, instead of my usual poplar.
I cut the two pieces, flipping the template over to cut and route the top piece. This helps hide the screw holes inside the finished body.
I also cut out the control cavity and neck cavity and routed a wiring channel in the top piece before gluing the two halves together. I used a dremel tool to route the wiring cavity so it wasn’t very pretty, but it worked. And once the guitar was assembled, no one would see it.
A lot of glue and clamps, and the body was ready for shaping and finishing.
At this point the body could be completed with just a little sanding and maybe a little rounding of the edges, but I decided to break out my files and give it some contours.
If you have a router, it makes this step a lot easier, but filing edge glued pine by hand isn’t that difficult, and getting the shape I wanted was actually pretty intuitive and enjoyable.
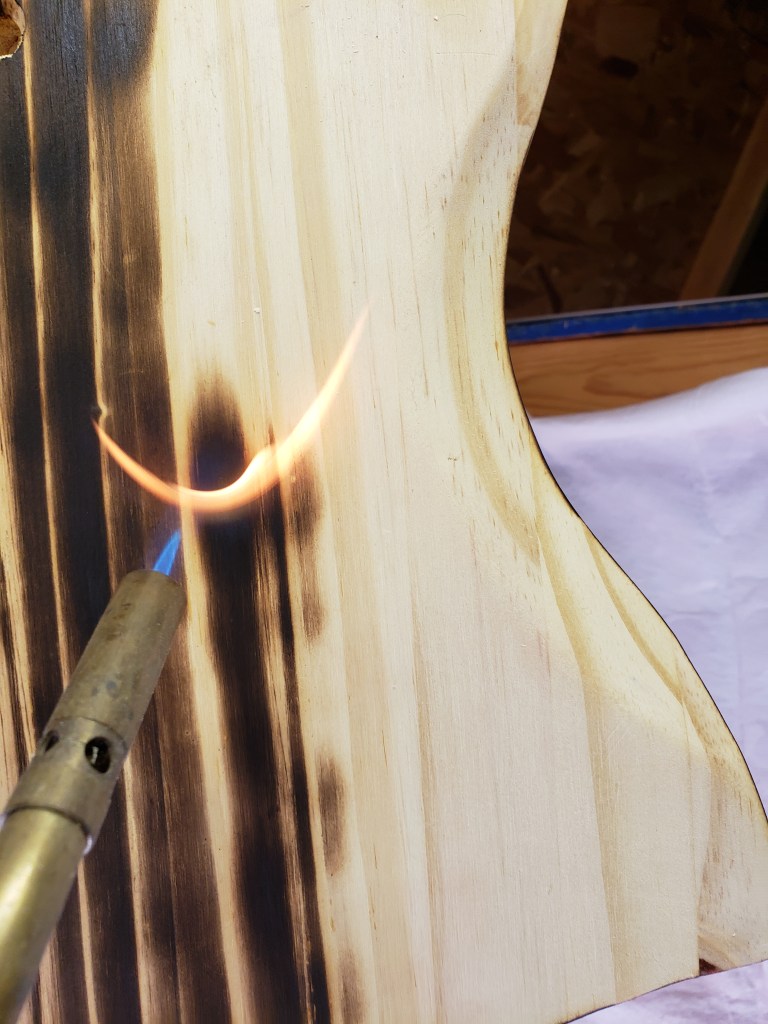
So with the body shape done, I needed some way to finish it. I’d learned about shou sugi ban years ago, and had always wanted to try it, so this seemed like to perfect opportunity. It fits well with the “budget” theme, and nothing screams rock-n-roll more than setting a guitar on fire.
Supposedly the flame treatment is enough to seal and protect the wood, but I ended up throwing on a clear topcoat, just for good measure.
As a “budget” build, especially for someone without a lot of tools, I had planned on using a bolt on neck from Guitar Fetish. I love these GF Basic necks, and for $33 you can’t beat the price, unless you happen to find one of the clearance necks. I’ve managed to pick up a couple of the “blemished” necks for $15-25 dollars, but that’s not typical.
I just happened to have a neck I’d already built, so I decided to use it instead of buying another one from Guitar Fetish, so I bolted it on.
This is where I deviated from my initial concept a little. I had planned on making the pickup and control cavity covers from wood, but then I changed my mind and 3D printed them. It still cost me next to nothing (~$0.50 for both), but I know most people don’t have 3D printers. And for anyone without a printer, the parts could still be made from wood.
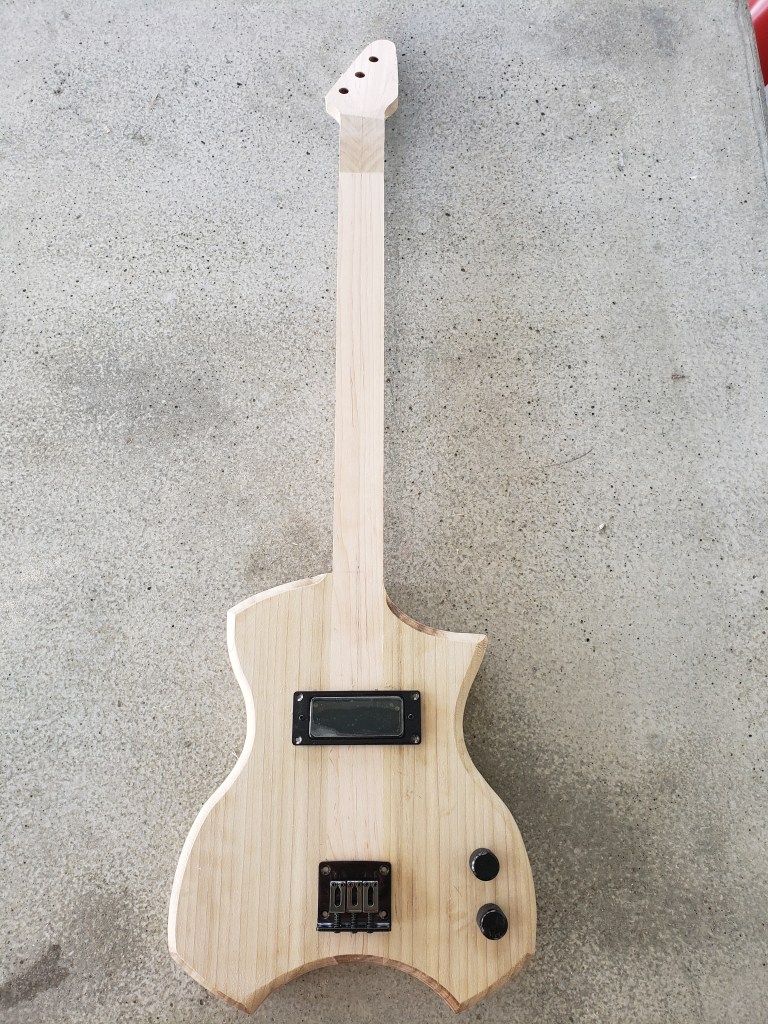
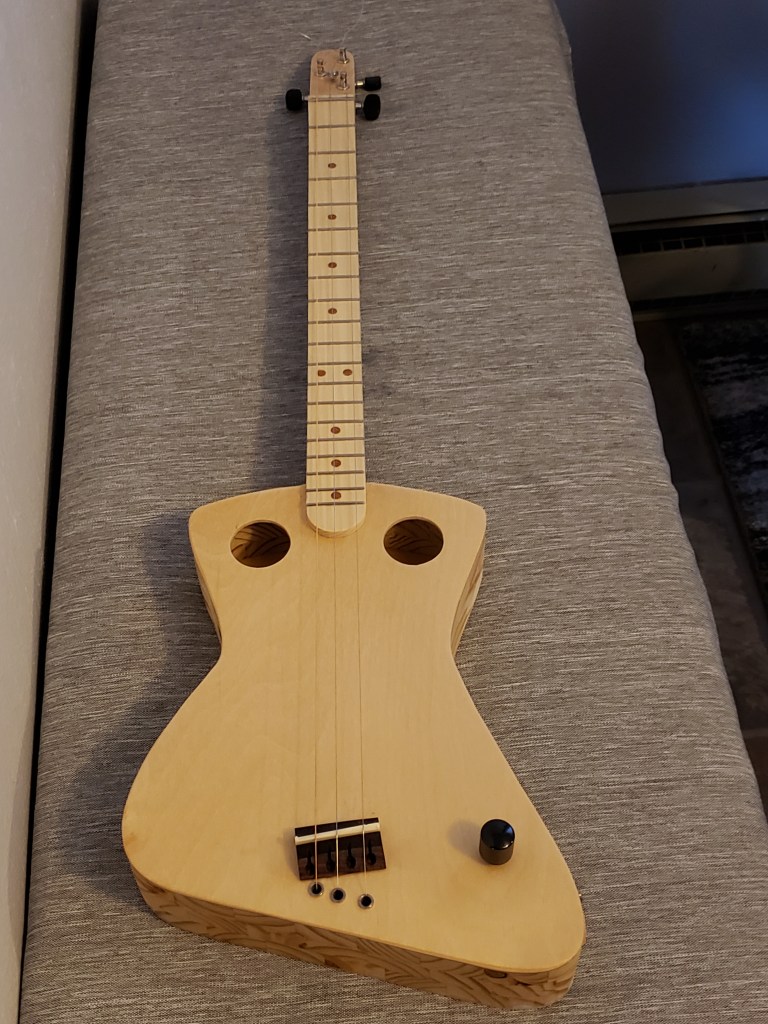
So here’s the final product:
This was a really fun build, and a great way to use some of the parts I had laying around. Calculating the cost of everything I used, even though I already had most of it, this guitar cost me about $75. Having to buy the Guitar Fetish neck would probably take the cost closer to $100, but I still think that’s a great price for a custom, one-of-a-kind, guitar.
I’ve played guitar (not necessarily well) most of my life. It’s something I enjoy for myself but I don’t take it very seriously. I’ve also been a builder/creative type to some degree, so it makes perfect sense to me that I would eventually start building guitars. The one thing I could not have expected was that I would end up building a 3 string guitar.
The general term used for 3 and 4 string guitars is “cigar box guitars”, because most of them are actually made from cigar boxes. I came across a lot of these while researching guitar building, and there are a ton of really cool ones but I was only interested in “real” (in my mind) guitars, so I never really looked into them. But then something funny happened.
One of the companies I bought my supplies from (https://mgbguitars.com/) caters to the cigar box market. Several of the pieces on the “Lady in Red” build came from them, so I shared a couple pictures of the final build with them. The owner liked it and invited me to join a facebook group for cigar box builders. I was intrigued, so I accepted the invitation, and let me tell you; these guys are amazing.
The guys in the facebook group are some of the most genuine, and genuinely nice, people I’ve never met in person. And they share a passion for building amazing and creative guitars out of anything and everything they can find. Their passion is contagious, so I decided to build a CBG, even though I didn’t have a cigar box. But that’s okay, because these guys had shown me that a “cigar box” guitar can be built from anything.
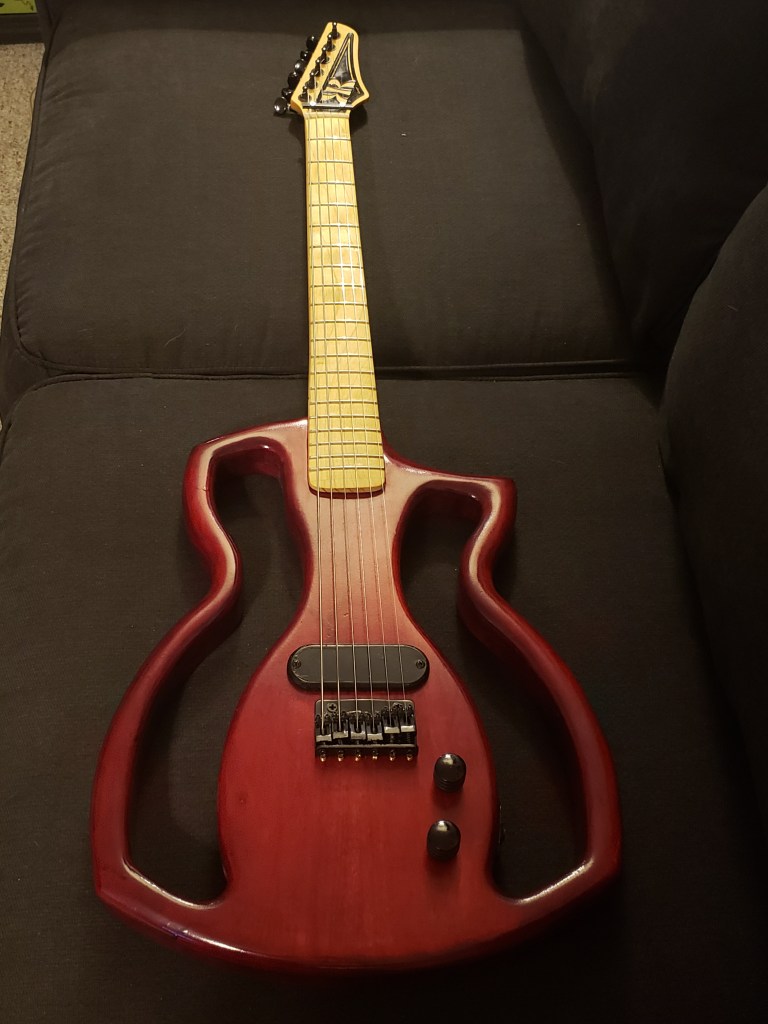
I really like building guitar bodies, so I took the opportunity to design a new body style. This is what I came up with:
Building this 3 string was similar to building other guitars, but somehow felt easier. I made a few mistakes during the build, but all-in-all, I’m really happy with how it turned out. But even more importantly, I’m really happy with how it plays.
I’ve always played a traditional 6-string guitar in standard tuning, so I figured it would be weird to play a 3-string in open G tuning. It was a little weird at first, but also amazing. Playing this thing is just so easy and freeing. after a couple days I found myself able to jump in and play along with many songs as they streamed on spotify. I immediately fell in love; so much so, that I’ve already started building several more of them. I also ordered way too many cigar boxes to try my hand at a few traditional CBG builds use as well.
I had been told a couple weeks ago that due to the Covid-19 issues disrupting the aerospace industry I was going to be furloughed for two weeks starting next week. I planned on using this time to finishing building several of these guitars and putting them for sale. Then yesterday, I was informed that my contract had been cancelled. So while I will still be building several guitars, I’ll also have to use this time to try to find a new contract or permanent position. I don’t know if this will result in me having more or less time to build, but I will definitely post an update as soon as I have some guitars ready for purchase. In the mean-time you can check out my other goodies at https://www.etsy.com/shop/keyboardmonkeydesign
One of the great things about building guitars is experimenting and changing things as the mood strikes me. The Lady in Red build looked great, but a solid body guitar with piezo pickups just didn’t provide the sound I was looking for, so I decided to make some changes. I’ve got several guitars with humbuckers, but I don’t have any with single coil pickups so I swapped out the double piezos with a single coil pickup from MGB (https://mgbguitars.com/collections/pickups/products/guitar-parts-pickups-seven-fitty). I didn’t take any pictures of the process, but it was pretty straight forward. I routed a cavity in the body and drilled a hole connecting it to control cavity, then ran the wiring.
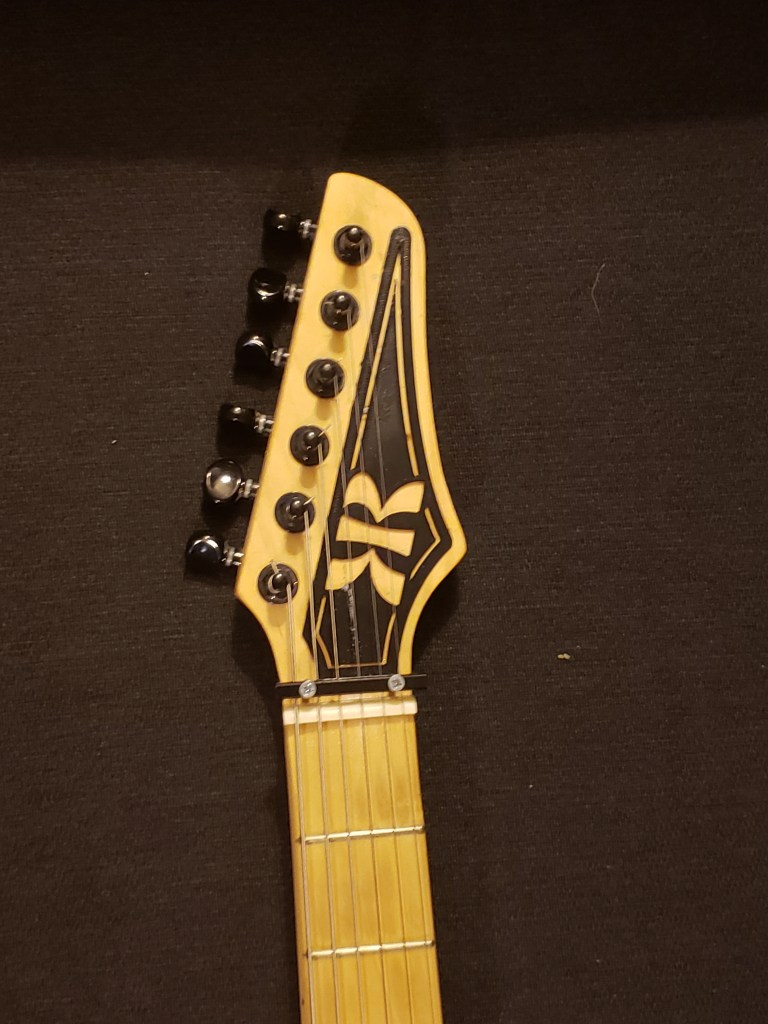
MGB sells a pickup cover for the seven-fitty but due to my setup it didn’t get the pickup as close to the strings as I wanted, so I 3D printed a new cover. I also 3D printed a logo for the head while I was at it. I can’t say I’m completely done with this one, but I love the way she sounds…for now.