

I started this next guitar with the idea of doing a budget build. I wanted to design a guitar that could be built with limited tools and for very little money. While the design changed a little over time, the basic concept remained the same.
To keep the cost down, I decided to use edge glued pine for the body, instead of my usual poplar.

I cut the two pieces, flipping the template over to cut and route the top piece. This helps hide the screw holes inside the finished body.

I also cut out the control cavity and neck cavity and routed a wiring channel in the top piece before gluing the two halves together. I used a dremel tool to route the wiring cavity so it wasn’t very pretty, but it worked. And once the guitar was assembled, no one would see it.

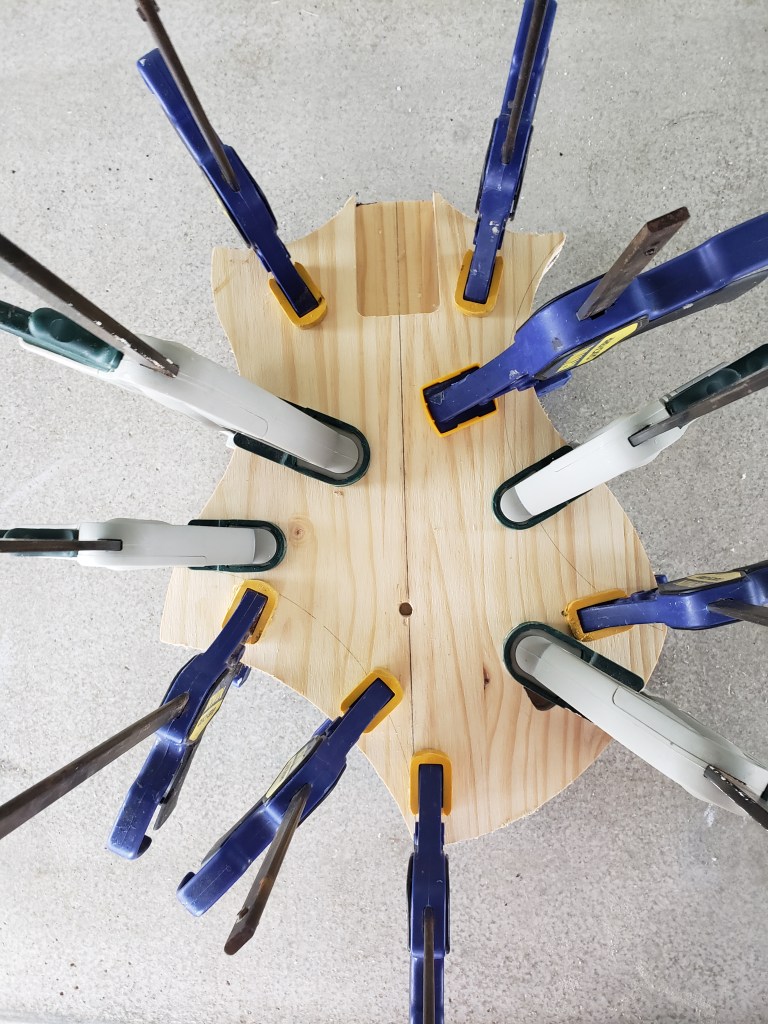
A lot of glue and clamps, and the body was ready for shaping and finishing.
At this point the body could be completed with just a little sanding and maybe a little rounding of the edges, but I decided to break out my files and give it some contours.

If you have a router, it makes this step a lot easier, but filing edge glued pine by hand isn’t that difficult, and getting the shape I wanted was actually pretty intuitive and enjoyable.
So with the body shape done, I needed some way to finish it. I’d learned about shou sugi ban years ago, and had always wanted to try it, so this seemed like to perfect opportunity. It fits well with the “budget” theme, and nothing screams rock-n-roll more than setting a guitar on fire.
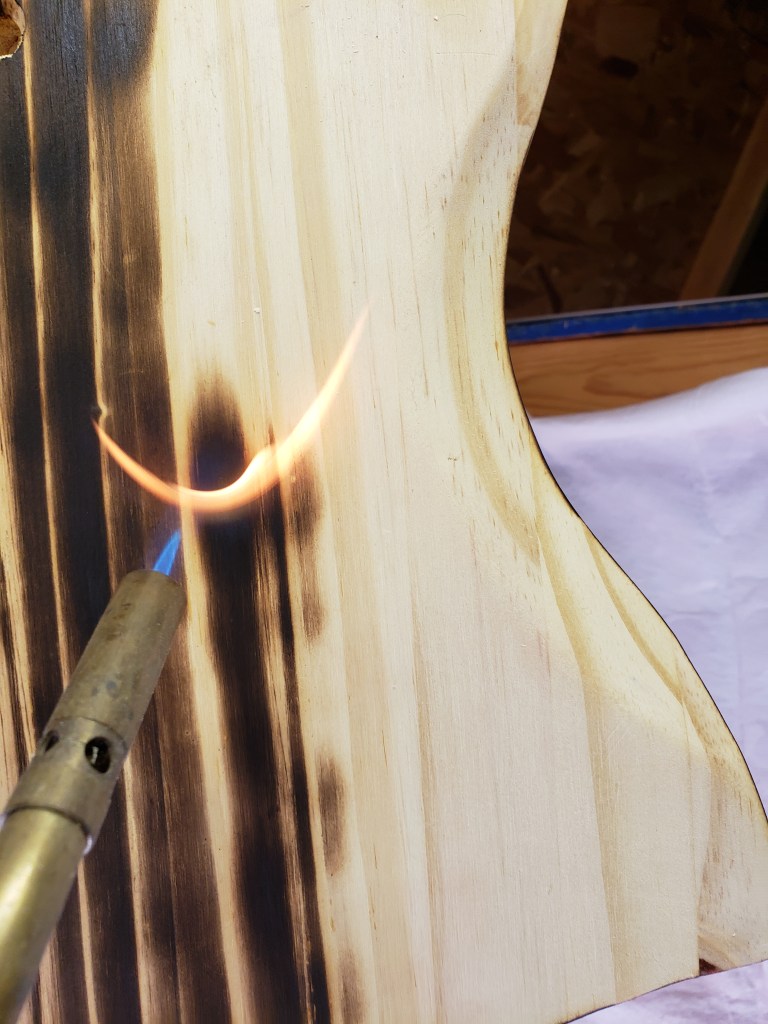

Supposedly the flame treatment is enough to seal and protect the wood, but I ended up throwing on a clear topcoat, just for good measure.
As a “budget” build, especially for someone without a lot of tools, I had planned on using a bolt on neck from Guitar Fetish. I love these GF Basic necks, and for $33 you can’t beat the price, unless you happen to find one of the clearance necks. I’ve managed to pick up a couple of the “blemished” necks for $15-25 dollars, but that’s not typical.
I just happened to have a neck I’d already built, so I decided to use it instead of buying another one from Guitar Fetish, so I bolted it on.
Unfortunately, I forgot about taking pictures as I finished assembling the guitar. I used a standard hardtail bridge, a single volume pot, tuners and a magnetic pickup, all from mgbguitars.com.
This is where I deviated from my initial concept a little. I had planned on making the pickup and control cavity covers from wood, but then I changed my mind and 3D printed them. It still cost me next to nothing (~$0.50 for both), but I know most people don’t have 3D printers. And for anyone without a printer, the parts could still be made from wood.
So here’s the final product:


This was a really fun build, and a great way to use some of the parts I had laying around. Calculating the cost of everything I used, even though I already had most of it, this guitar cost me about $75. Having to buy the Guitar Fetish neck would probably take the cost closer to $100, but I still think that’s a great price for a custom, one-of-a-kind, guitar.

hola me encanta la cabecera de tu blog, es una creación personal? Kari Zacharia Taka
LikeLiked by 1 person
Thank you! Yes, it is one of my designs. I have been a graphic designer for the past 17 years, though mainly working in the appliance, automotive and aerospace industries.
LikeLike