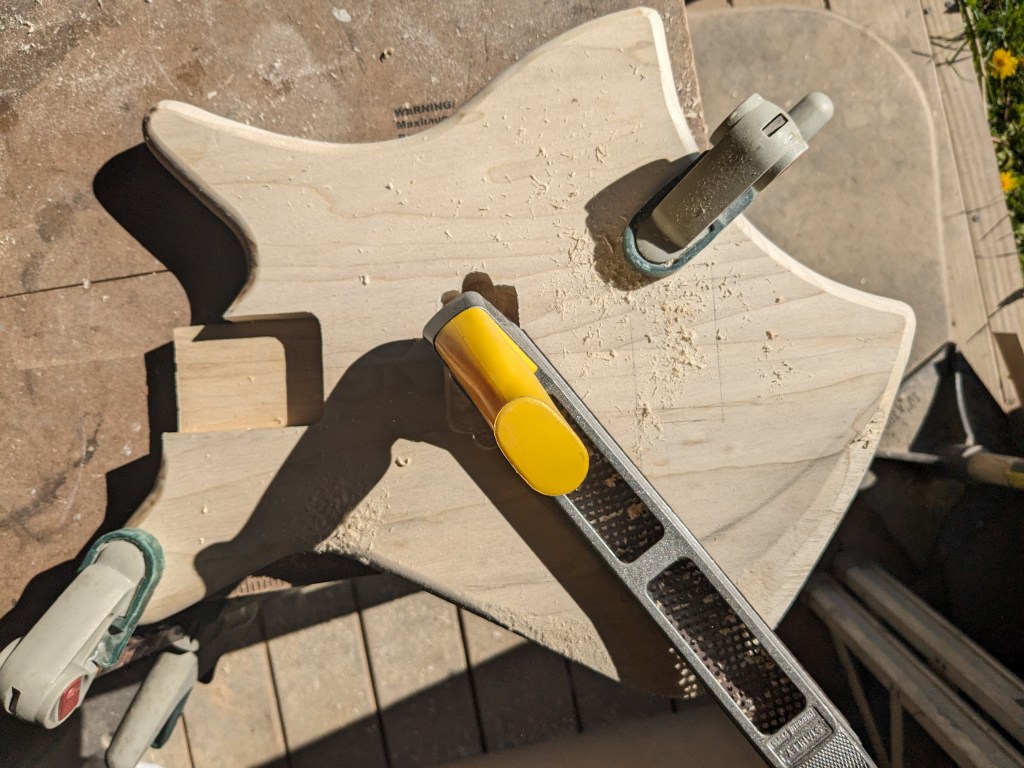
Once I had the body glued up, it was time to shape and sand it. I started by rounding over the edges, then got to work with a rasp to start contouring the arm rest area. This will reduce the weight a little and making it more comfortable to play.
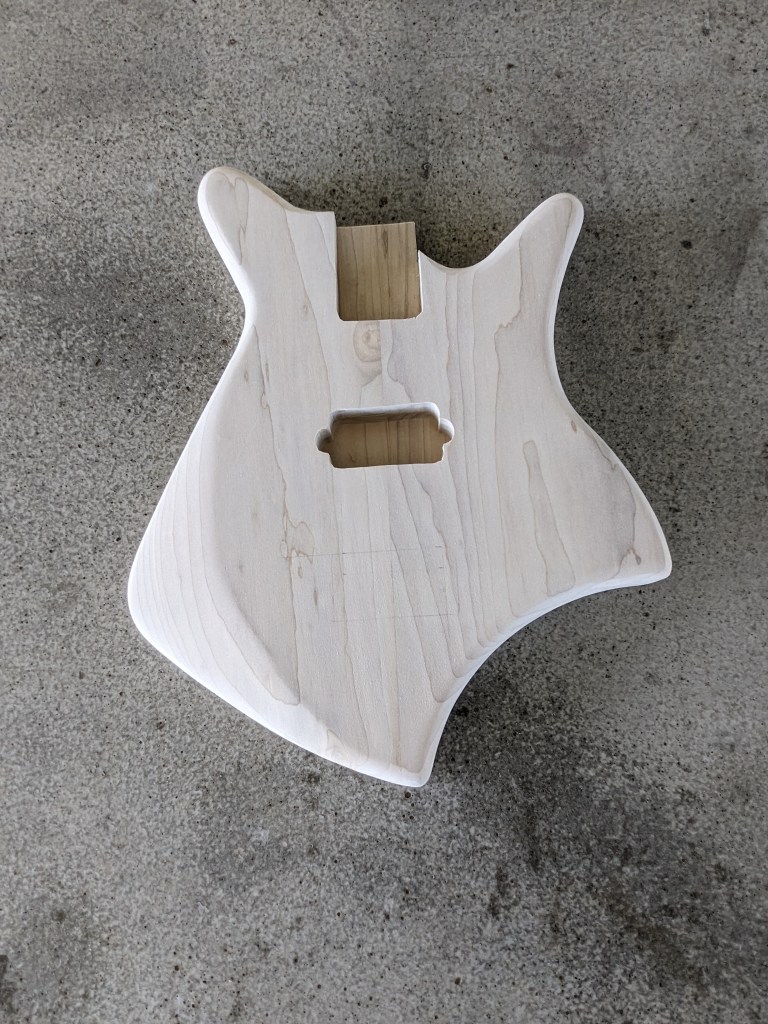
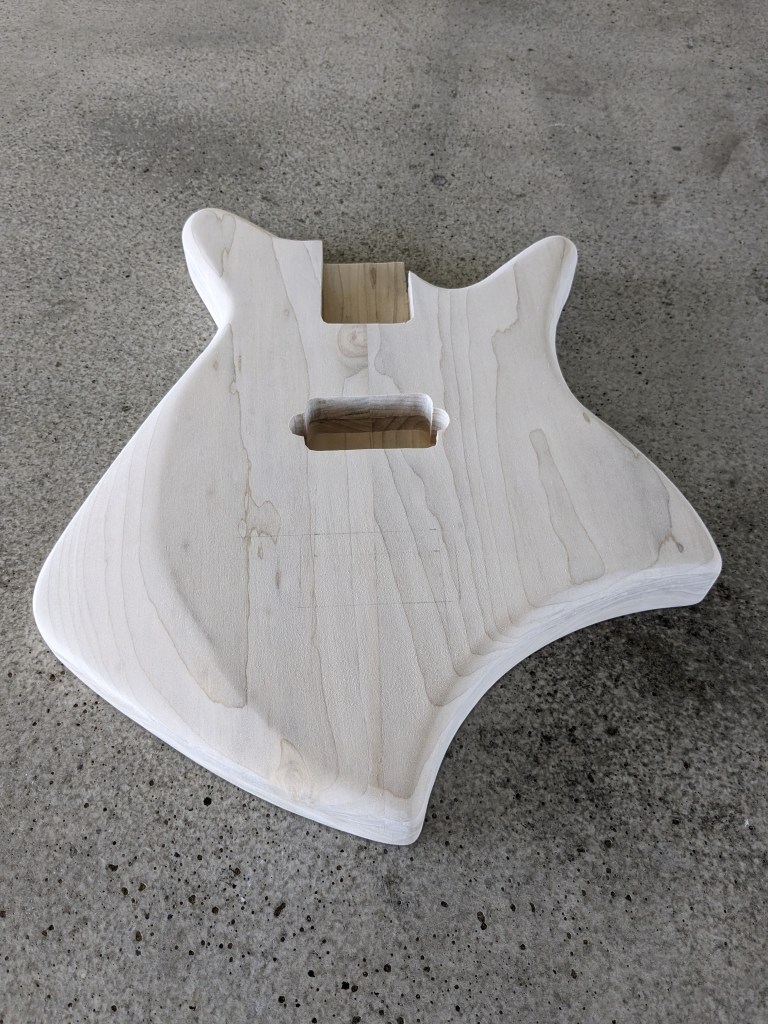
Once I had the contouring done, I drilled for the volume and tone pots, the jack, the bridge (including the grounding wire channel, and the neck screws.
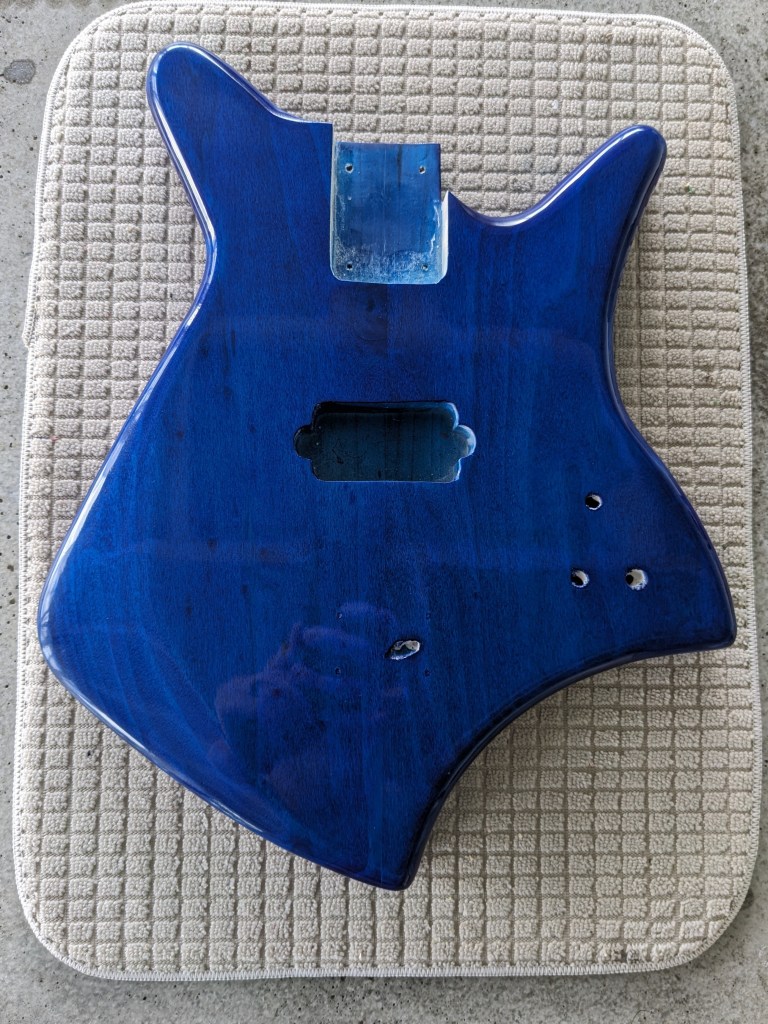
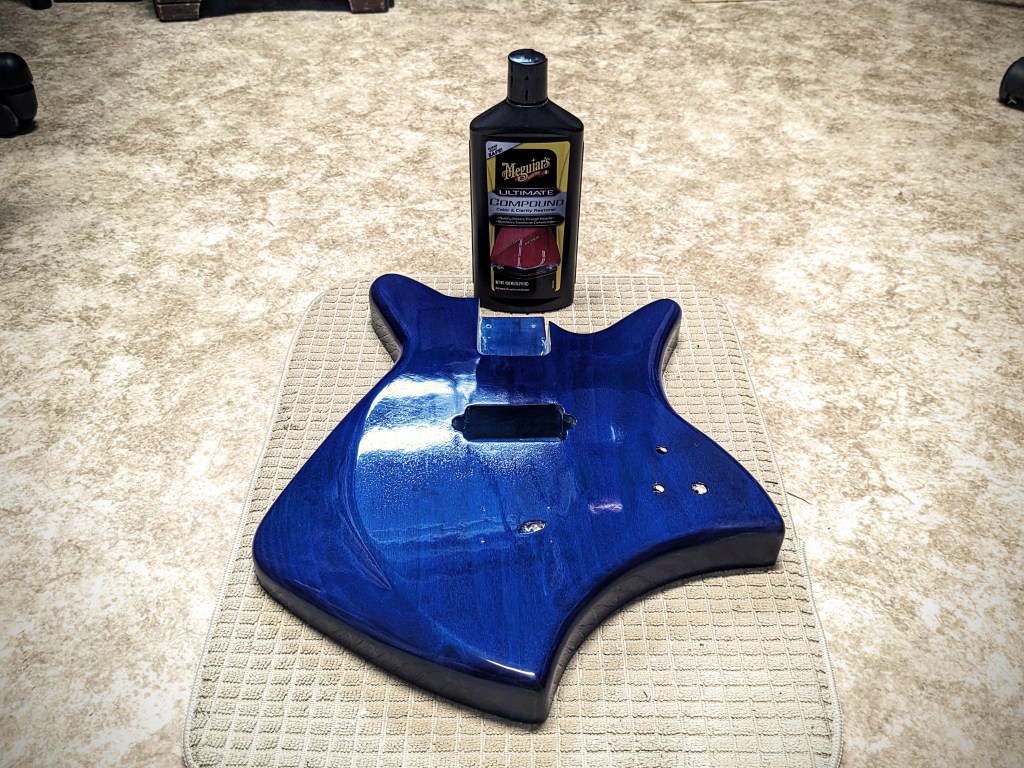
I didn’t take any pictures of the sanding process, but once it was done, it was time to add a little color. I really wanted to blue to stand out on this one so I started by staining the body with ColorTone liquid stain. This alone is usually good enough, but I wanted to enhance this with Metalcast Blue Anodized coating. This is a translucent blue finish meant to go over chrome or bright metal, but it works just as well over wood. I topped this off with Rust-Oleum Triple Thick Glaze. I gave each of these layers ample time to cure between coats, then let the whole stack rest for a week before wet sanding and polishing with Meguiars compound.
Once I had my design modeled in Fusion 360, I modeled the routing jigs I would need, and started 3D printing them. This included the body templet with the control cavity cutout and the control cavity cover routing templet. These are printed 1/4″ thick, then I use double sided “carpet” tape to adhere them to 1/2″ MDF and route to make a template that is 3/4″ thick. I do this because the 3D printed template is susceptible to heat. Routing the mdf doesn’t produce a lot of heat, but trying to rout 3/4″ or 1.5″ poplar does, and can actually start to deform the 3D printed plastic.
While the templates were printing, I glued up the blanks for the body, which you can see in the second picture. I took a 1″x8″x6′ poplar board and cut it into four 18″ long pieces, then edge glue two pieces together for the top and two pieces together for the bottom. then I planed them . Unfortunately, I didn’t take any pictures of this process.
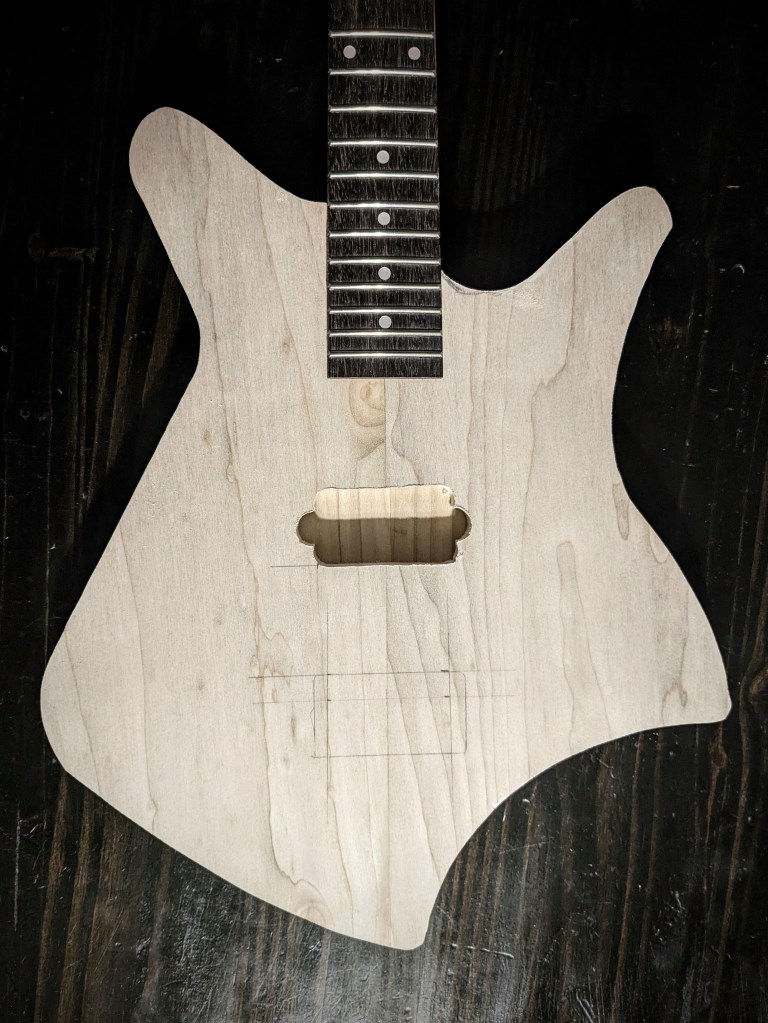
Once the blanks were ready, I traced out the template onto them and used a band saw to cut them almost to size. Then, routed exactly to size. At that point, I couldn’t resist a little mock up with the neck. This allowed me to layout the neck pocket, pickup cavity and bridge placements.
After mocking up the guitar, I realized that the cutout didn’t quite allow enough access to the lower part of the fretboard, so I freehanded a deeper cutout.
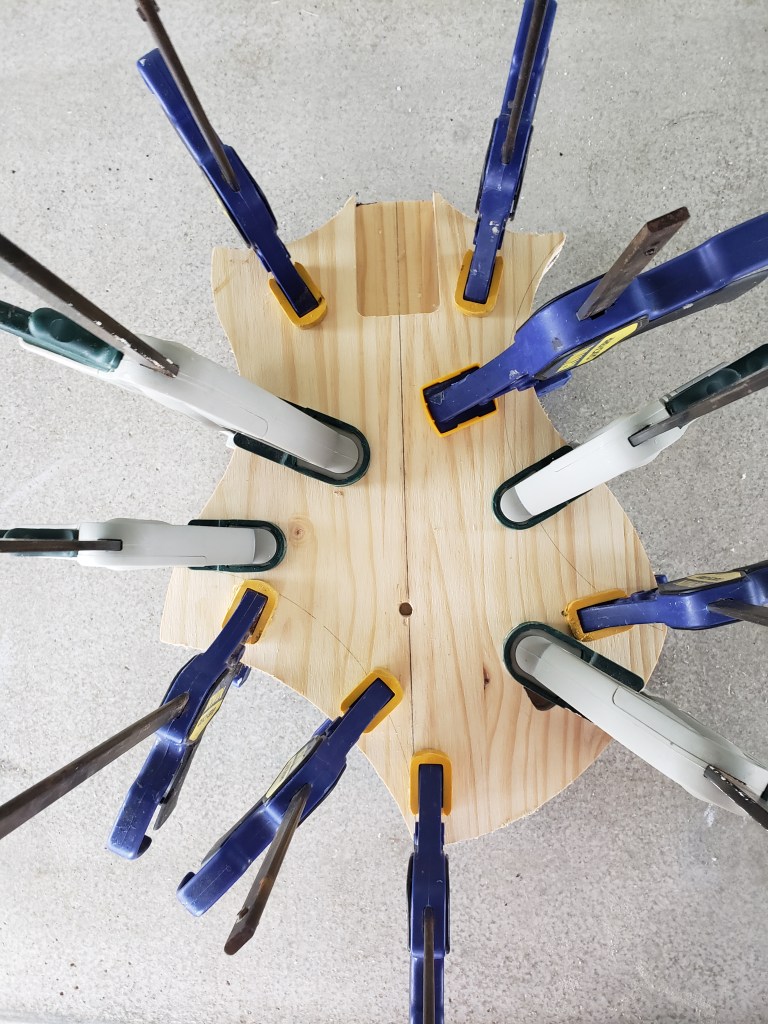
With the majority of the cutting and routing done, I glued up the top and bottom halves, using almost every clamp I own:
This is a part I definitely didn’t want to rush, so at this point all I could do was wait.
Once I had the basic 2D design established in Adobe Illustrator, I exported it as an SVG file so I could import it into Autodesk Fusion 360. Even though svg files are vector graphics, there is a discrepancy in how Illustrator and Fusion understand the size based on pixels. Illustrator treats the file as 72 dpi and fusion expects 96 dpi, so when importing an svg from Illustrator to Fusion you have to scale it 72/96% or a factor of ~1.33333.
Once imported, I extruded the body, then decided on the control cavity shape, the pickup routing cavity and the neck routing. In designing this guitar, I had a few criteria in mind. I wanted this guitar for playing heavy metal music, which meant I wanted a powerful humbucker pickup. A few years ago I used a BK2000 in a build. This is a quad rail pickup rated at 18 kilohms and has wiring so it can be split, making it even more versatile. I’d even bought an extra one at that time, so it was a no brainer to use it on this build.
Another criteria was the size. I wanted this to be as small as possible while remaining a full size guitar. In other words, I wanted it to be light, and compact to make it as easy and fast as possible to play, which really made me reconsider scale length. Scale length is the distance from the nut (top of the neck where the strings rest) to the bridge (part on the body that holds the strings. Manufacturers have used various scale length over the years, but Fender really standardized the 25.5″ scale length, and this is what I’ve used for all of my six string guitars so far. Lately, though, I’ve found that I really prefer a 24″ scale for my 3-string guitars, so I decided to use it on this design as well. Some manufacturers have sold 24″ scale guitars in the past as “student models”, so I am optimistic that this guitar should be easy to play.
Once I knew what pickup and neck I was going to use, I was able to place the cavities for these:
Next was the control cavity. Even though I was only going to have a push-pull Tone pot, Volume pot and jack, I wanted a large cavity to help reduce weight. I also wanted to to be easy to route, so I designed everything with a half-inch router bit in mind. This is what I came up with:
When I had the design done, I 3d-printed the routing templates and was ready to start the build!
After getting kicked out of high school, I never thought I’d go to college. Ten years later I convinced myself to pursue a degree in Computer Application Development in order to have a career that would better provide for my family. The funny thing is, that by the time I completed that degree my career took off in a completely different direction, focusing on graphic, color and material, and CAD design. I worked with a lot of great people and had a lot of great experiences, but after 20 years with that company, I felt a need to change direction, so in 2018 I left, unsure of what was next. Freelancing provided time for me to pick a direction, but Covid really was the catalyst that made me decide to go back to school and pursue a second degree, this time focusing on Mechanical Engineering Technologies. And I am pleased to say that Monday night was my final class for this degree. The final grades haven’t been posted yet, but for all intents and purposes, I am done. In a funny twist of fate, my career decided to take a little different direction about six months ago, and even though I am in an engineering position, my main projects are more focused on Computer Application Development then on Engineering Technologies, but I love the job and the company, so it all worked out. The only question is, “Now what?” For the last couple years I have structured my life around school, so now that I’m done, I will have to decide what projects I want to focus on the most (besides the projects directed by the wife). The guitar building is still going strong so I know I will continue working on them, but I don’t think I’m going to dedicate a whole lot of additional time to that pursuit. I enjoy it, but I feel I’ve been spending the right amount of time on it. What I have not been spending enough time on is my writing. MLAD has been done for quite a while, but I really haven’t done anything with it yet. It’s time to get it out in the world. And while I have been working on the sequel, it’s only about half done, and I plan on having it completed this year. I also plan on finishing the sequel to The Consciousness Puzzle soon. In order to do this, I’m going to have to spend a lot more time with my butt in the chair, pounding on the keyboard, so I guess that’s my plan going forward…Butt in chair, hands on keyboard. I’m sure I’ll come up with plenty of other, creative projects to fill my time, but I really want to have at least two books out this year, and preferably three. It’s going to be a huge undertaking but I have a lot me free time now, so stick around to see how it turns out.
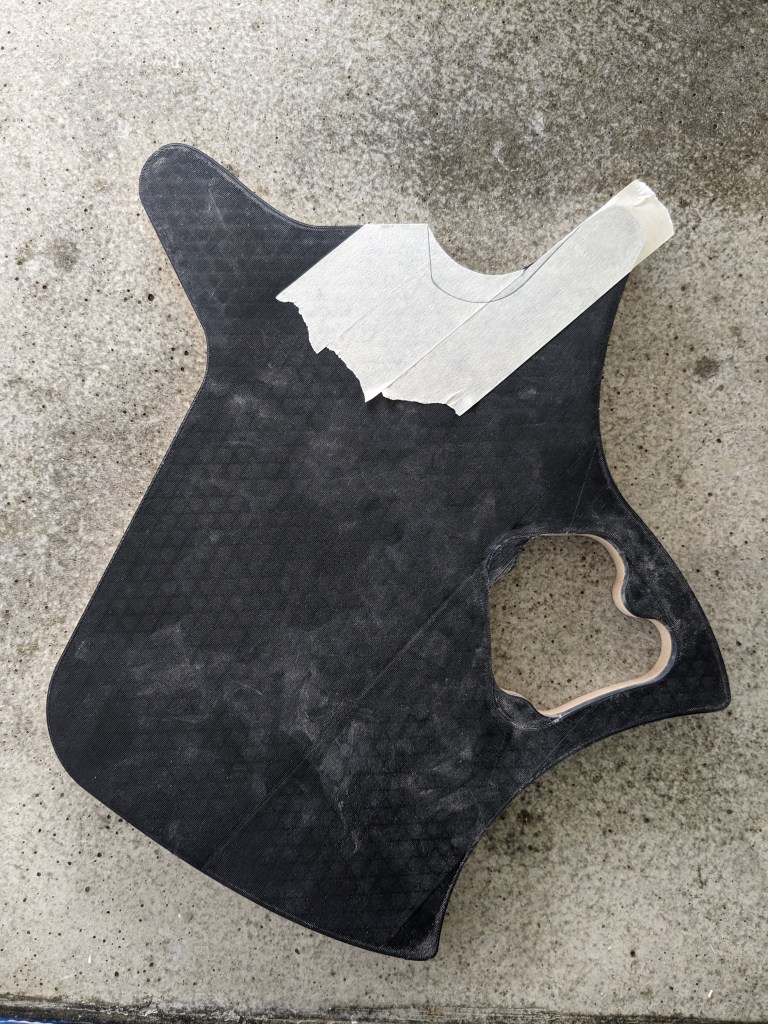
I started this next guitar with the idea of doing a budget build. I wanted to design a guitar that could be built with limited tools and for very little money. While the design changed a little over time, the basic concept remained the same.
To keep the cost down, I decided to use edge glued pine for the body, instead of my usual poplar.
I cut the two pieces, flipping the template over to cut and route the top piece. This helps hide the screw holes inside the finished body.
I also cut out the control cavity and neck cavity and routed a wiring channel in the top piece before gluing the two halves together. I used a dremel tool to route the wiring cavity so it wasn’t very pretty, but it worked. And once the guitar was assembled, no one would see it.
A lot of glue and clamps, and the body was ready for shaping and finishing.
At this point the body could be completed with just a little sanding and maybe a little rounding of the edges, but I decided to break out my files and give it some contours.
If you have a router, it makes this step a lot easier, but filing edge glued pine by hand isn’t that difficult, and getting the shape I wanted was actually pretty intuitive and enjoyable.
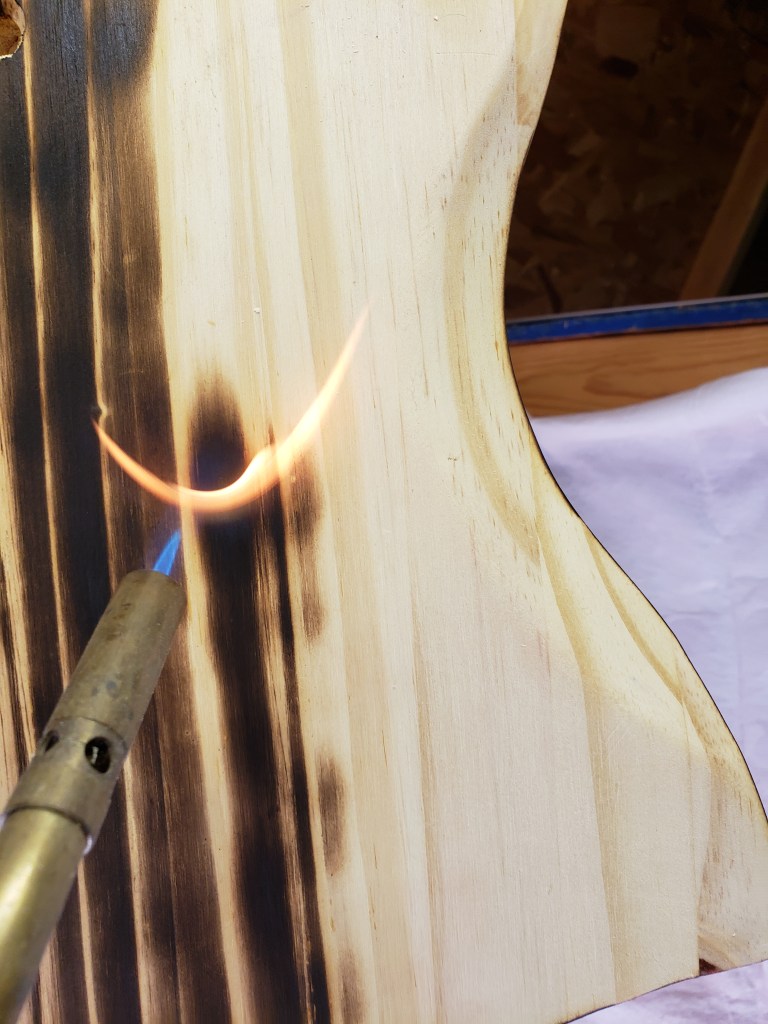
So with the body shape done, I needed some way to finish it. I’d learned about shou sugi ban years ago, and had always wanted to try it, so this seemed like to perfect opportunity. It fits well with the “budget” theme, and nothing screams rock-n-roll more than setting a guitar on fire.
Supposedly the flame treatment is enough to seal and protect the wood, but I ended up throwing on a clear topcoat, just for good measure.
As a “budget” build, especially for someone without a lot of tools, I had planned on using a bolt on neck from Guitar Fetish. I love these GF Basic necks, and for $33 you can’t beat the price, unless you happen to find one of the clearance necks. I’ve managed to pick up a couple of the “blemished” necks for $15-25 dollars, but that’s not typical.
I just happened to have a neck I’d already built, so I decided to use it instead of buying another one from Guitar Fetish, so I bolted it on.
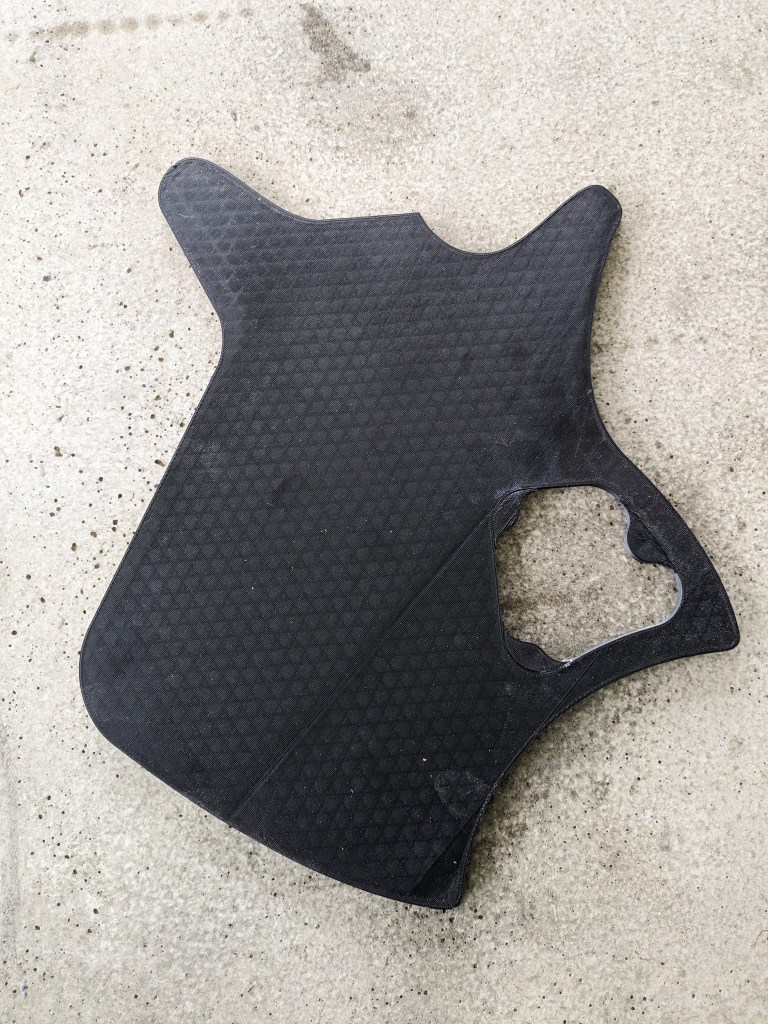
This is where I deviated from my initial concept a little. I had planned on making the pickup and control cavity covers from wood, but then I changed my mind and 3D printed them. It still cost me next to nothing (~$0.50 for both), but I know most people don’t have 3D printers. And for anyone without a printer, the parts could still be made from wood.
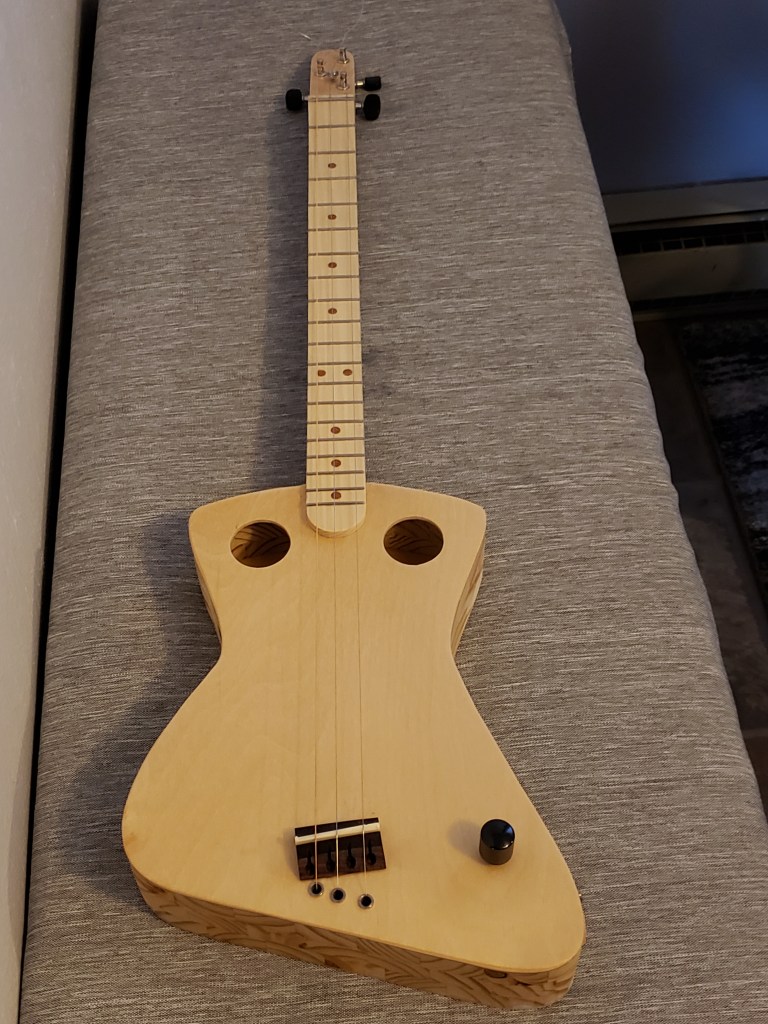
So here’s the final product:
This was a really fun build, and a great way to use some of the parts I had laying around. Calculating the cost of everything I used, even though I already had most of it, this guitar cost me about $75. Having to buy the Guitar Fetish neck would probably take the cost closer to $100, but I still think that’s a great price for a custom, one-of-a-kind, guitar.
I’ve played guitar (not necessarily well) most of my life. It’s something I enjoy for myself but I don’t take it very seriously. I’ve also been a builder/creative type to some degree, so it makes perfect sense to me that I would eventually start building guitars. The one thing I could not have expected was that I would end up building a 3 string guitar.
The general term used for 3 and 4 string guitars is “cigar box guitars”, because most of them are actually made from cigar boxes. I came across a lot of these while researching guitar building, and there are a ton of really cool ones but I was only interested in “real” (in my mind) guitars, so I never really looked into them. But then something funny happened.
One of the companies I bought my supplies from (https://mgbguitars.com/) caters to the cigar box market. Several of the pieces on the “Lady in Red” build came from them, so I shared a couple pictures of the final build with them. The owner liked it and invited me to join a facebook group for cigar box builders. I was intrigued, so I accepted the invitation, and let me tell you; these guys are amazing.
The guys in the facebook group are some of the most genuine, and genuinely nice, people I’ve never met in person. And they share a passion for building amazing and creative guitars out of anything and everything they can find. Their passion is contagious, so I decided to build a CBG, even though I didn’t have a cigar box. But that’s okay, because these guys had shown me that a “cigar box” guitar can be built from anything.
I really like building guitar bodies, so I took the opportunity to design a new body style. This is what I came up with:
Building this 3 string was similar to building other guitars, but somehow felt easier. I made a few mistakes during the build, but all-in-all, I’m really happy with how it turned out. But even more importantly, I’m really happy with how it plays.
I’ve always played a traditional 6-string guitar in standard tuning, so I figured it would be weird to play a 3-string in open G tuning. It was a little weird at first, but also amazing. Playing this thing is just so easy and freeing. after a couple days I found myself able to jump in and play along with many songs as they streamed on spotify. I immediately fell in love; so much so, that I’ve already started building several more of them. I also ordered way too many cigar boxes to try my hand at a few traditional CBG builds use as well.
I had been told a couple weeks ago that due to the Covid-19 issues disrupting the aerospace industry I was going to be furloughed for two weeks starting next week. I planned on using this time to finishing building several of these guitars and putting them for sale. Then yesterday, I was informed that my contract had been cancelled. So while I will still be building several guitars, I’ll also have to use this time to try to find a new contract or permanent position. I don’t know if this will result in me having more or less time to build, but I will definitely post an update as soon as I have some guitars ready for purchase. In the mean-time you can check out my other goodies at https://www.etsy.com/shop/keyboardmonkeydesign
I’ve been slacking with with my updates on this build because it’s been done for a few weeks now, but here are the final steps in completing this build.
Final assembly on each of my guitars starts with bolting on the neck and re-attaching the bridge which was pre-positioned. Before I can secure the bridge, though, I have to attach the piezo pickups and run the wires through the body to the control cavity. Unfortunately, I didn’t take any pictures of this process, but it is fairly straight forward. I use double sided tape to adhere the pickups to a 3-d printed housing I designed, and then use more tape to hold the housing to the bridge. The housing helps align the pickups and protects them from being crushed when sandwiched between the bridge and body, but because it’s only 0.050″ thick, it’s almost invisible.
With this guitar I used two pickups, each with their own volume pot. Because one pickup is on the base side and one is on the treble, I can use the pots to blend the highs and lows to customize the sound I want. I don’t have the schematic for how I wired these, or even a great picture, but basically I wired the piezos in parallel, adding the volume pots between them and the jack based on this diagram from https://www.cigarboxguitar.com/knowledge-base/cigar-box-guitar-piezo-wiring-diagrams/ :
I’m not the best with wiring or soldering, so it wasn’t the prettiest job (and I accidentally touched the soldering iron the the body, leaving a coupe small burn marks), but it worked.
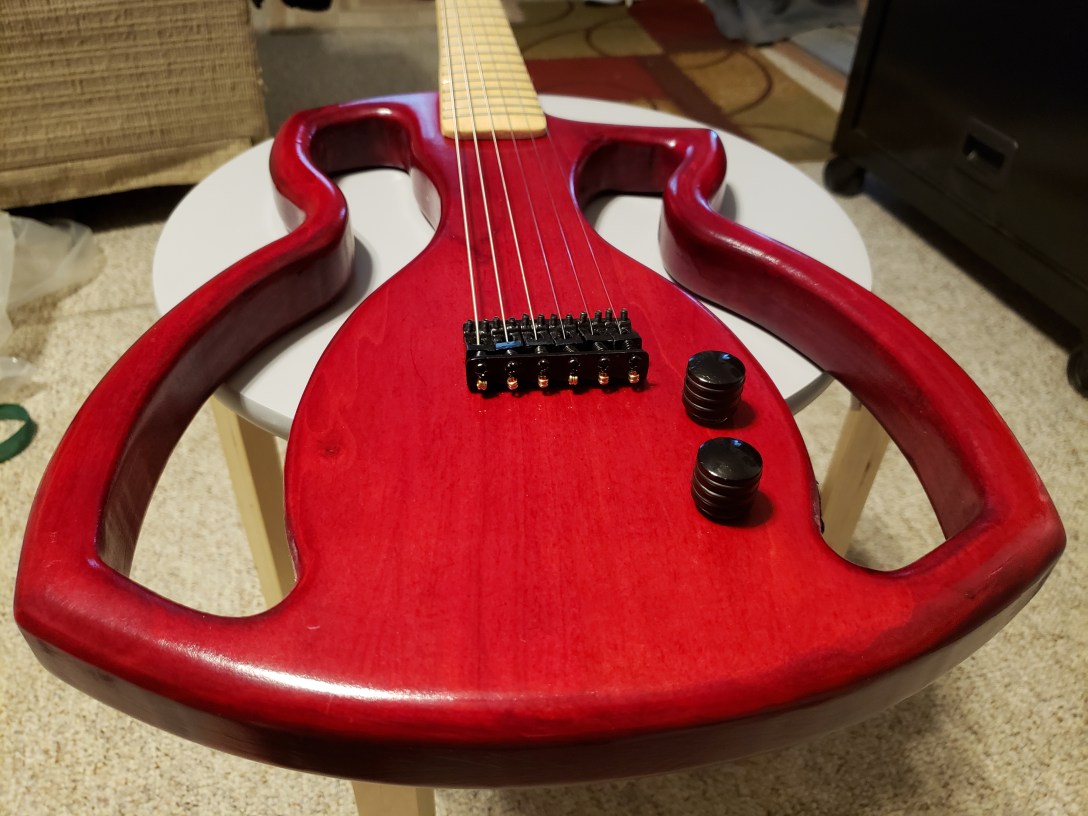
All in all, I’m very happy with this guitar. It’s a solid body with electric strings so it has a completely different sound then my semi-hollow build which is strung with acoustic strings. The semi-hollow has a fuller sound, more in line with the stuff I usually play but this one has a more driven, piercing sound that will go really well with the new rock/metal songs I’m working on learning.
Every project I take on turns out to be a great learning experience, and this one was no exception. I love the control the two pickup-two pot setup gives me, but I have a slight modification I’m going to try in the build. I’ve also already modified the neck design slightly. This one plays fine, but I want to get it a little thinner and a little more aggressive on the side angles to help facilitate some faster playing. And with these changes in mind, I’ve already started on my next one; a budget build. Because it’s a budget build, it won’t require a lot of the extra tools and steps of my previous builds so I’ll do the write-up in one post as soon as it is complete. In the meantime, here’s a preview:
With the neck built, it was time to finish the body. This included routing all the body edges, routing the control cavity cover recess, and drilling the neck bolt holes.
Then, with the neck fitted into the neckpocket of the body, I measured out the 25.5″scale and positioned the bridge, drilling the holes for the mounting screws and for routing the pickup wiring.
With all the routing and drilling done, it was on to the most nerve-racking part of the build for me, finishing. Sanding all the parts took a lot of time, especially the inner parts of the cutouts, and I still didn’t do a great job but the results are good enough for me.
After sanding, it was time to add some color and protection to the wood. I found an awesome red paint (duplicolor metalcast) that I used for my brother’s guitar and decided to use it. It’s a translucent automotive paint that is meant to go over bare/bright metal, so it is extremely durable while still allowing the natural woodgrain to show through. I did 6 coats of the red, wet sanding after every-other coat.
When the paint had time to cure, it was time to apply top coat. My go-to for guitar building has been Rust-oleum’s Triple Thick Glaze. It’s a non-yellowing coating that goes on well and provides an awesome high gloss finish. I applied 4 coats of the topcoat, wet-sanding after every-other coat. I then allow the topcoat to sit for a while (about a week in this case) before polishing. During this time, I also applied boiled linseed oil to the entire neck. I had thought about using the same Triple Thick Glaze, but ultimately decided that the linseed oil would give it a more natural feel
So, with all the painting and polishing done, all that is left is the final assembly and wiring.
I know that I said in my last post that I was going to use one of the pre-built necks for this guitar, but then I remembered that this guitar is going to use nylon strings. The necks I bought already have truss rods installed, which is really a good thing, but truss rods are most beneficial for steel stringed guitars and not necessary for guitars with nylon strings so I decided to make a neck for this build. But before I started on the neck, I needed to cut the neck pocket in the body.
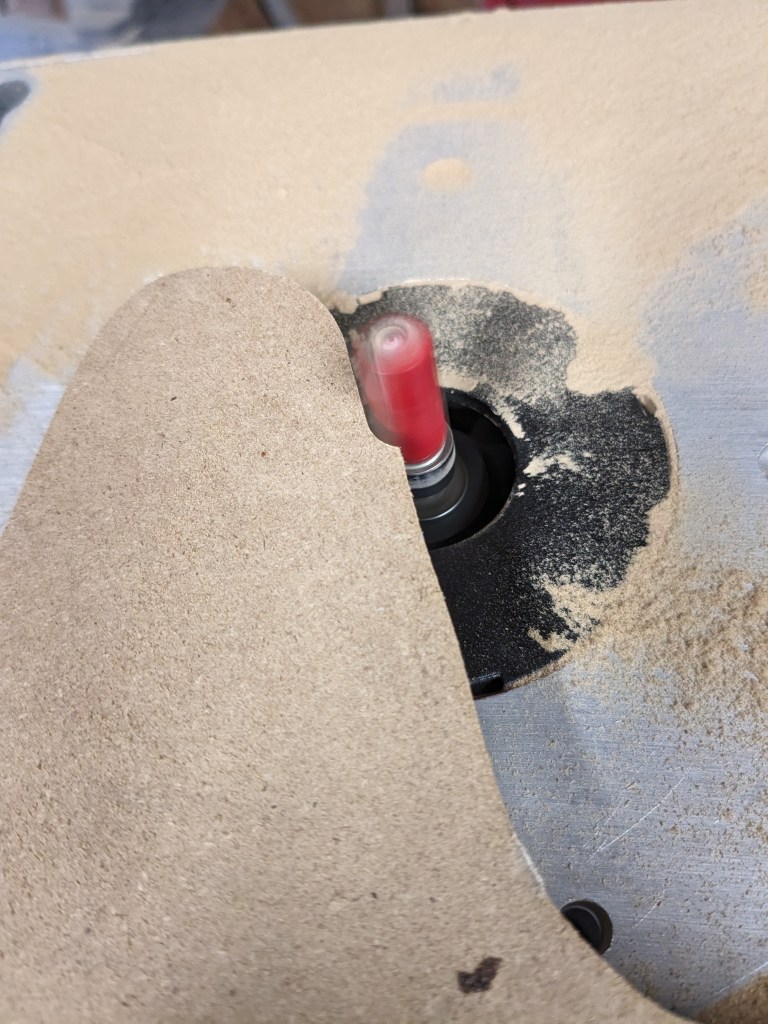
Because of the way I designed this guitar, I was able to use a scroll saw to cut out the neck pocket close to the lines, then attach the template I 3D printed to get the final shape.
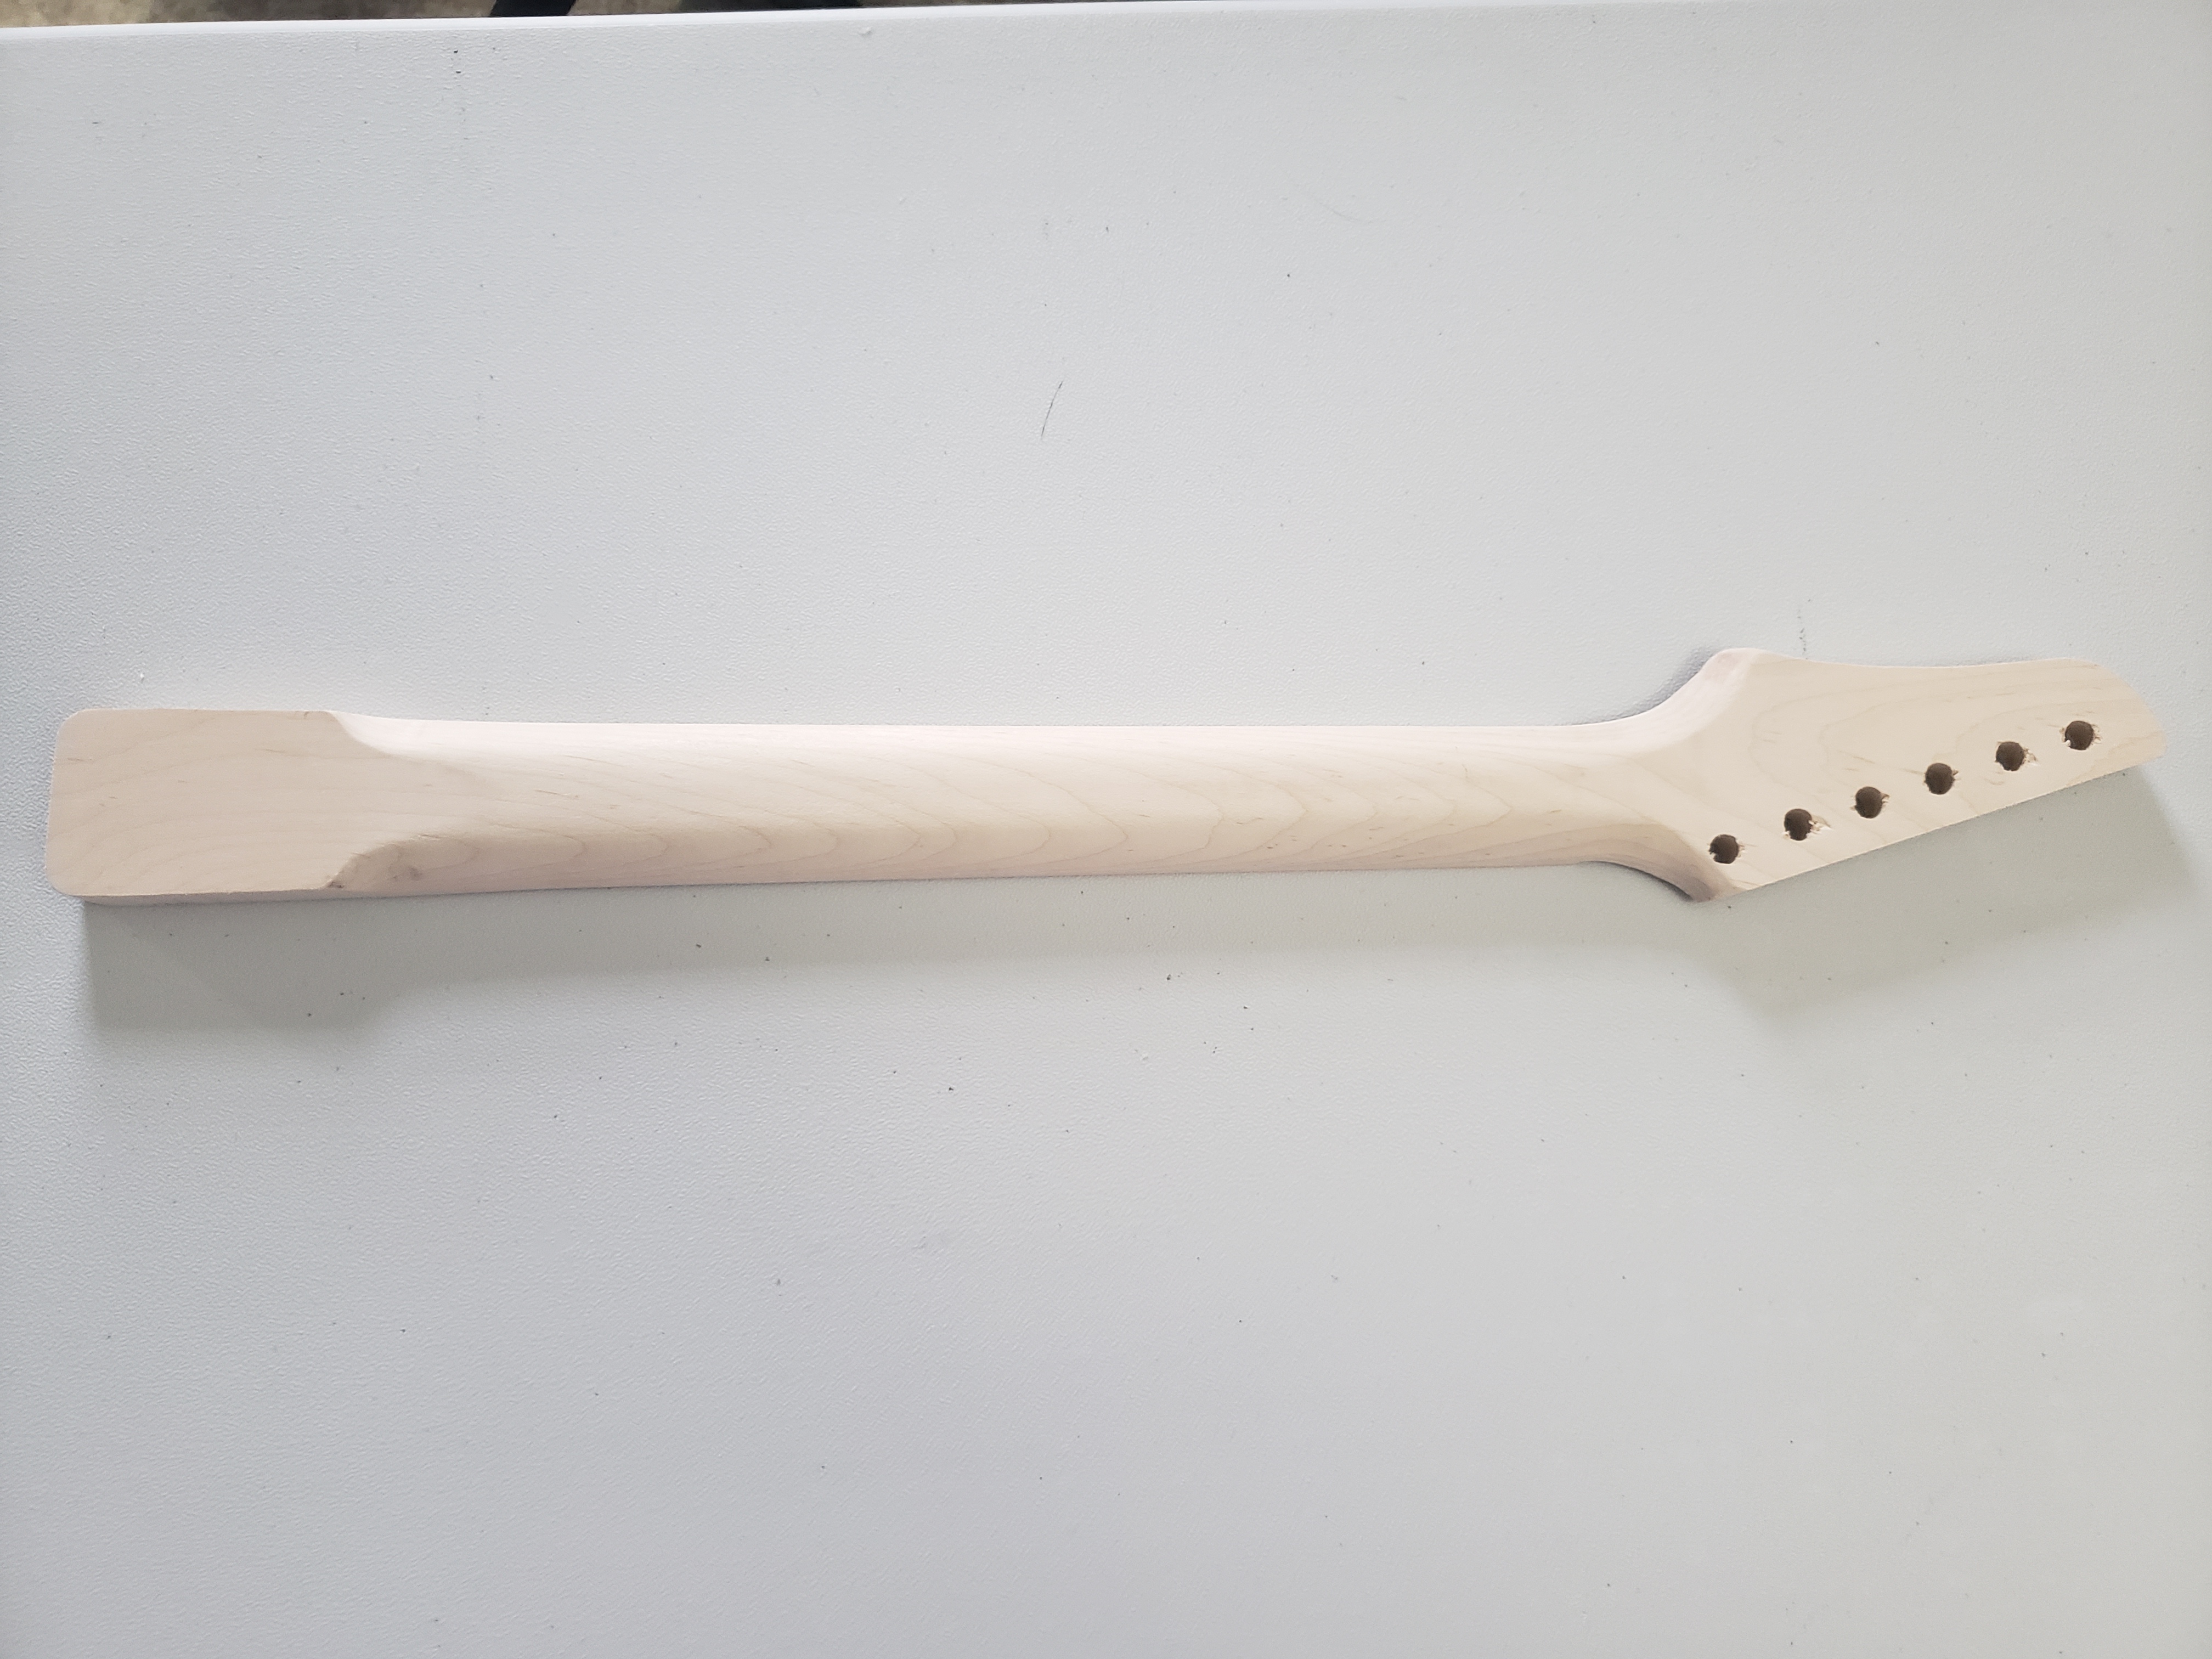
With the neck pocket routed, it was time to begin making the neck. I started the process by grabbing a piece of maple and marking a center line before aligning my template. Unfortunately I didn’t think to take a picture of the process this time, so here’s a few pictures of a neck I did out of poplar.
Like the body, I cut out the neck close to the template lines, then used the router with a pattern bit to get an exact match. I make several passes with the router, taking just a little off with each pass so I don’t risk tearing the wood. I then use a drill press to add the tuner holes based on the same template.
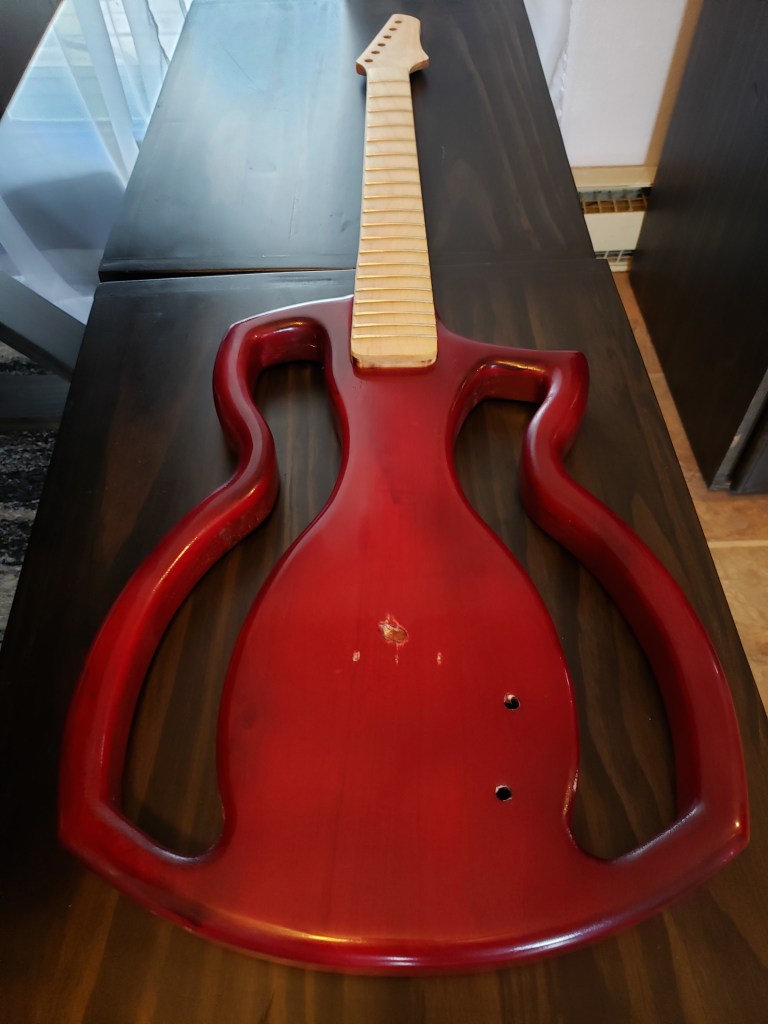
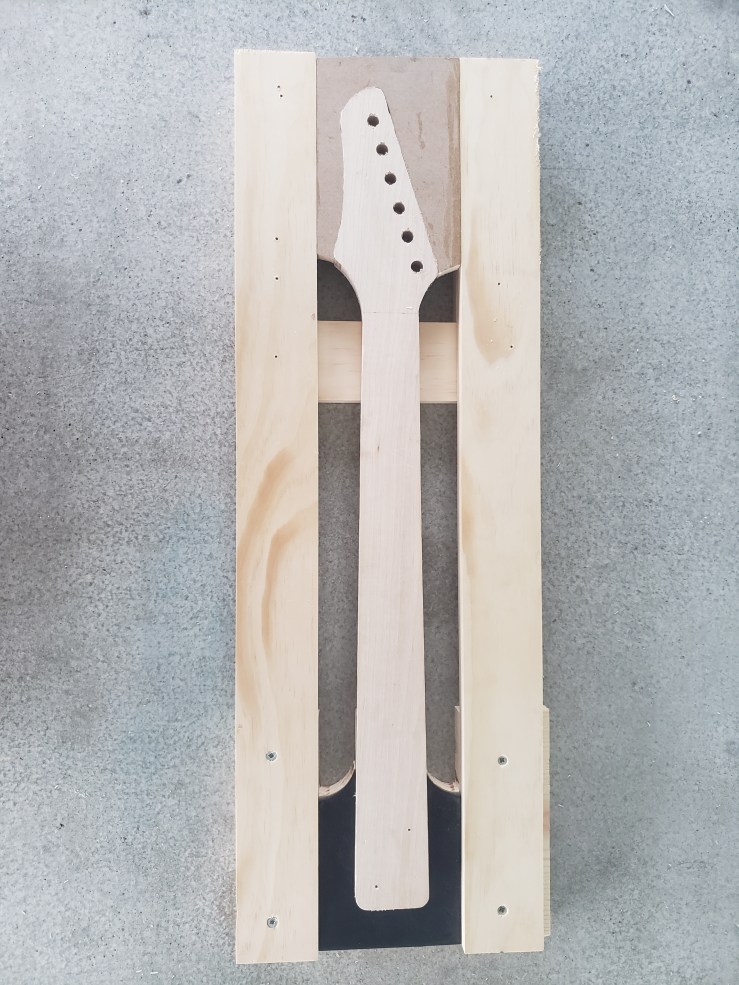
With the basic neck shape done, I proceeded to test fit the piece into the neck pocket on the body. The body was still in very rough shape, but the neck fit perfectly, so I was ready to continue shaping the neck.
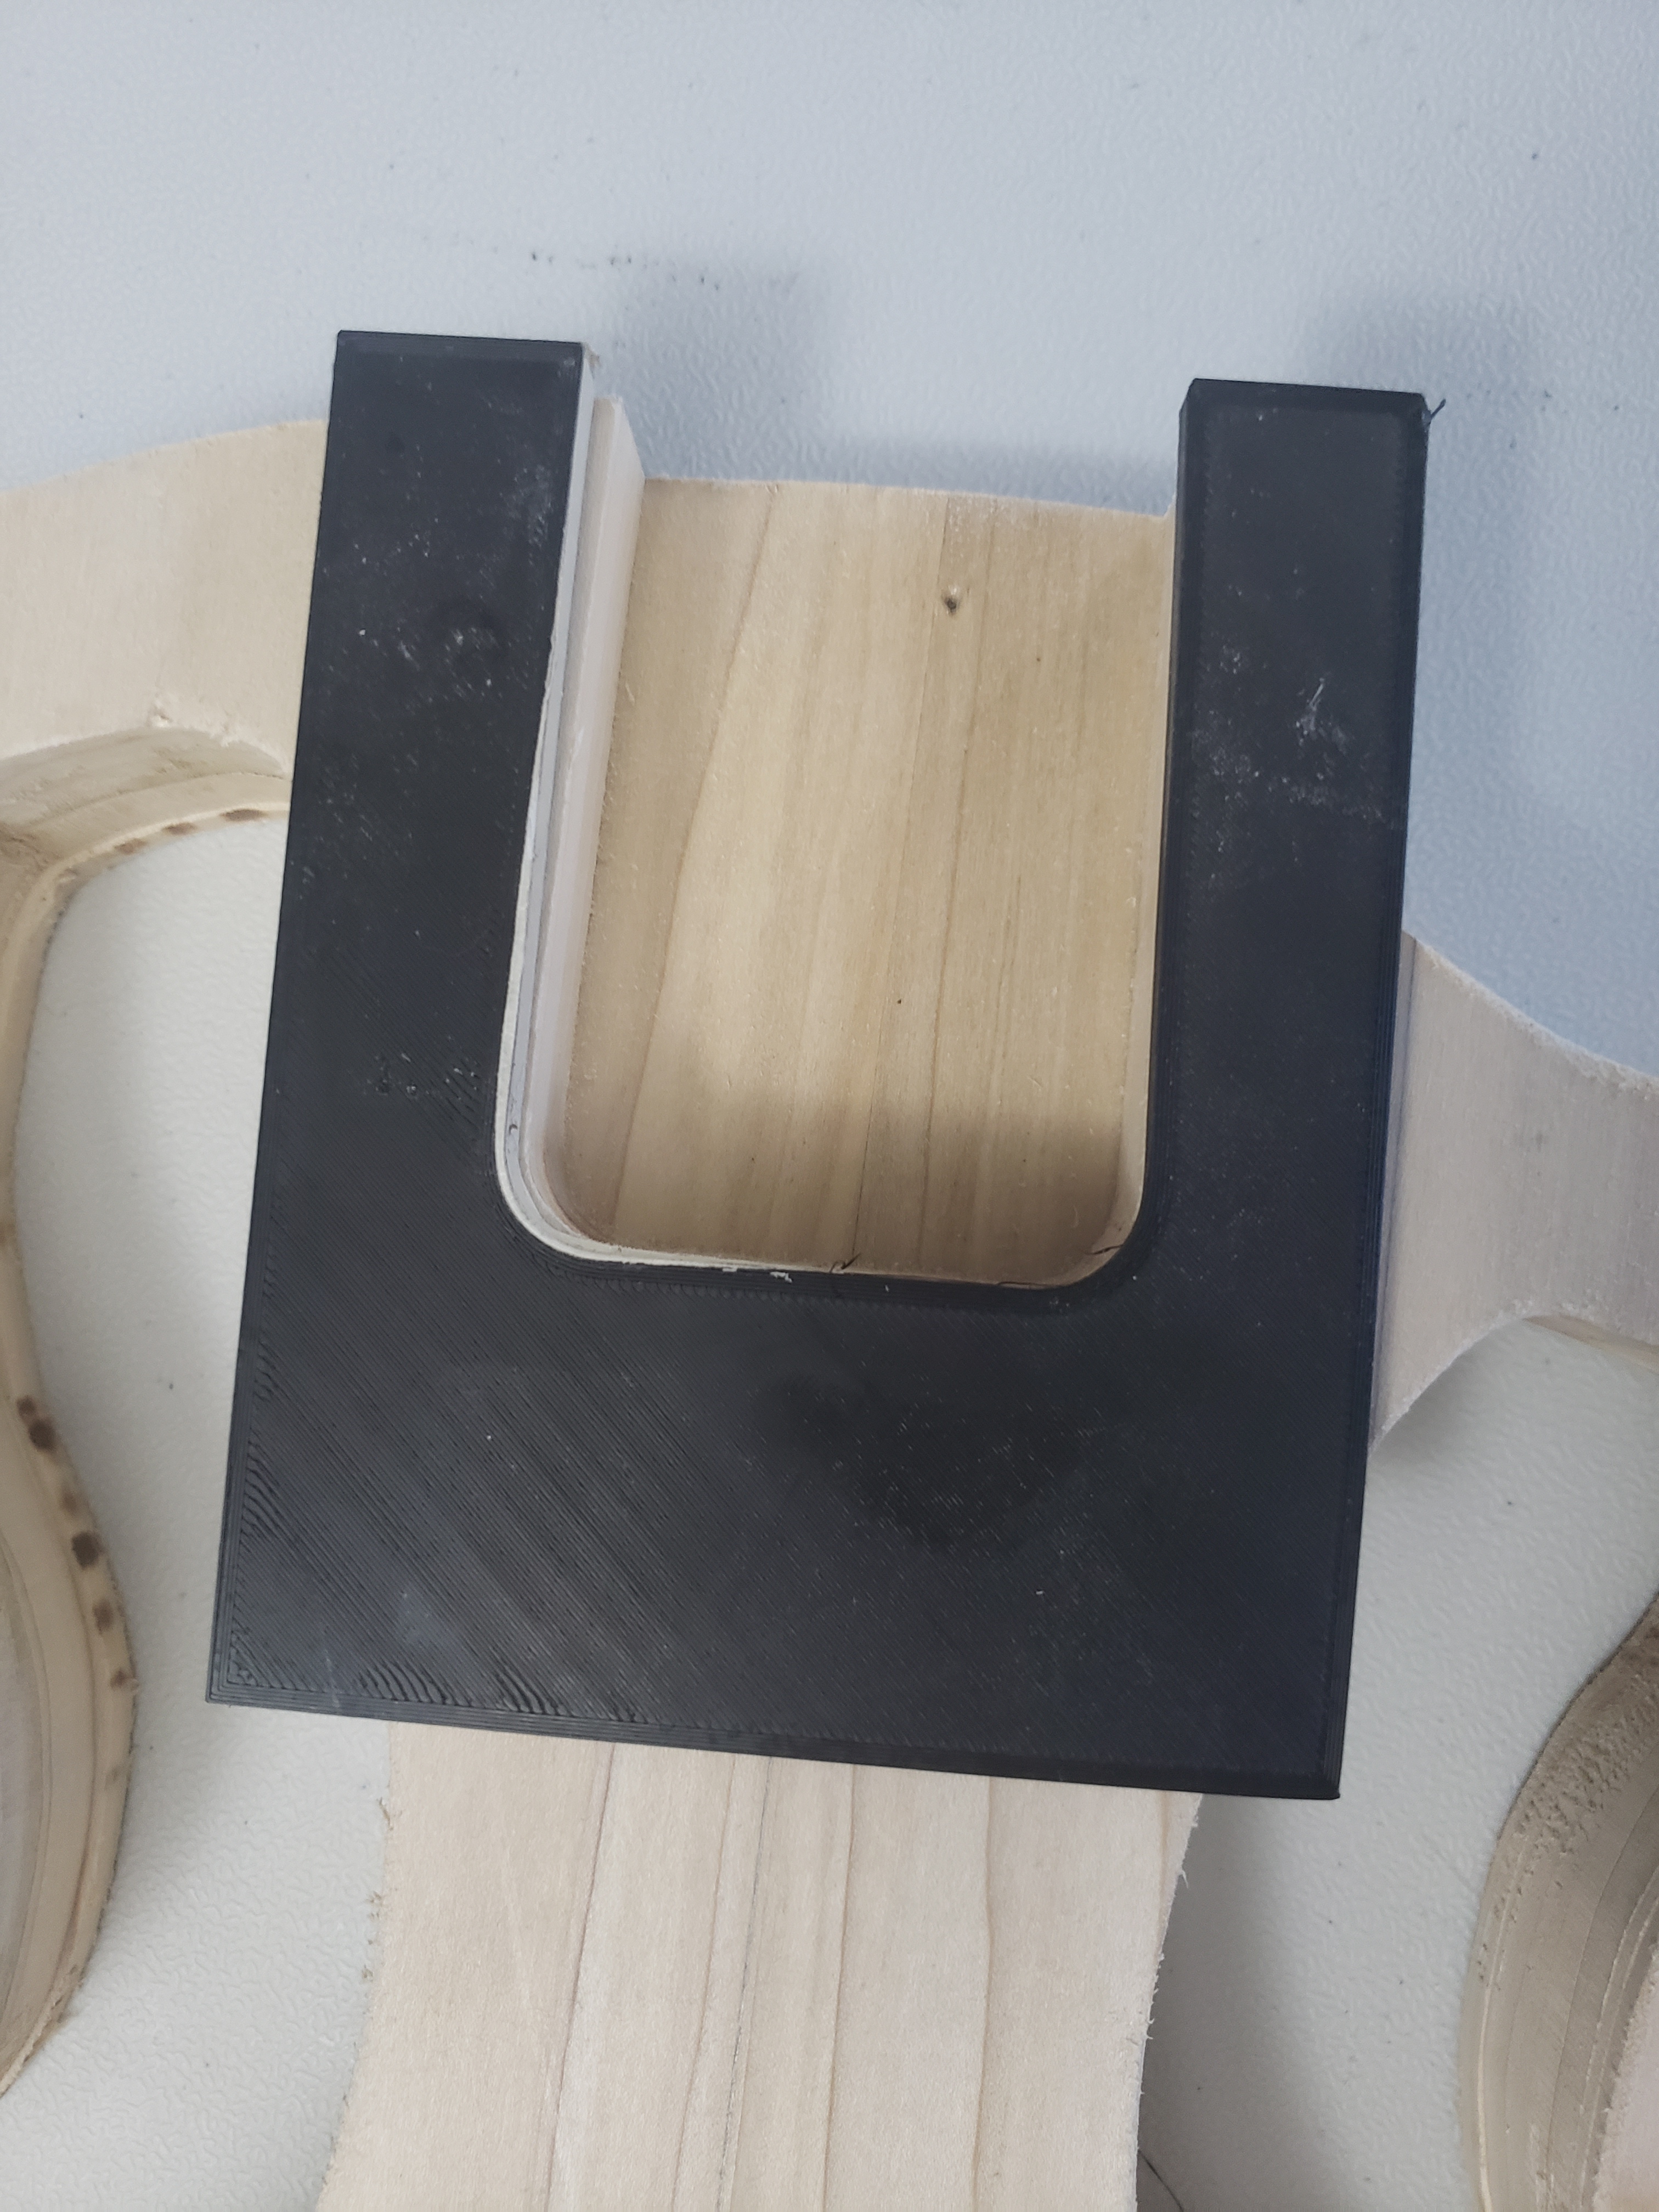
There are many different guitar neck designs, and even more ways to shape them, so of course I chose to ignore all of the conventional ways and design my own neck shaping jig.
This jig allows me to use either a rounded or 45 degree angle router bit to shape the rear sides of the neck depending on how aggressive I want the angle to be. For this one, I went with the 45 degree bit. Then, by just flipping the entire jig over, I was able to use a router with the pattern bit set to the proper depth to remove some stock from the head.
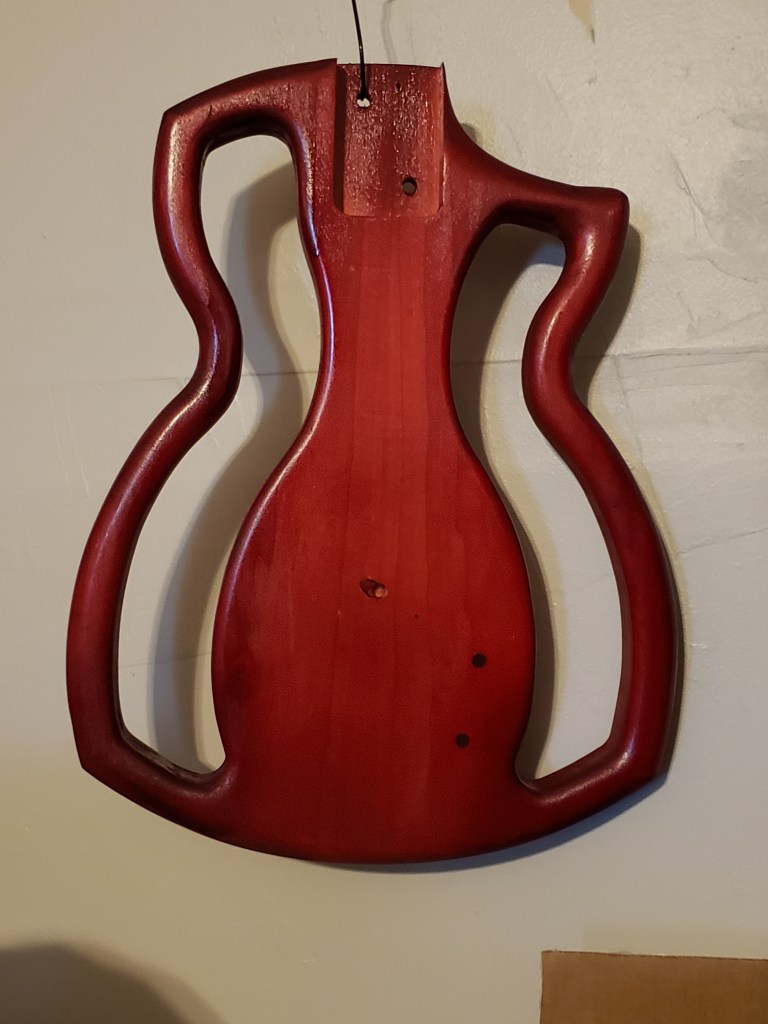
So with the neck ready to move on to sanding and assembly, I decided to cut the control cavity into the back of the guitar, then glue the front and back pieces together using every clamp I have.
Then, when the body had adequate time to cure, I did one more test fit before beginning the neck assembly and sanding.
A couple posts back I talked about how I got into guitar building, and in that same post I said that I would be building another guitar and documenting the process including the neck build. That was only halfway true. I had planned on the next guitar build to include a hand made neck, and I even have the neck started, but then I got an awesome deal on a couple of mostly finished necks so I decided to expedite this next build by using one of them.
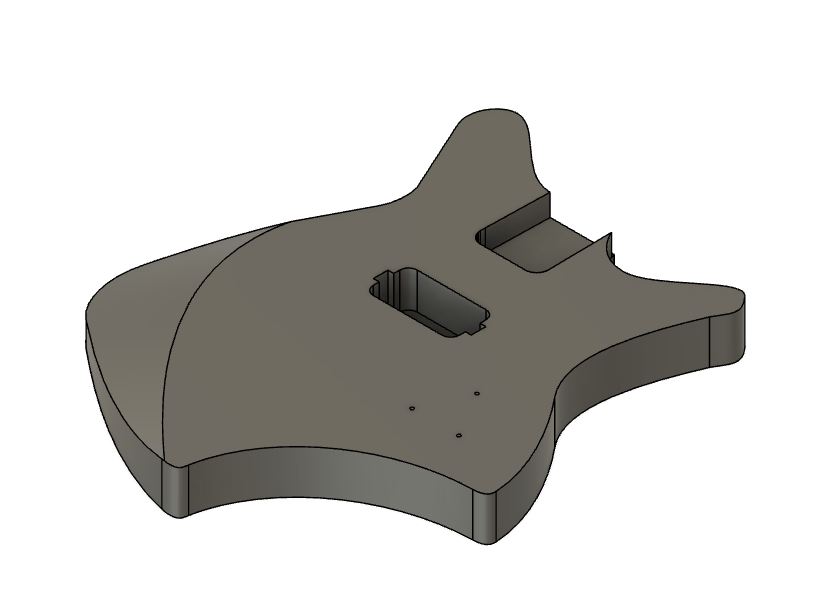
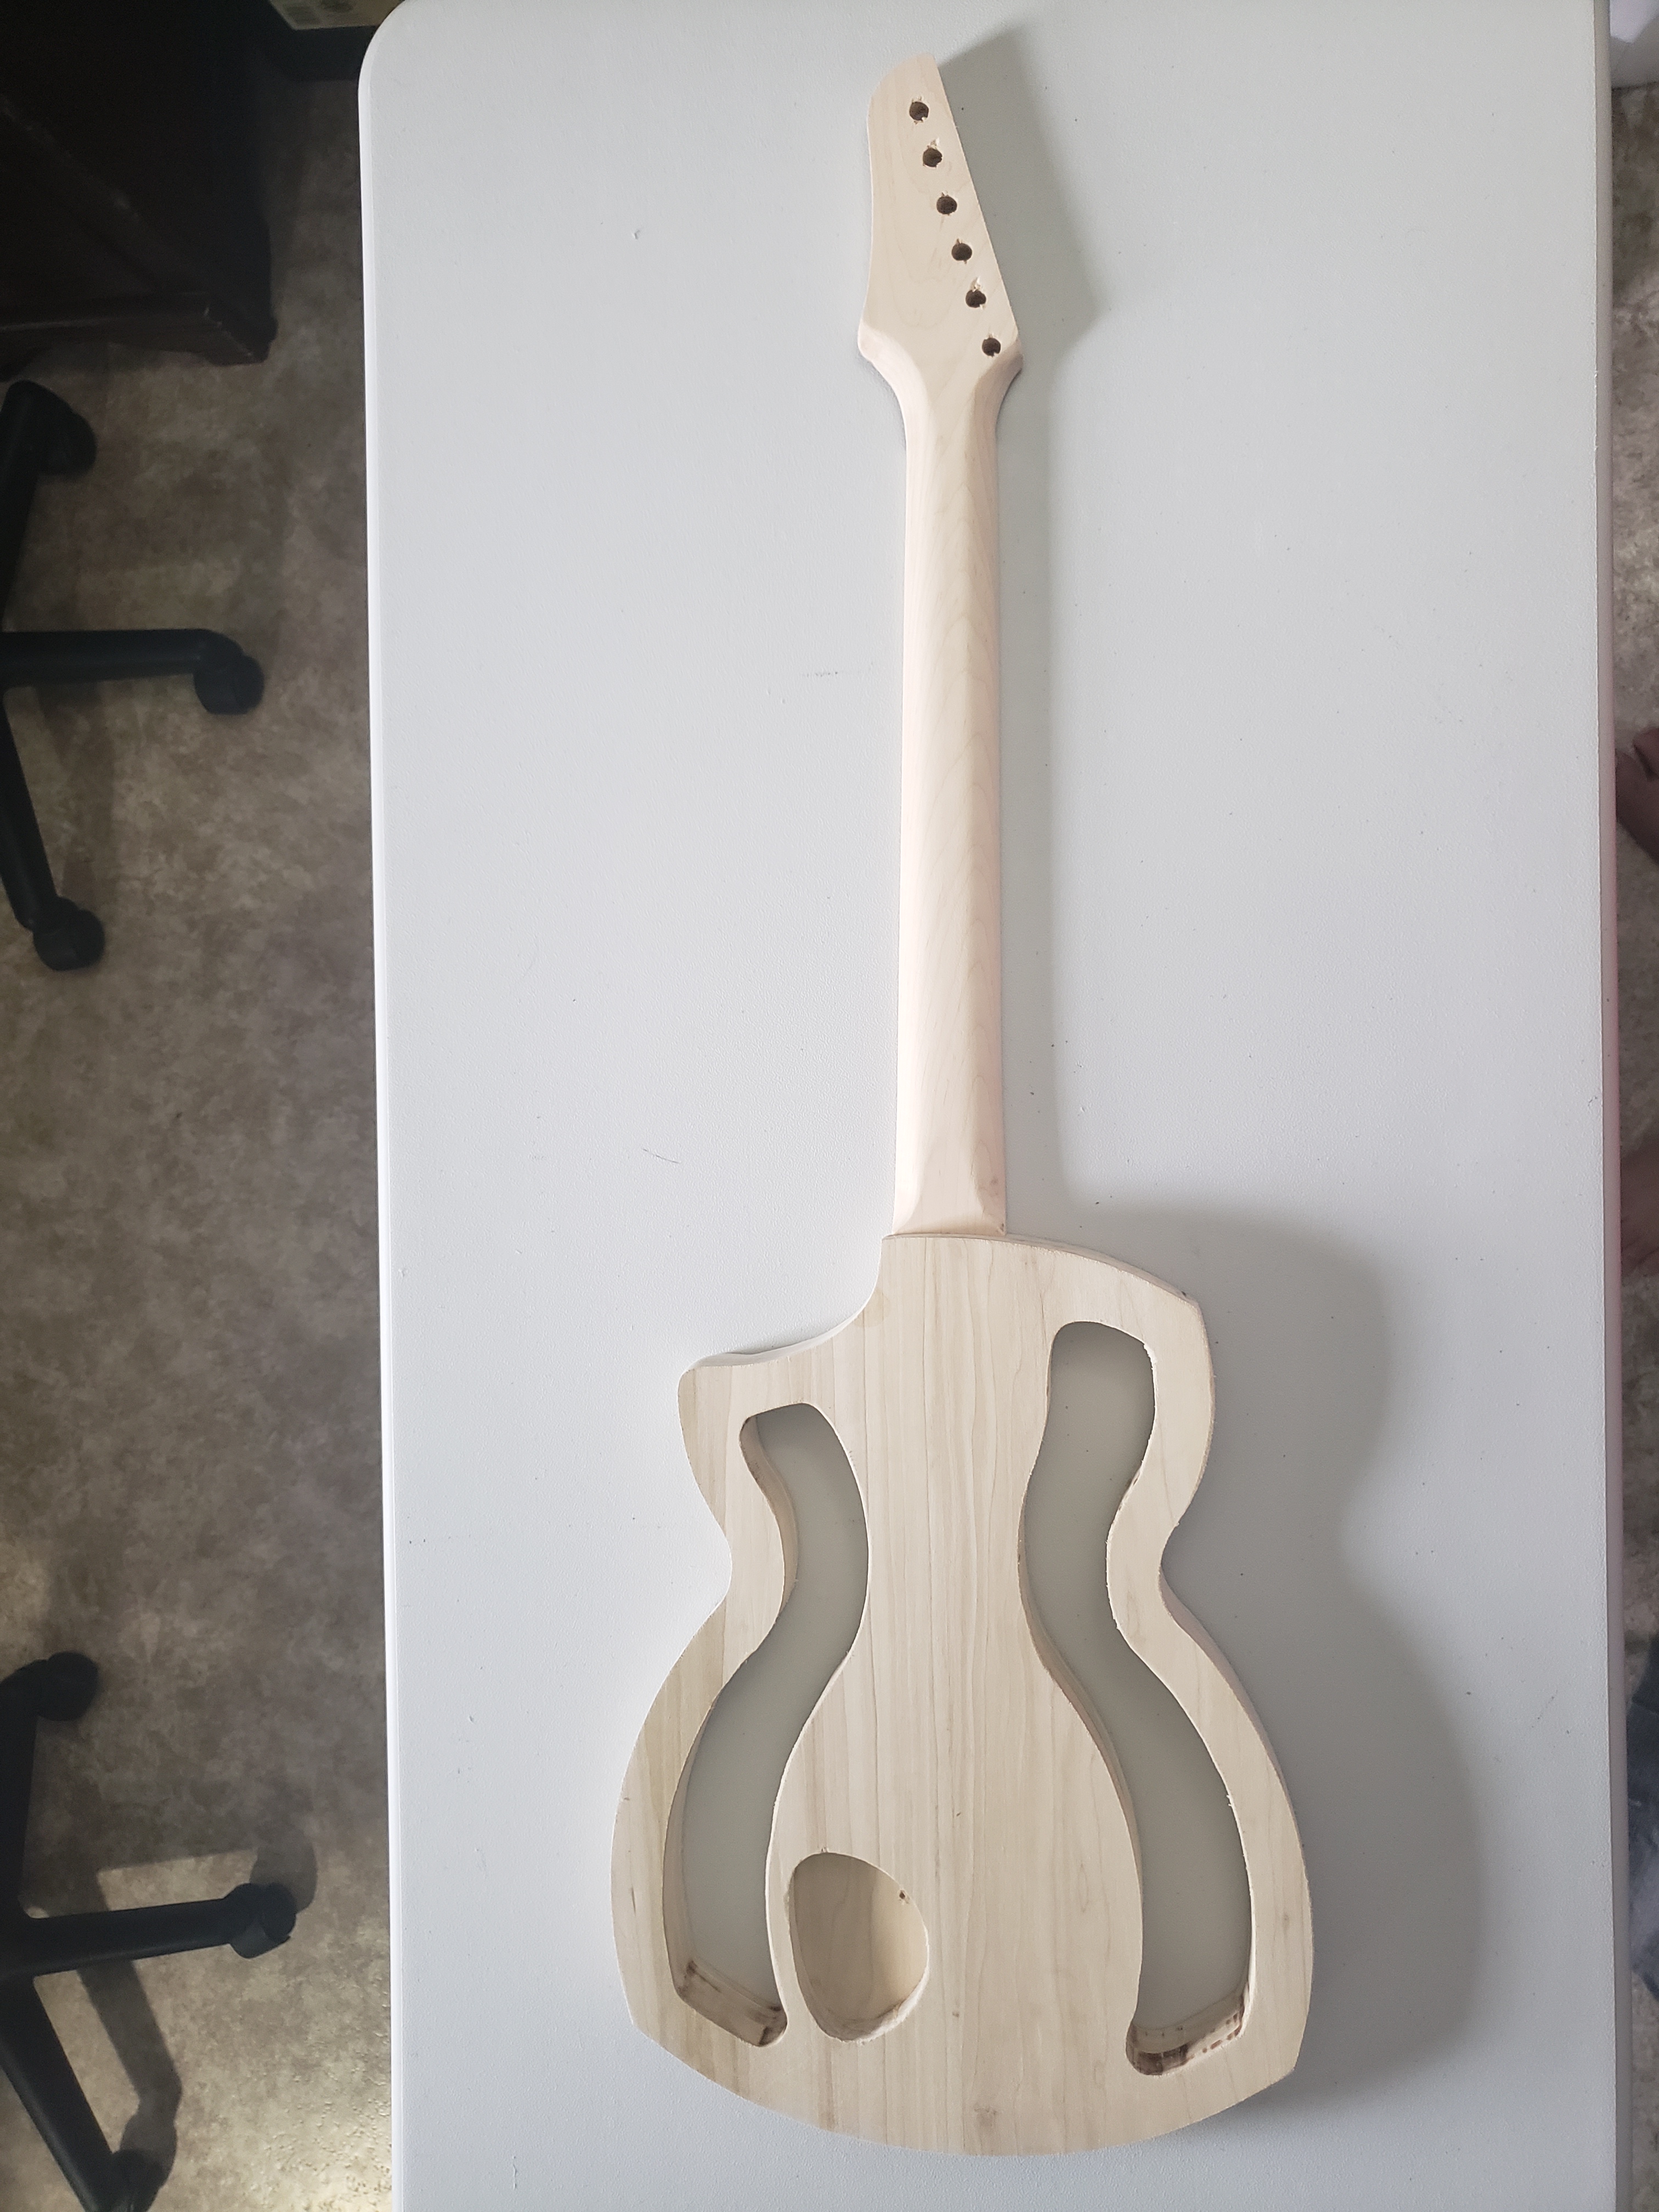
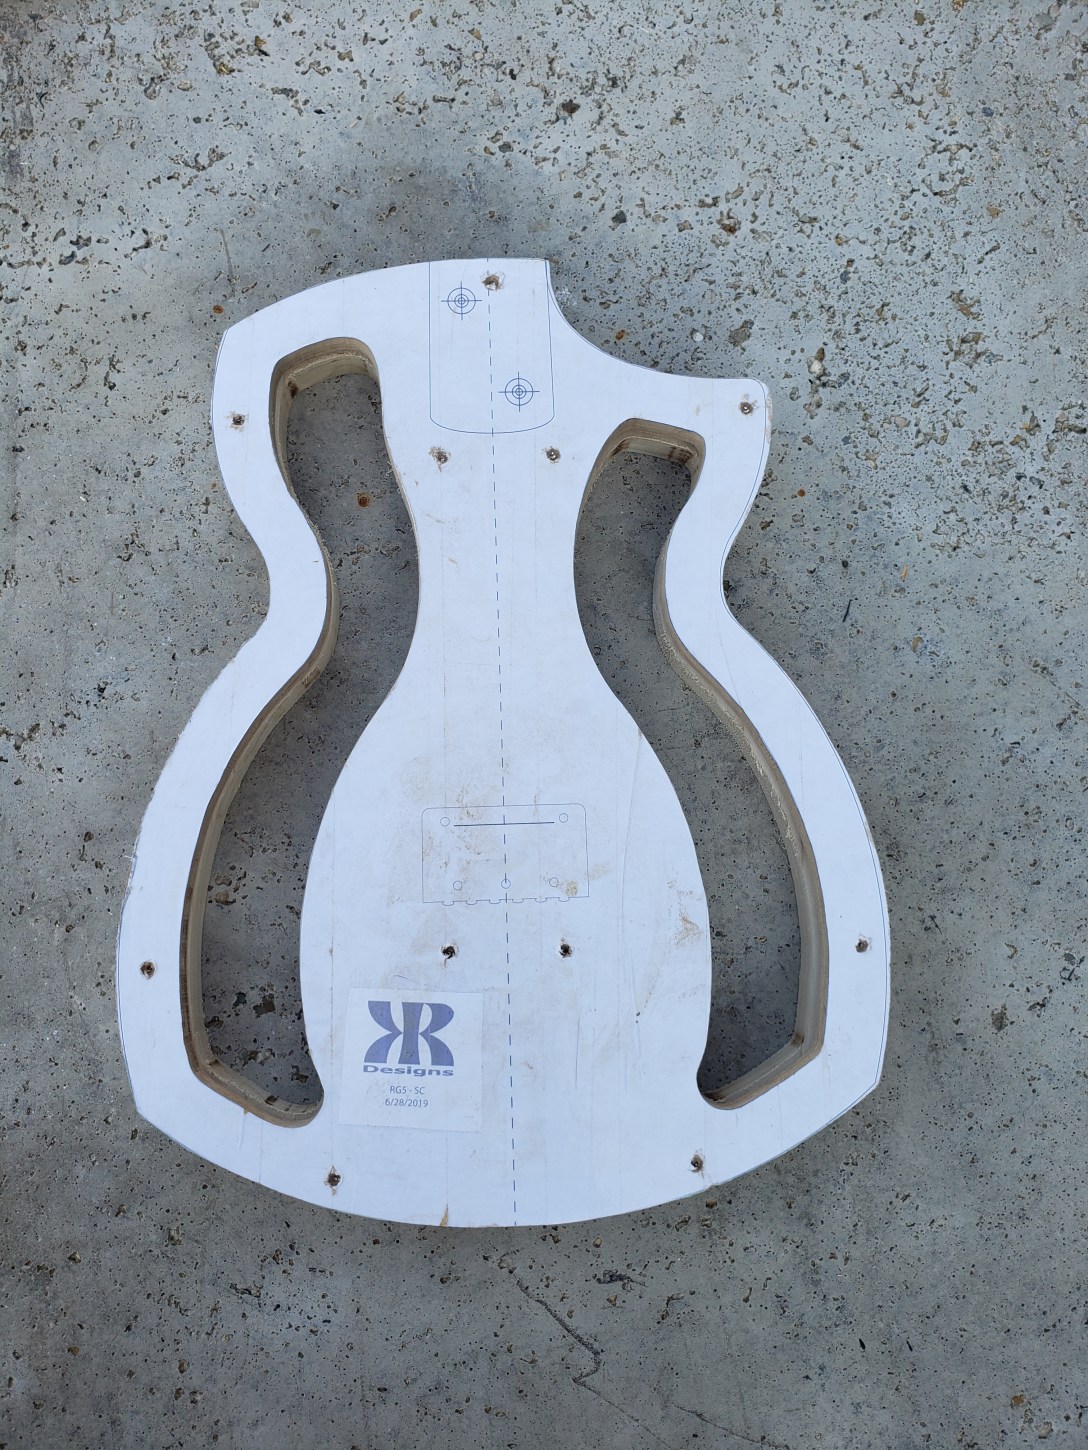
This build is the first for the RG5-SC model. The RG5 indicated the overall body style and the SC stands for “Special Cut”. While the overall body shape is the same as the initial RG5 model, this one will be a solid body design instead of the standard semi-hollow design and it will have large weight-saving cutouts.
To begin building the guitar I needed a template. Our local UPS store can print full scale copies, so I saved the file to a flash drive and had them print it out. I could have tiled the file, printed it from my home printer and pieced it together as I’ve done in the past, but the $1.50 cost of having them print it was worth it to save me a little time and effort.
I glued the full size print to 1/2″ MDF board and cut it out with my scroll-saw. Since the outside edge is identical to the standard RG5 design, I cut that edge a little wider, then attached my existing RG5 template to it and used a router with a template bit to give me an exact match. Then, with the template done, I started gluing up my body blanks.
A lot of purists hate the idea of using lumber from the “big-box” stores for building guitars. I understand exactly why the are against it, but our local Menards has select grade Mastercraft lumber that has been surfaced on four sides. By using this, and inspecting it before I buy, I’ve not had any problems. I chose a nice piece of 1″x8″x6′ Poplar, cut it into four 18″ pieces and then glued two sets of two pieces, making sure to use more clamps than necessary:
I like to let the body blanks setup for at least 24 hours, then I use the template to mark the cut lines and use a combination of scroll saw and band saw to rough cut the body shape, making sure to cut just outside the lines. When the rough cuts are done, I then screw the template to the body blanks and use the router with template bit to finish getting the final shape. The template will be right-side-up for the bottom piece and up-side-down for the top to keep the screw holes from being visible after final assembly.
Now that the body is taking shape, the next step will be cutting the neck pocket.