A new Guitar Design – Part 2

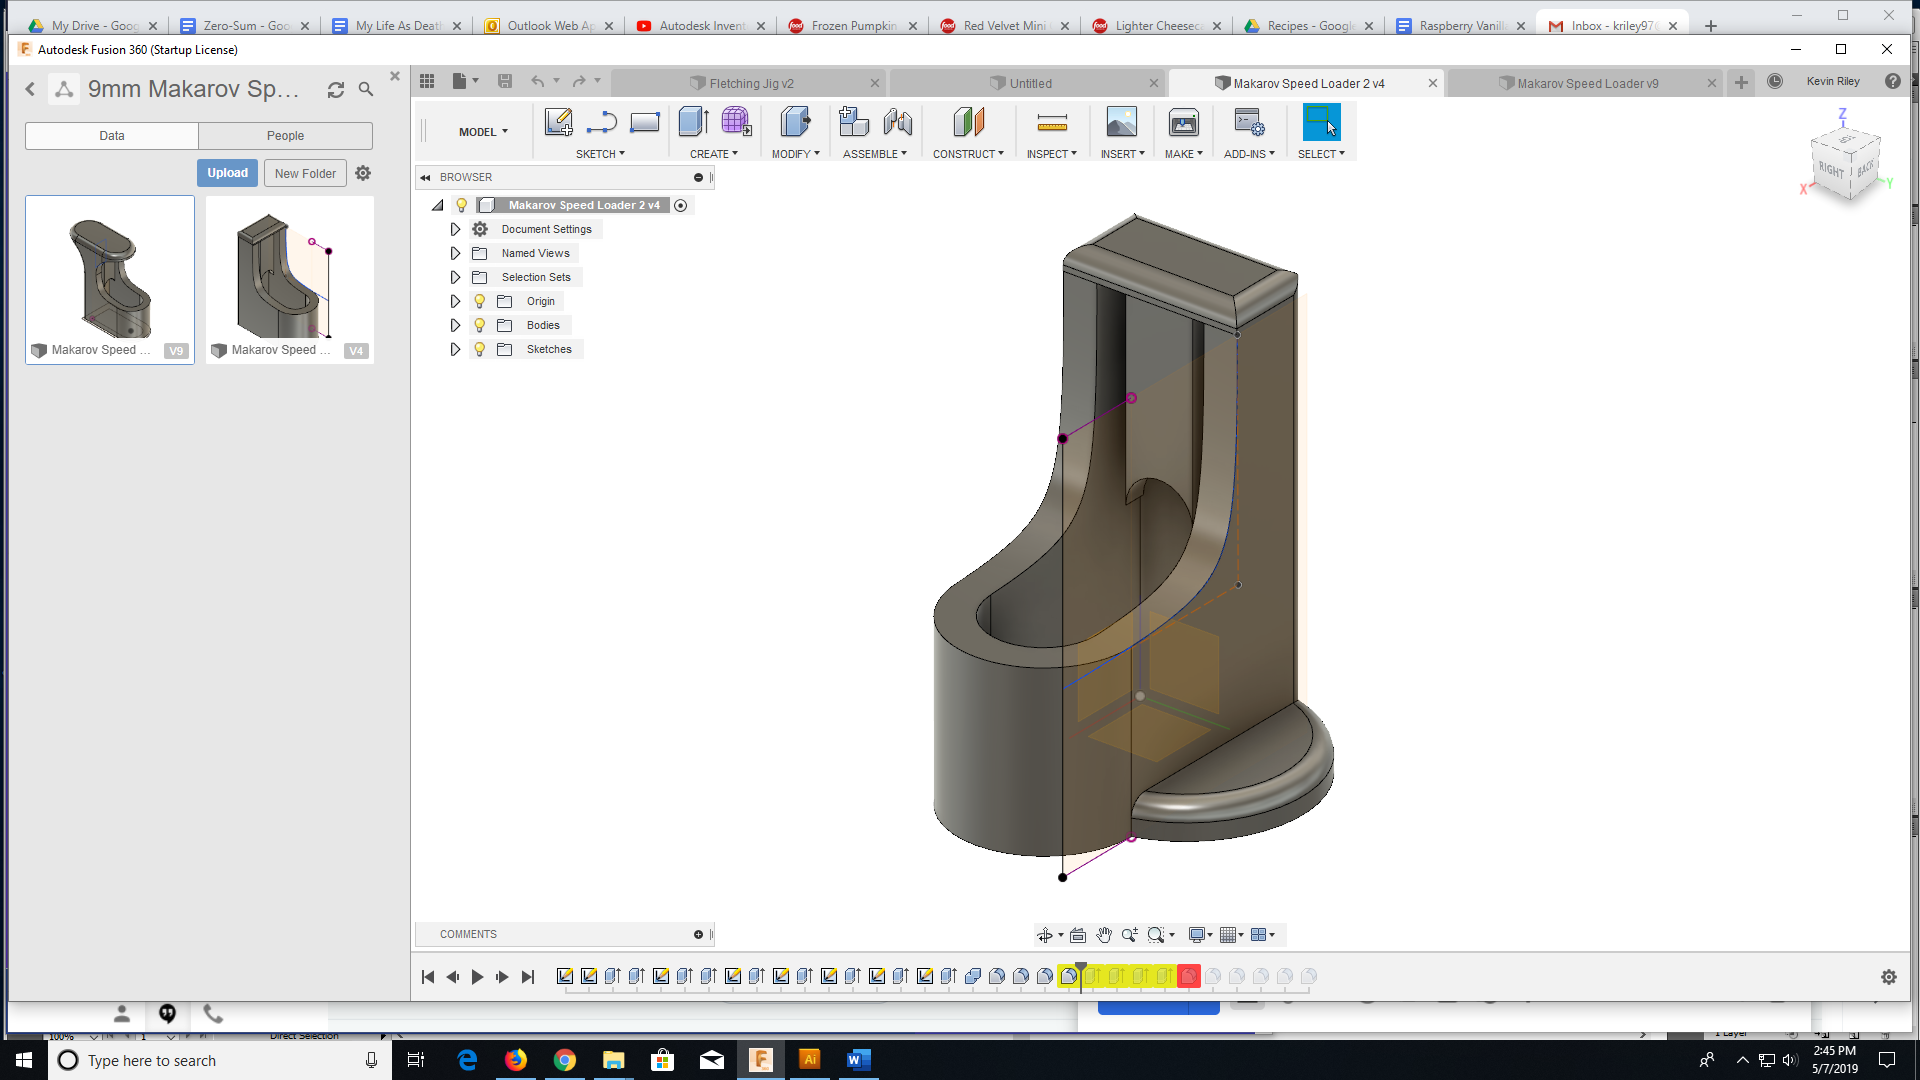
Once I had the basic 2D design established in Adobe Illustrator, I exported it as an SVG file so I could import it into Autodesk Fusion 360. Even though svg files are vector graphics, there is a discrepancy in how Illustrator and Fusion understand the size based on pixels. Illustrator treats the file as 72 dpi and fusion expects 96 dpi, so when importing an svg from Illustrator to Fusion you have to scale it 72/96% or a factor of ~1.33333.

Once imported, I extruded the body, then decided on the control cavity shape, the pickup routing cavity and the neck routing. In designing this guitar, I had a few criteria in mind. I wanted this guitar for playing heavy metal music, which meant I wanted a powerful humbucker pickup. A few years ago I used a BK2000 in a build. This is a quad rail pickup rated at 18 kilohms and has wiring so it can be split, making it even more versatile. I’d even bought an extra one at that time, so it was a no brainer to use it on this build.

Another criteria was the size. I wanted this to be as small as possible while remaining a full size guitar. In other words, I wanted it to be light, and compact to make it as easy and fast as possible to play, which really made me reconsider scale length. Scale length is the distance from the nut (top of the neck where the strings rest) to the bridge (part on the body that holds the strings. Manufacturers have used various scale length over the years, but Fender really standardized the 25.5″ scale length, and this is what I’ve used for all of my six string guitars so far. Lately, though, I’ve found that I really prefer a 24″ scale for my 3-string guitars, so I decided to use it on this design as well. Some manufacturers have sold 24″ scale guitars in the past as “student models”, so I am optimistic that this guitar should be easy to play.

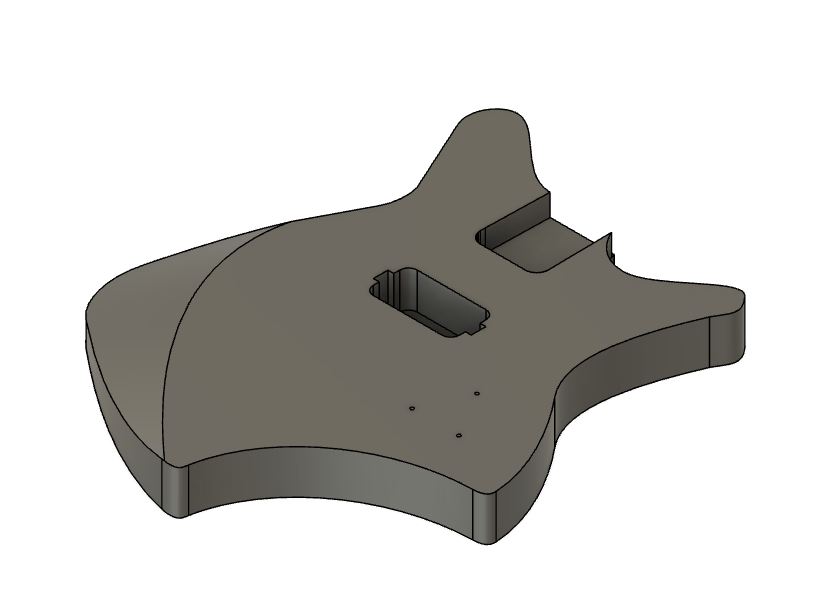
Once I knew what pickup and neck I was going to use, I was able to place the cavities for these:

Next was the control cavity. Even though I was only going to have a push-pull Tone pot, Volume pot and jack, I wanted a large cavity to help reduce weight. I also wanted to to be easy to route, so I designed everything with a half-inch router bit in mind. This is what I came up with:

When I had the design done, I 3d-printed the routing templates and was ready to start the build!

Procrastinating – Linklings

One of the great things about having a 3D printer is the ability to feel like you’re accomplishing something while you’re really just procrastinating. Load a file, hit print, and then you’re making something without actually doing anything. One of my favorite things to print are these linklings. They print well, print quickly, and you really can never have too many.

Another way to successfully procrastinate is to play around with the 15-or so linklings you’ve just printed. I kind of made it a challenge to see how many linklings I can balance on top of a single one. So far I’ve done a total of 16, in various poses. Here are some of my favorites that I’ve come up with when I should have been writing.

How do you prefer to procrastinate?

Fusion 360

In addition to being a writer, I’m also a designer. Most of my career has been spent around screen and digital printing so most of my design skills have developed around graphic design and color and material design. These skills have served me well, and I have successfully translated these skills into woodworking and other design applications but when it came to true 3D design, my skills and tools were sadly lacking.

In a previous position I designed and 3D printed some sample display assets, and last year my wife and son decided I needed a 3D printer of my own, so I have some CAD experience, but everything I’d done was with the free TinkerCAD software, which is extremely limited. But by designing some of the complex shapes in Illustrator and exporting as an svg file to be imported into TinkerCAD, I was able to get around a lot of the limitations. Eventually, though, those limitations became too much so I finally listened to the advice of others and signed up for the free Fusion 360 “startup” license.

For anyone interested in learning CAD, CAM & CAE software, I cannot recommend this highly enough. A design engineer I used to work with recommended it to me and I can only kick myself for waiting so long to download it.

Like most professional CAD/CAM software, there is a steep learning curve, but there are tons of tutorials online, through autodesk themselves as well as from other design professionals. It also really helps having a son who is somewhat experienced with solidworks to give me pointers, but there is plenty of information and helpful forums on line for those of you without engineering students to rely on.

My first Fusion 360 project from scratch was a speedloader/thumbsaver for a 9mm. It went through a couple iterations to get where I wanted it, but it turned out great and was an awesome learning experience. Now I just have to come up with my next project.