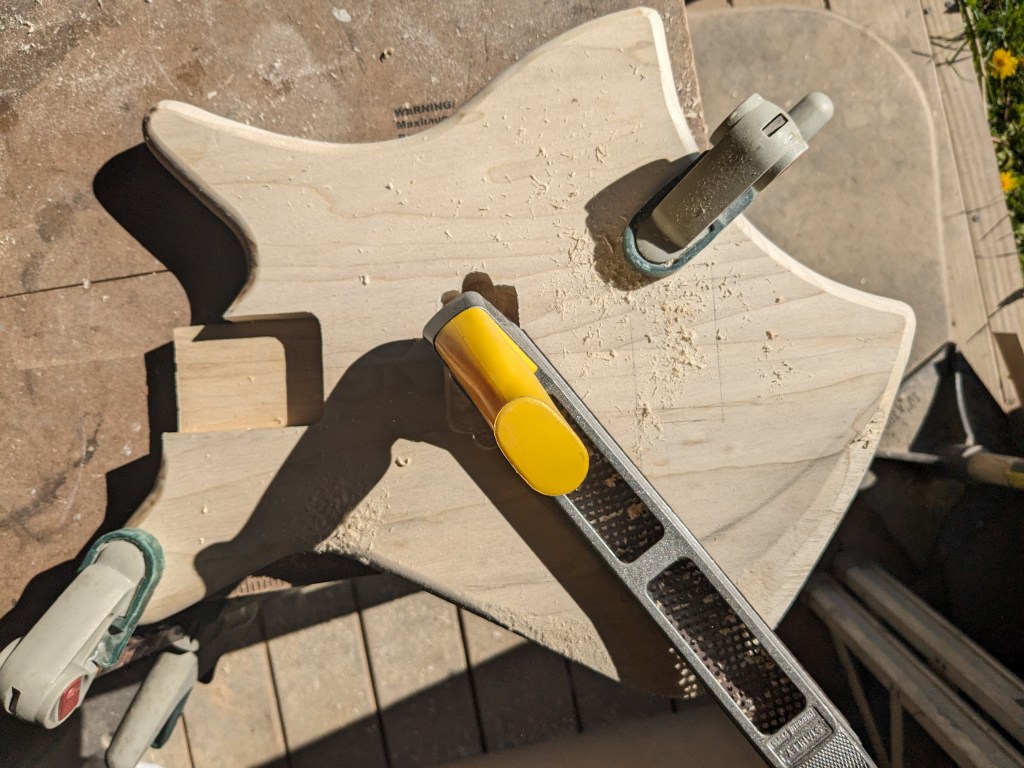
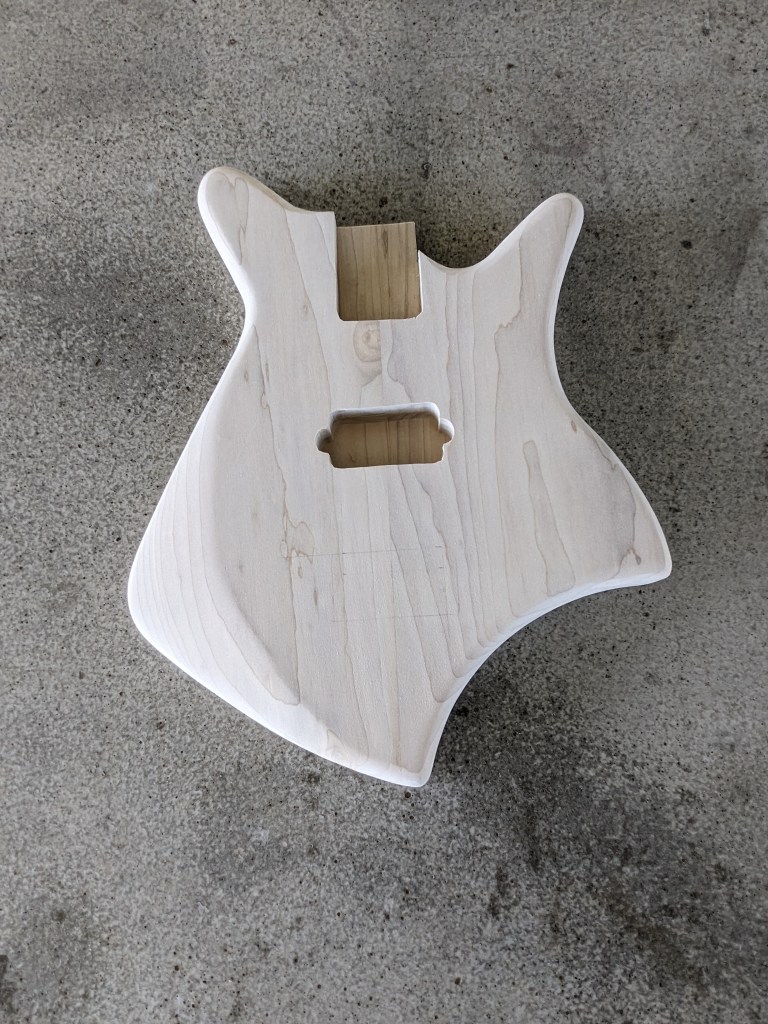
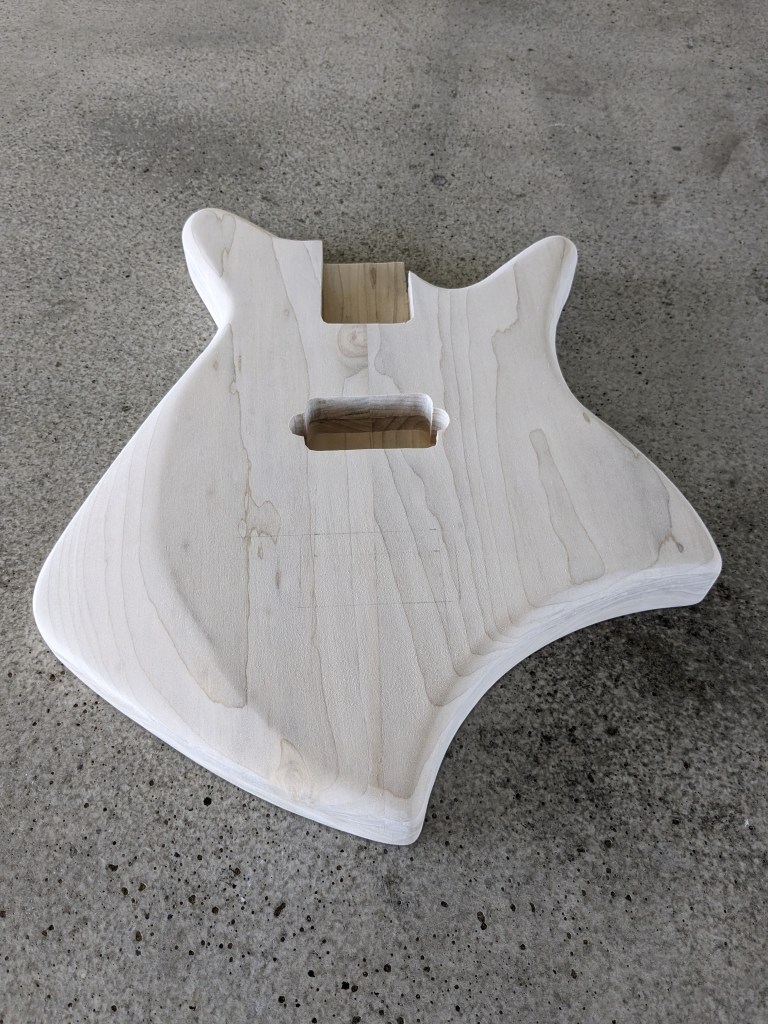
Once I had the body glued up, it was time to shape and sand it. I started by rounding over the edges, then got to work with a rasp to start contouring the arm rest area. This will reduce the weight a little and making it more comfortable to play.
Once I had the contouring done, I drilled for the volume and tone pots, the jack, the bridge (including the grounding wire channel, and the neck screws.
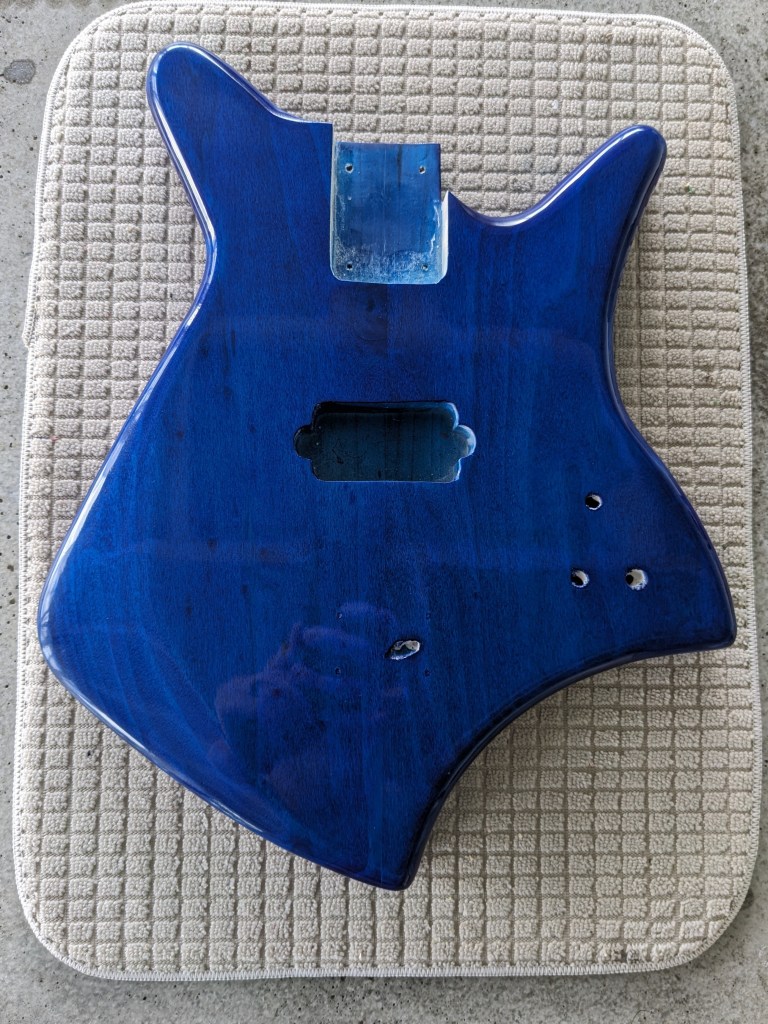
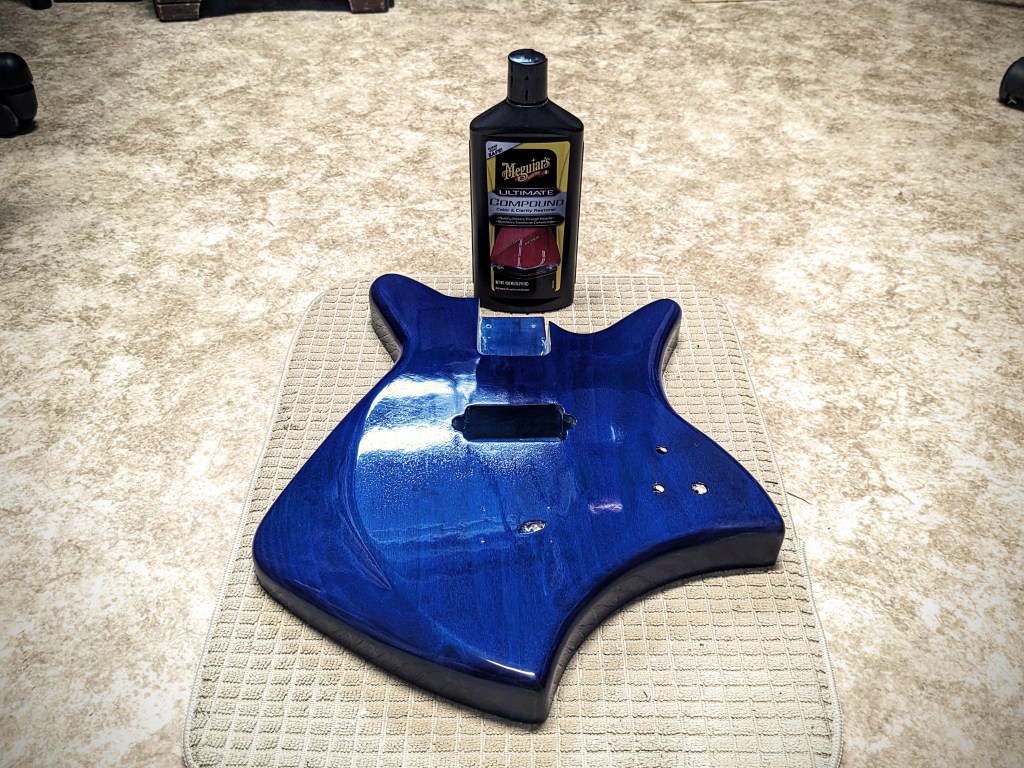
I didn’t take any pictures of the sanding process, but once it was done, it was time to add a little color. I really wanted to blue to stand out on this one so I started by staining the body with ColorTone liquid stain. This alone is usually good enough, but I wanted to enhance this with Metalcast Blue Anodized coating. This is a translucent blue finish meant to go over chrome or bright metal, but it works just as well over wood. I topped this off with Rust-Oleum Triple Thick Glaze. I gave each of these layers ample time to cure between coats, then let the whole stack rest for a week before wet sanding and polishing with Meguiars compound.
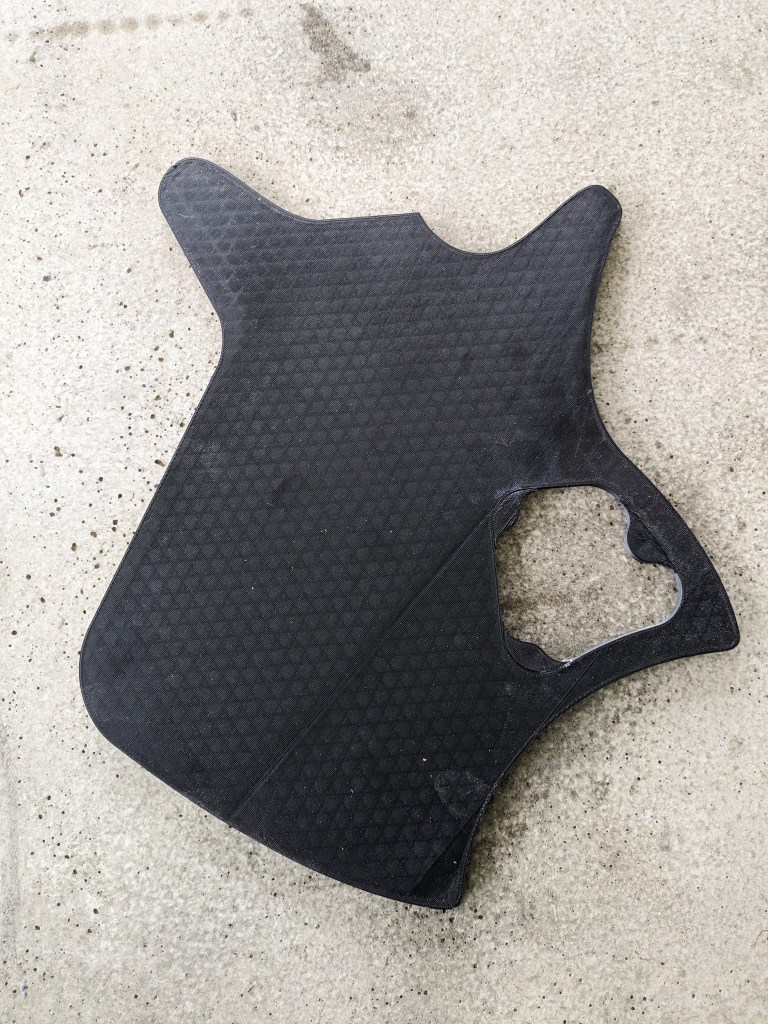
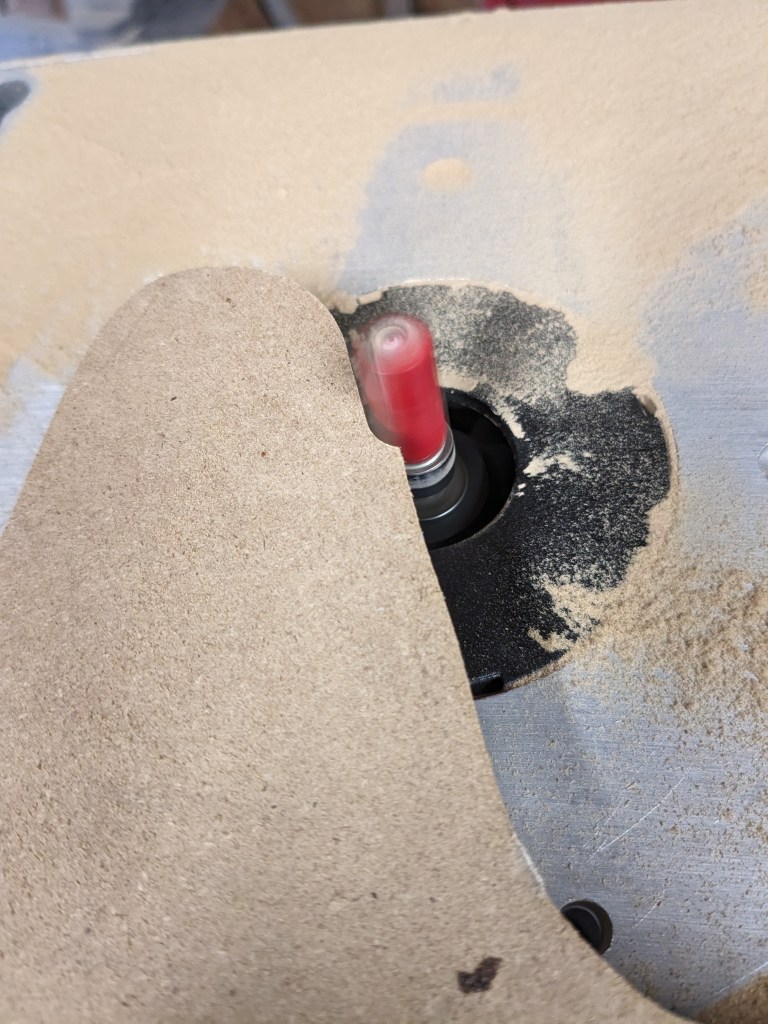
Once I had my design modeled in Fusion 360, I modeled the routing jigs I would need, and started 3D printing them. This included the body templet with the control cavity cutout and the control cavity cover routing templet. These are printed 1/4″ thick, then I use double sided “carpet” tape to adhere them to 1/2″ MDF and route to make a template that is 3/4″ thick. I do this because the 3D printed template is susceptible to heat. Routing the mdf doesn’t produce a lot of heat, but trying to rout 3/4″ or 1.5″ poplar does, and can actually start to deform the 3D printed plastic.
While the templates were printing, I glued up the blanks for the body, which you can see in the second picture. I took a 1″x8″x6′ poplar board and cut it into four 18″ long pieces, then edge glue two pieces together for the top and two pieces together for the bottom. then I planed them . Unfortunately, I didn’t take any pictures of this process.
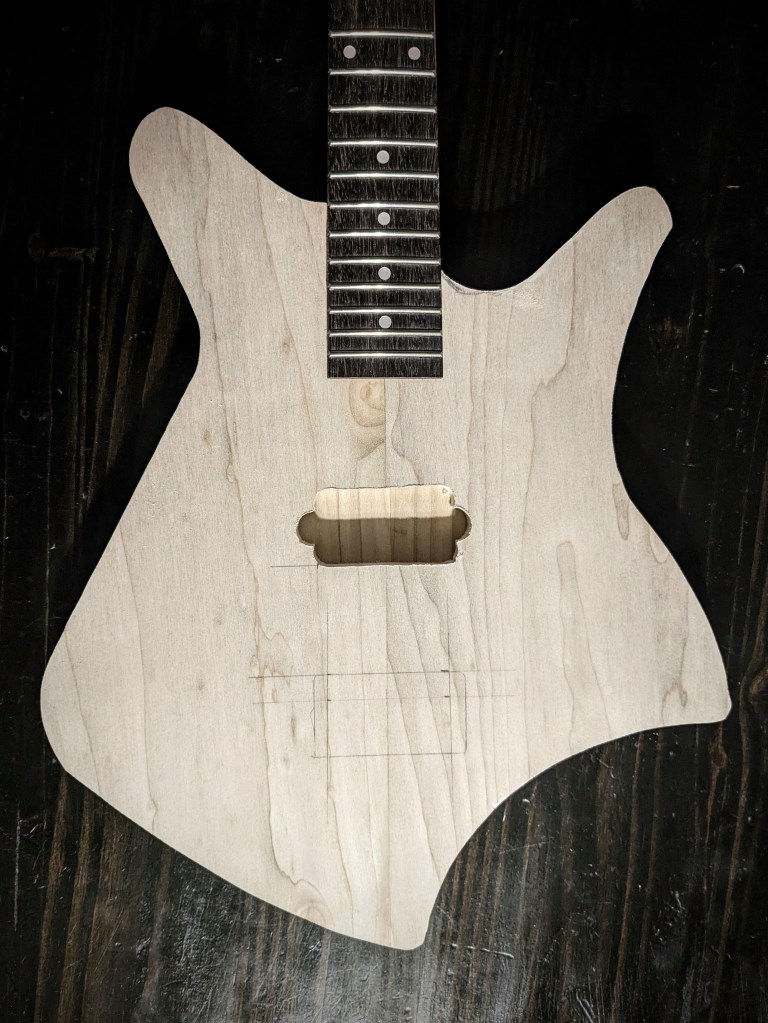
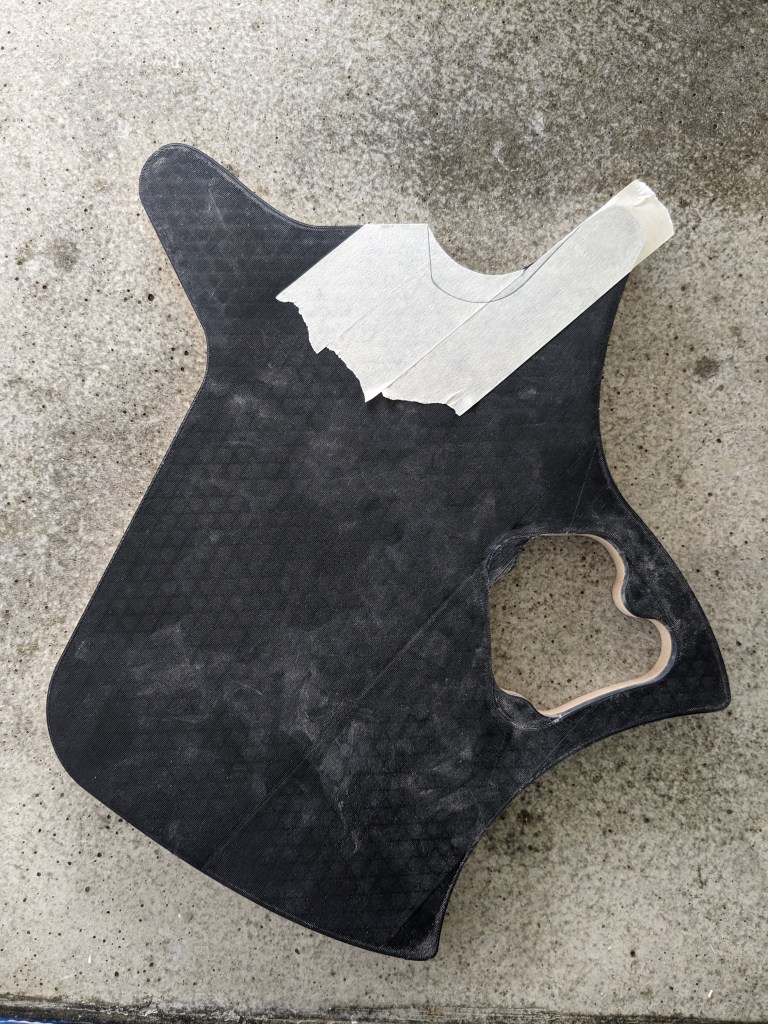
Once the blanks were ready, I traced out the template onto them and used a band saw to cut them almost to size. Then, routed exactly to size. At that point, I couldn’t resist a little mock up with the neck. This allowed me to layout the neck pocket, pickup cavity and bridge placements.
After mocking up the guitar, I realized that the cutout didn’t quite allow enough access to the lower part of the fretboard, so I freehanded a deeper cutout.
With the majority of the cutting and routing done, I glued up the top and bottom halves, using almost every clamp I own:
This is a part I definitely didn’t want to rush, so at this point all I could do was wait.
Once I had the basic 2D design established in Adobe Illustrator, I exported it as an SVG file so I could import it into Autodesk Fusion 360. Even though svg files are vector graphics, there is a discrepancy in how Illustrator and Fusion understand the size based on pixels. Illustrator treats the file as 72 dpi and fusion expects 96 dpi, so when importing an svg from Illustrator to Fusion you have to scale it 72/96% or a factor of ~1.33333.
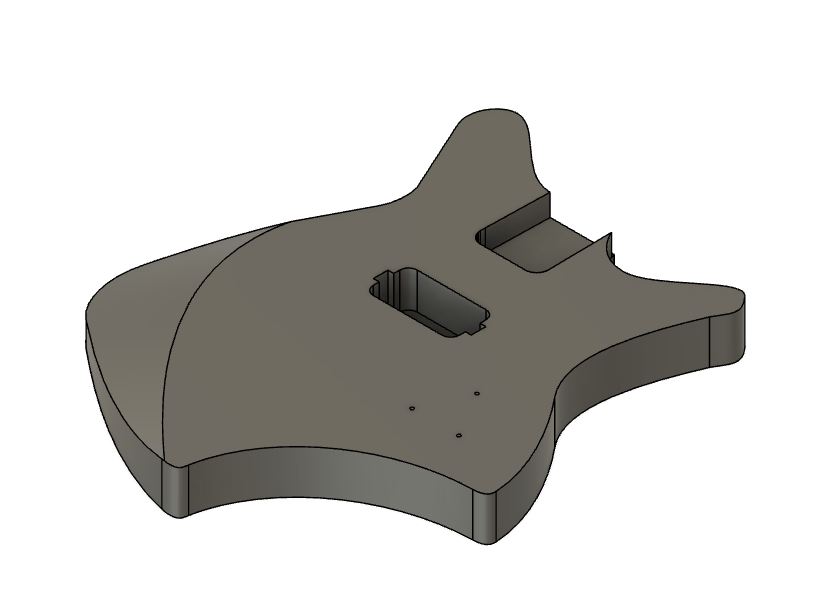
Once imported, I extruded the body, then decided on the control cavity shape, the pickup routing cavity and the neck routing. In designing this guitar, I had a few criteria in mind. I wanted this guitar for playing heavy metal music, which meant I wanted a powerful humbucker pickup. A few years ago I used a BK2000 in a build. This is a quad rail pickup rated at 18 kilohms and has wiring so it can be split, making it even more versatile. I’d even bought an extra one at that time, so it was a no brainer to use it on this build.
Another criteria was the size. I wanted this to be as small as possible while remaining a full size guitar. In other words, I wanted it to be light, and compact to make it as easy and fast as possible to play, which really made me reconsider scale length. Scale length is the distance from the nut (top of the neck where the strings rest) to the bridge (part on the body that holds the strings. Manufacturers have used various scale length over the years, but Fender really standardized the 25.5″ scale length, and this is what I’ve used for all of my six string guitars so far. Lately, though, I’ve found that I really prefer a 24″ scale for my 3-string guitars, so I decided to use it on this design as well. Some manufacturers have sold 24″ scale guitars in the past as “student models”, so I am optimistic that this guitar should be easy to play.
Once I knew what pickup and neck I was going to use, I was able to place the cavities for these:
Next was the control cavity. Even though I was only going to have a push-pull Tone pot, Volume pot and jack, I wanted a large cavity to help reduce weight. I also wanted to to be easy to route, so I designed everything with a half-inch router bit in mind. This is what I came up with:
When I had the design done, I 3d-printed the routing templates and was ready to start the build!
It’s been a a while since I posted on here, and though I am continuing to write, I don’t really have much to report on that, other than the fact that you can download “My Grim Life” FREE from Amazon through Monday 4/22/24. After that it’ll go back to the usual $2.99 price for the Kindle version.
Since I don’t have much to discuss on the writing front, I decided it was time to document my process for designing and building a guitar. I’m really excited about this one, because I woke up several times dreaming about this guitar. I have not completed the prototype, but I will be posting as I work on it, starting with the design process.
I’ve really been listening to a lot more metal lately, especially metalcore, which is something I have not played, so I wanted to design and build a guitar focused on playing this type of music. I wanted something that looked the part, but was light and easy to play. Since I already had a killer look floating around in my head, the next part I needed was to design it to scale, and make to sure it not only looked good, but was also usable. I decided on a shorter 24″ scale, in hopes of making it play a little faster than the standard 25.5″ fender scale. I use this scale on my 3-string builds, and it feels very natural to me, so I hope it’ll feel the same for this 6-string design.
I really should start doing this design work in a CAD program (I have Fusion or Solidworks), but I was a graphic designer for years, so Illustrator is still my go-to for initial design conception. I tried a few different things in Illustrator, and probably spent at least 8 hours tweaking paths and dimension, before finalizing the design for the RG36 Metalcore body. What do you think?
Today I received my second rejection letter. It was once again a courteous one, but it was also quite evidently a form letter so I didn’t get any direct feedback. One thing I was able to gather from it is that I might need to tweak my description. It’s a little hard to say for sure, though, because the only explanation was “Unfortunately, the project you describe does not suit our list at this time.” Maybe I’m not describing it well enough to catch their attention or maybe they just aren’t looking for a YA novel about a teen protagonist who has to kill people. It’s really hard say. One thing I do know, is that with each subsequent submission I have continued to make slight adjustments to my pitch, which I hope has improved it.
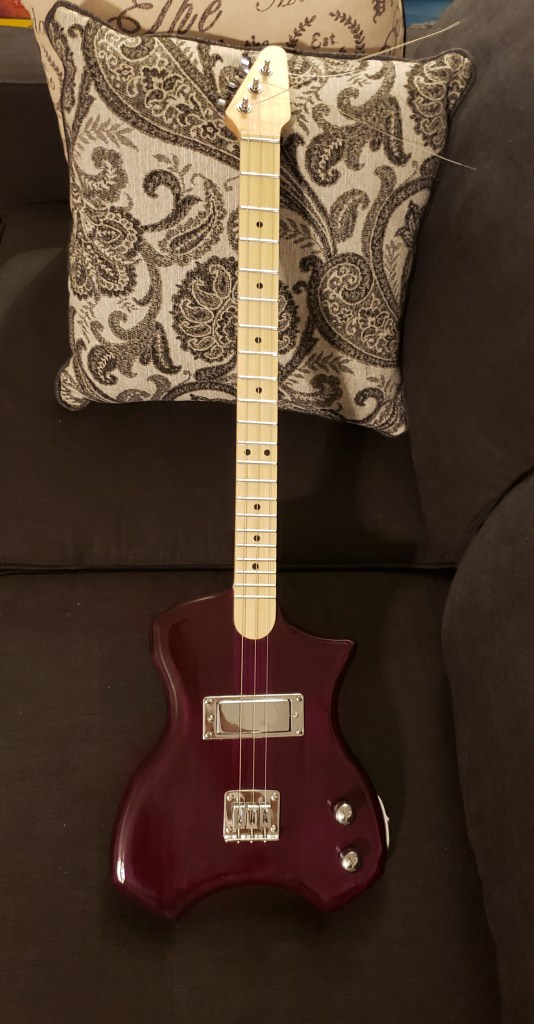
This rejection came from a submission I made two weeks ago, so I am cautiously optimistic that this two week turn around might be the norm, rather than the exception, though most of the places I’ve submitted to have stated turn around times of six weeks to six months, so maybe it is just rejections that have the quicker turn around. All I really know, is that I will continue submitting to agents and publishing houses and eventually, My Life As Death will be picked up. In the mean-time, I’ll keep writing and building guitars like this one I just finished today:
I’ve got a little more setup to do (mainly intonation and adding the serial number tag and strap buttons) but even though a customer said one of my previous builds “almost plays itself”, from a playability standpoint, this is probably the best guitar I’ve made. It plays so easily but I’m not 100% sure why. I do have a few ideas though, so hopefully I can keep that going with all my future builds.
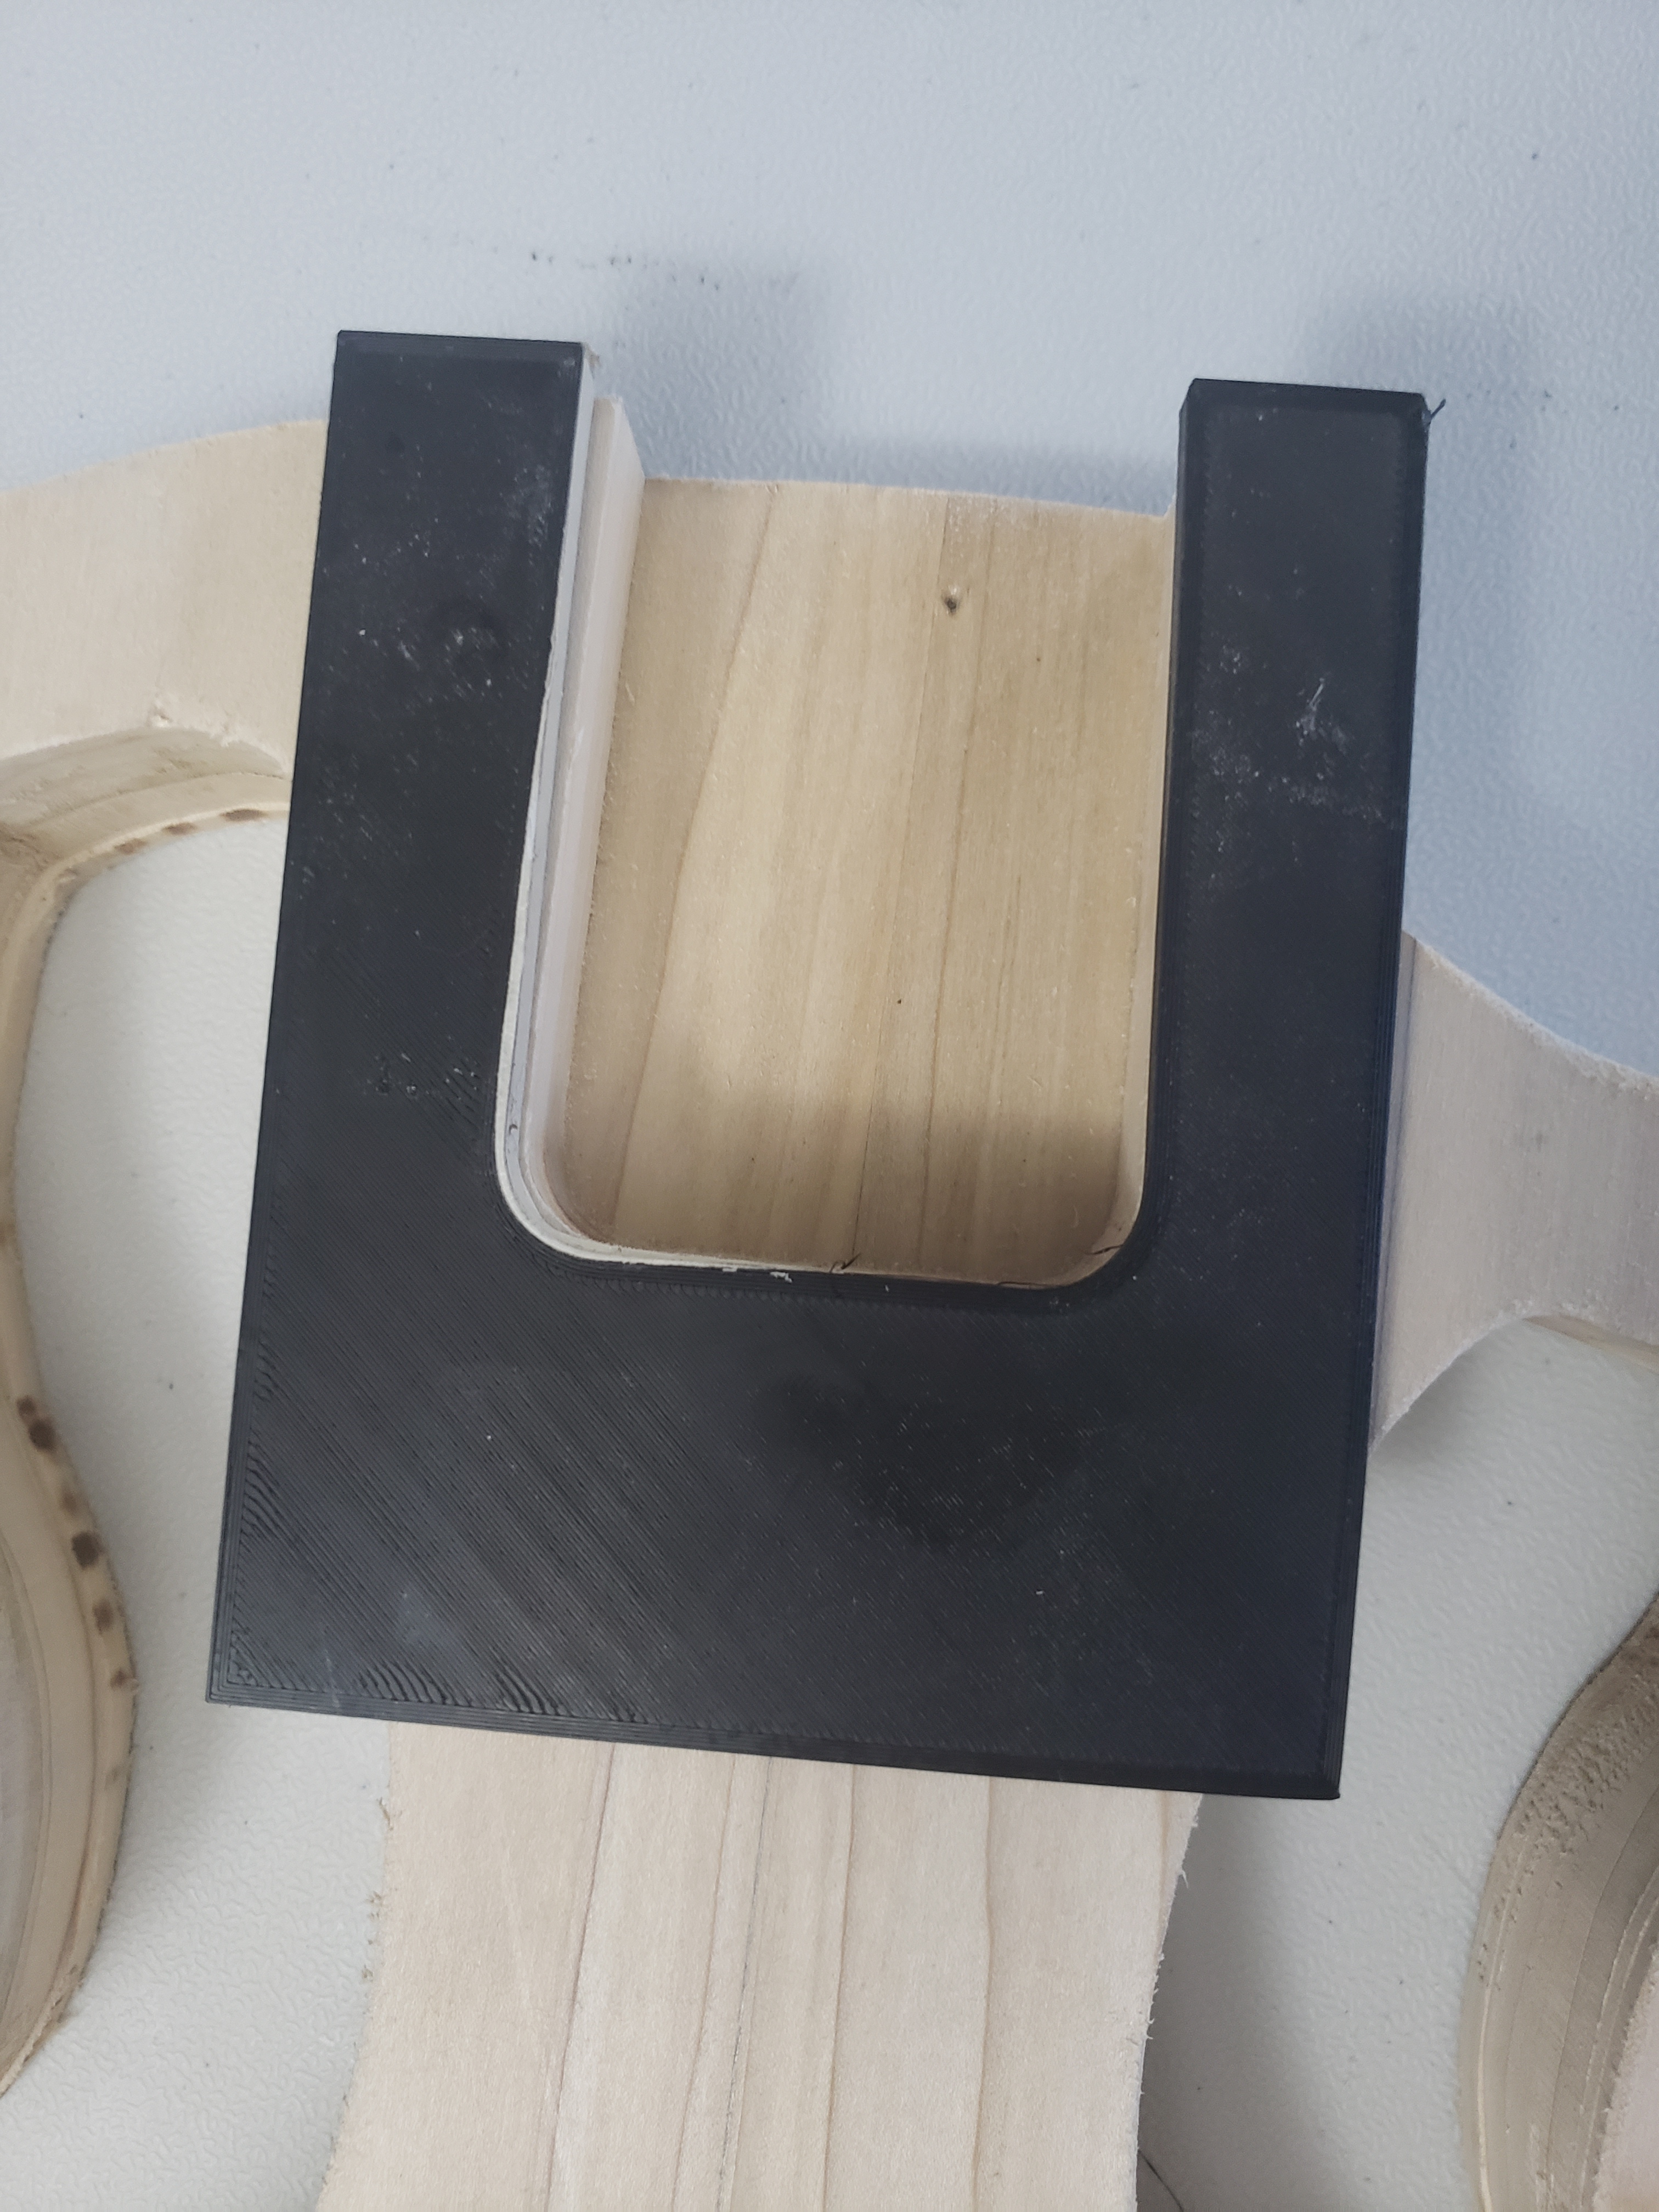
I know that I said in my last post that I was going to use one of the pre-built necks for this guitar, but then I remembered that this guitar is going to use nylon strings. The necks I bought already have truss rods installed, which is really a good thing, but truss rods are most beneficial for steel stringed guitars and not necessary for guitars with nylon strings so I decided to make a neck for this build. But before I started on the neck, I needed to cut the neck pocket in the body.
Because of the way I designed this guitar, I was able to use a scroll saw to cut out the neck pocket close to the lines, then attach the template I 3D printed to get the final shape.
With the neck pocket routed, it was time to begin making the neck. I started the process by grabbing a piece of maple and marking a center line before aligning my template. Unfortunately I didn’t think to take a picture of the process this time, so here’s a few pictures of a neck I did out of poplar.
Like the body, I cut out the neck close to the template lines, then used the router with a pattern bit to get an exact match. I make several passes with the router, taking just a little off with each pass so I don’t risk tearing the wood. I then use a drill press to add the tuner holes based on the same template.
With the basic neck shape done, I proceeded to test fit the piece into the neck pocket on the body. The body was still in very rough shape, but the neck fit perfectly, so I was ready to continue shaping the neck.
There are many different guitar neck designs, and even more ways to shape them, so of course I chose to ignore all of the conventional ways and design my own neck shaping jig.
This jig allows me to use either a rounded or 45 degree angle router bit to shape the rear sides of the neck depending on how aggressive I want the angle to be. For this one, I went with the 45 degree bit. Then, by just flipping the entire jig over, I was able to use a router with the pattern bit set to the proper depth to remove some stock from the head.
So with the neck ready to move on to sanding and assembly, I decided to cut the control cavity into the back of the guitar, then glue the front and back pieces together using every clamp I have.
Then, when the body had adequate time to cure, I did one more test fit before beginning the neck assembly and sanding.
In addition to being a writer, I’m also a designer. Most of my career has been spent around screen and digital printing so most of my design skills have developed around graphic design and color and material design. These skills have served me well, and I have successfully translated these skills into woodworking and other design applications but when it came to true 3D design, my skills and tools were sadly lacking.
In a previous position I designed and 3D printed some sample display assets, and last year my wife and son decided I needed a 3D printer of my own, so I have some CAD experience, but everything I’d done was with the free TinkerCAD software, which is extremely limited. But by designing some of the complex shapes in Illustrator and exporting as an svg file to be imported into TinkerCAD, I was able to get around a lot of the limitations. Eventually, though, those limitations became too much so I finally listened to the advice of others and signed up for the free Fusion 360 “startup” license.
For anyone interested in learning CAD, CAM & CAE software, I cannot recommend this highly enough. A design engineer I used to work with recommended it to me and I can only kick myself for waiting so long to download it.
Like most professional CAD/CAM software, there is a steep learning curve, but there are tons of tutorials online, through autodesk themselves as well as from other design professionals. It also really helps having a son who is somewhat experienced with solidworks to give me pointers, but there is plenty of information and helpful forums on line for those of you without engineering students to rely on.
My first Fusion 360 project from scratch was a speedloader/thumbsaver for a 9mm. It went through a couple iterations to get where I wanted it, but it turned out great and was an awesome learning experience. Now I just have to come up with my next project.